

Solution
Using EOS Utility Ver. 3.x, you can register lens aberration correction data in the camera or delete registered data from the camera.
To register or delete lens aberration correction data, please refer to the procedures below.
Caution
The screens displayed may differ depending on the computer you use.
1. Connect your camera and computer.
For the details about how to connect the camera and the computer, please refer to the camera's instruction manual.
2. Set the camera's power switch to ⋖ON⋗, and set the mode dial to a Creative Zone mode (such as ⋖P⋗).
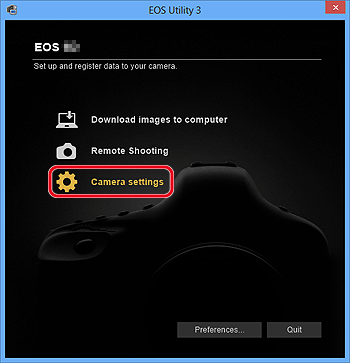
3. Start up EOS Utility Ver. 3.x, and then click [Camera settings].
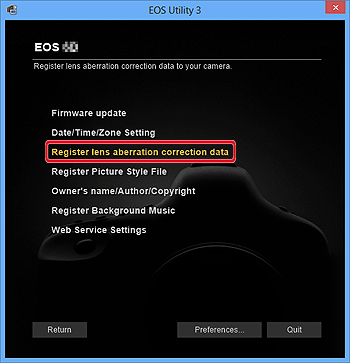
4. Click [Register lens aberration correction data].
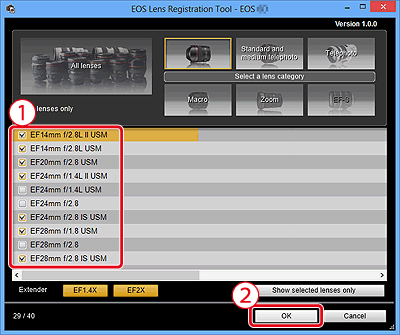
5. The [Register lens aberration correction data] window appears. Lenses for which correction data is registered in the camera are displayed with a check mark.
The titles of screens that appear and data to be registered in the camera differ depending on the camera, however, the following steps are the same.


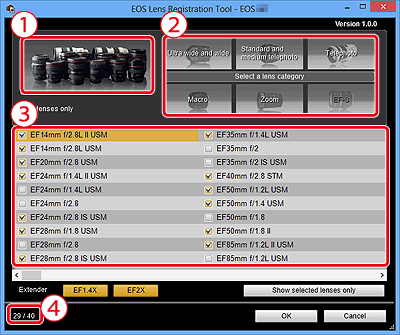
6. A list appears showing only the selected lens category. 

7. The selected lens correction data is registered in the camera.
Caution