

Preparation
Caution
1.
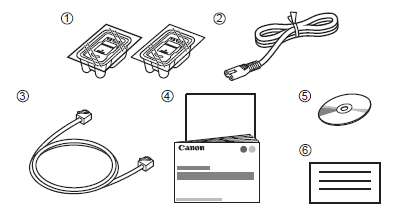
Make sure all the following items are supplied.
(1). FINE cartridges (Color, Black)
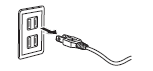
(2). Power cord
(3). Telephone line cable
(4). Manuals
(5). Setup CD-ROM (containing the drivers, applications and on-screen manuals)
(6). Other documents
Caution
A USB cable is necessary to connect the machine with your computer.
Caution
Do not connect the power cord yet.
2.
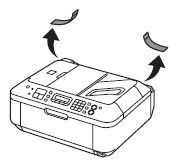
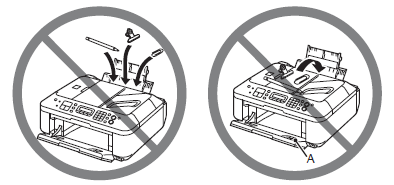
Remove all the protective materials and orange tape from the outside of the machine.
Caution
The tape and protective materials may differ in shape and position from those shown here.
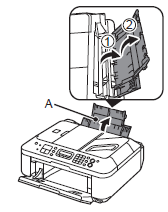
3.
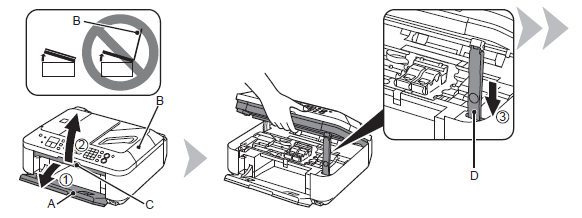
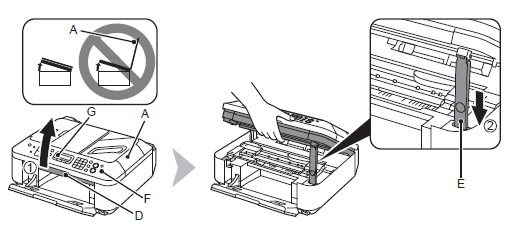
(1). Open the Paper Output Tray (A).
(2). Make sure the Document Cover (B) is closed, then lift to open the Scanning Unit (Cover) (C).
(3). Fix it with the Scanning Unit Support (D).
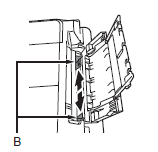
4.
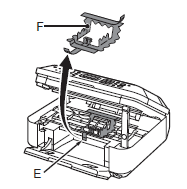
Remove both the orange tape (E) and the protective material (F) carefully.
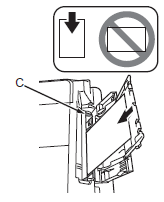
5.
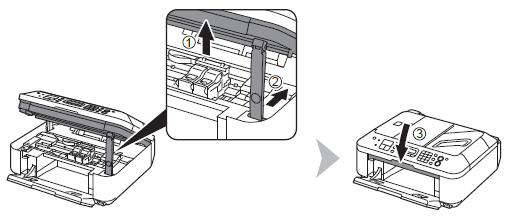
(1). Lift the Scanning Unit (Cover) slightly.
(2). Fold the Scanning Unit Support.
(3). Close the Scanning Unit (Cover) gently.
Use fax features?
Yes -⋗ Go to 6
No -⋗ Go to 8
6.
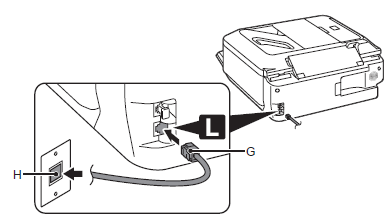
Connect one end of supplied telephone line cable (G) to the lower connector labeled "L" on the machine, and then connect the other end to the telephone jack on the wall (H).
Caution
If you cannot send faxes after installing the machine, check the following:
1. The telephone line cable is connected to connector labeled "L" on the machine.
2. The dial tone at the telephone jack on the wall.
3. The telephone line type. For details, refer to [ Confirming the Telephone Line Connection ] after installation is complete.
Users in Europe: If you prepare your own telephone line cable, be sure it is a 6-wire telephone line cable.
7. Only when connecting a telephone or an answering machine
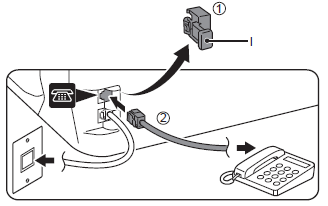
Remove the Cap (I) (1), then connect a telephone or an answering machine with the telephone line cable (2).
Caution
8.
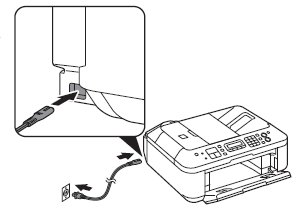
Insert the power cord into the connector on the left side of the machine and into the wall outlet firmly.
Caution
9.
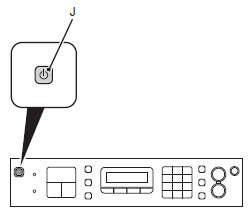
Press the ON button (J) to turn on the machine.
Caution
It takes about 5 seconds for the ON button to work after the power cord is plugged in.
10.
Use the 

Caution
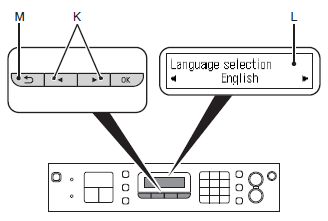
If you want to change the language shown on the LCD, press the Back button (M) to return to the Language selection screen.
11.

Select the country or region of use, then press the OK button.
Caution
The Country select screen may not be displayed depending on the country or region of purchase.
12.

When this screen is displayed, proceed to the next step.
Caution
When it is necessary to turn off the machine
Be sure to follow the procedure below.
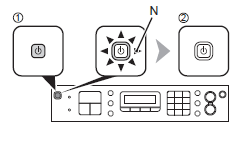
1. Press the ON button to turn off the machine.
2. Make sure that the lamp (N) of the ON button is not lit.
Operating noise may continue for up to 30 seconds until the machine turns off.
Caution
When using the fax features
Caution
The specification of the power cord differs for each country or region.
Install the FINE Cartridges
1.
(1). Make sure the Document Cover (A) is closed, then lift to open the Scanning Unit (Cover) (D).
(2). Fix it with the Scanning Unit Support (E).
Caution
When you lift the Scanning Unit (Cover), do not touch the buttons on the Operation Panel (F) or the LCD (G). May result in unintended operation.
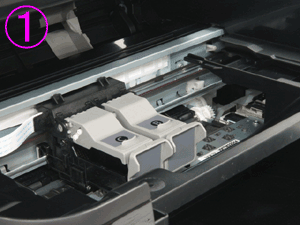
2.
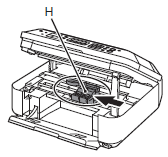
The FINE Cartridge Holder (H) moves to the installation position.
If the FINE Cartridge Holder does not move, make sure that the machine is turned on.
For details, refer to 8 to 9 in [ Preparation ].
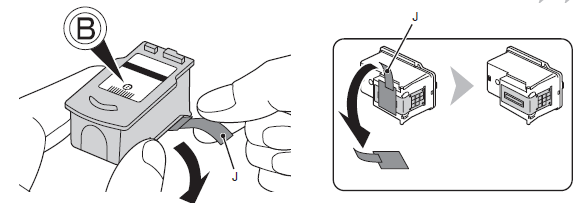
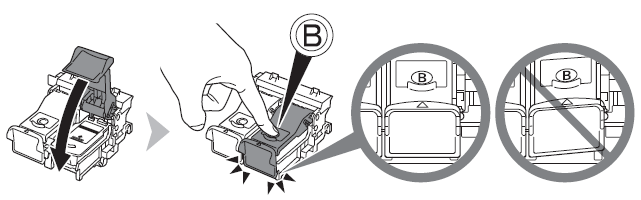
3.
Follow the next procedure to insert the Black 

4.
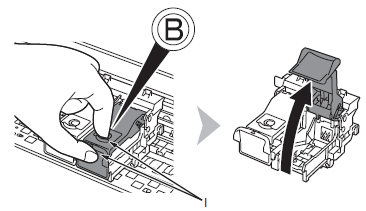
Open the Ink Cartridge Locking Cover
Pinch (I) firmly and pull up the cover.
5.
After removing the Black FINE Cartridge
Caution
6.
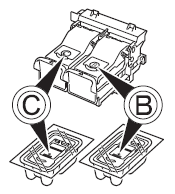
Place the Black FINE Cartridge
Caution
into the right slot , and the Color FINE Cartridge into the left slot .7.
Push down
View the Ink Cartridge Locking Cover
8.
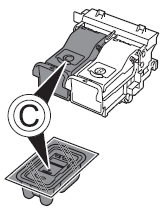
Insert the Color FINE Cartridge
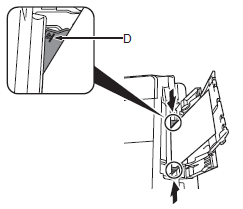
9.
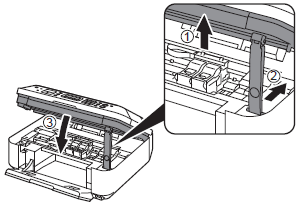
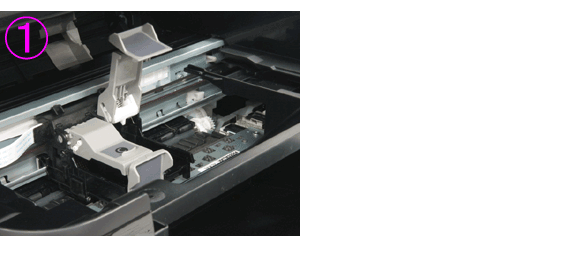
(1). Lift the Scanning Unit (Cover) slightly.
(2). Fold the Scanning Unit Support.
(3). Close the Scanning Unit (Cover) gently.
10.
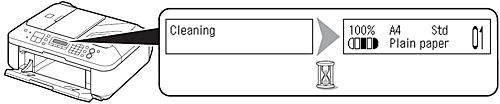
Wait for about 1 minute until the LCD changes as shown in the illustration, then proceed to the next step.
Caution
Caution
The LCD will turn off if the machine is not operated for about 5 minutes. Pressing any button other than the ON button will restore the display.
Load Paper
1.
Open the Paper Support (A).
2.
Move the Paper Guides (B) to both edges.
3.
Load paper in the center of the Rear Tray (C).
Load paper in portrait orientation with the printing side facing up.
4.
Slide the left and right Paper Guides against both edges of the paper.
Make sure that the height of the paper stack does not exceed the line (D).
Caution
For details on how to handle paper, refer to [ Loading Plain Paper / Photo Paper ].
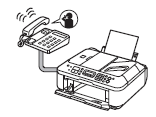
Set Up for Fax Reception
Read this section only when using the fax features.
If not using the fax features, go to [ Install the Software ].
Depending on your needs, select one of the following three modes for receiving faxes. You can change the receive mode after installation is complete.
Caution
A call ring pattern detective service (DRPD/Network Switch) may not be available depending on the country or region of use.
Caution
Even when a telephone is connected to the machine, the telephone’s ringtone may not sound for an incoming call depending on the telephone type or settings.
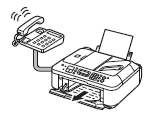
Intended Use
-⋗ [ TEL priority mode ]
Voice calls cannot be received unless a telephone is connected.
-⋗ [ FAX only mode ]
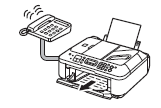
-⋗ [ DRPD/Network Switch ]
Responses to Calls in Each Mode
-When a fax call arrives
While the telephone's ringtone sounds, pick up the handset.
When the fax reception starts, replace the handset.
If an answering machine is connected, the fax is received automatically.
-When a voice call arrives
While the telephone's ringtone sounds, pick up the handset to answer the call.
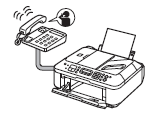
-When a fax call arrives
The fax is received automatically
-When a fax call arrives
The call cannot be answered.

-When a fax call arrives
The telephone’s ringtone sounds. The fax is received automatically when the machine detects the fax ring pattern.
DRPD/Network Switch must be supported by your telephone service provider.
Please contact them for service details.
-When a voice call arrives
The telephone continues to ring.
Pick up the handset to answer the call.
1.
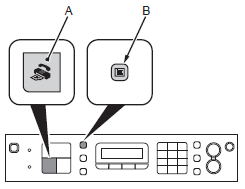
Press the FAX button (A), then press the Menu button (B).
2.
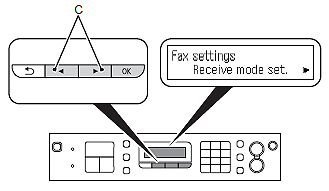
Use the
3.
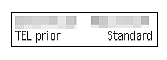
Select a receive mode, then press the OK button.
If the advanced settings screen is displayed Select No, then press the OK button.
The selected receive mode is displayed.
Caution
For details on the advanced settings on the receive mode, refer to [ Receiving Faxes ] after installation is complete.