

Solution
Switching the Connection Method to Wireless LANSetting by Manually Selecting an Access Point
Checking the Wireless LAN Setting is Completed
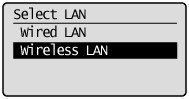
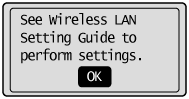
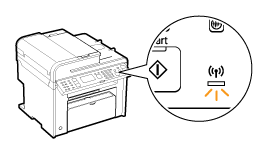
Switching the Connection Method to Wireless LAN
1. Press [ 
2. Press [ 

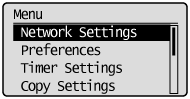
3. Press [
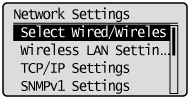
4. Press [
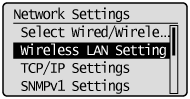
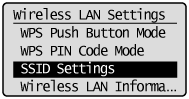
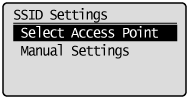
Setting by Manually Selecting an Access Point
1. Write down the following information required for the settings. The information is needed in steps 8 and 9.
* For more information on how to check, refer to the instruction manual of the wireless LAN router or access point, or contact the manufacturer.

* It may be indicated as access point name or network name.
Write down all if there is multiple SSID.
It is used when selecting an access point in step 8.
* It may be indicated as encryption key, WEP key, WPA/WPA2 passphrase, PSK or pre-shared key.
Write down the network key that is currently specified for the wireless LAN router or access point.
It is used when entering an network key in step 9.
Caution
Checking for SSID and network keys:
[ Checking the Access Point Name or Network Key (Windows) (MF4890dw/MF4720w Only) ]
2. Press [
3. Press [
4. Press [
5. Press [OK].
6. Press [
7. Press [

* When the ⋖Cannot find access point.⋗ is displayed, see the "e-Manual" (HTML manual) in the CD-ROM supplied with the machine.
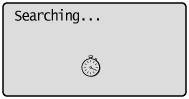
8. Press [
If the multiple matched SSID are displayed, select the one that is displayed at the top (a stronger signal).

The next screen is displayed for approximately 5 seconds.
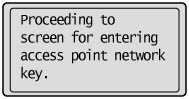
* See the following when you cannot find an access point you want to connect.
[ Checking the Access Point Name or Network Key (Windows) (MF4890dw/MF4720w Only) ]
9. Enter the network key that you have written down in step 1.
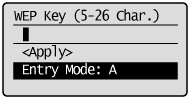
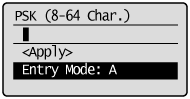
(1) Use the numeric keys to enter the network key.
(2) Press [
10. Press [ 

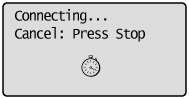
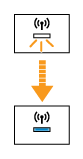
The Wi-Fi indicator blinks.
The next screen is displayed for approximately 2 seconds, and then the Wi-Fi indicator lights.

* If an error message appears, press [OK] to close the screen, check to make sure that the network key is correct, and follow the procedure in 6 again. If you cannot connect the access point after retrying, see the "e-Manual" (HTML manual) in the CD-ROM supplied with the machine.
11. Wait until the machine sets the IP address automatically (approx. 2 min).
If you want to set the IP address manually, see the following.
Checking the Wireless LAN Setting is Completed
1. Press [
2. Press [
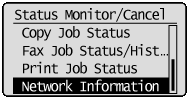
3. Press [
4. Press [
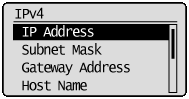
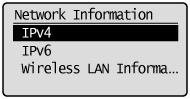
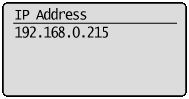
5. View the information.
6. Press [
7. Start the Web browser of a computer which is connected to a network.
8. Enter "http://IP address of the machine/" in the address field and press the [ENTER] key on the keyboard.
You can check ⋖IP Address⋗ at step 5.

9. Check that the screen of the Remote UI is displayed.
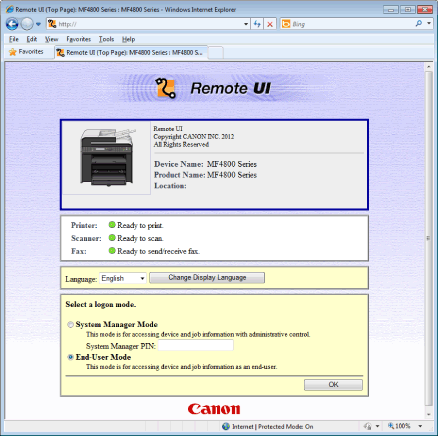
Caution
When Remote UI is not displayed:
- Whether the computer and hub are connected using a LAN cable
- Whether the ⋖Remote UI On/Off⋗ is set to ⋖On⋗