

Solution
If you changed the IP address or name of the printer (the DNS name to be registered on the DNS server), you need to change the port to be used.
If you are using Windows 2000/XP/Server 2003 and are using Standard TCP/IP Port, change the port to be used using the following procedure.
Caution
[Uninstalling the Printer Driver]
[If the Printer and Computer Are Connected by a LAN Cable (Auto Setup)]
Caution
The screenshots used in this section are from Windows XP Professional with which LBP5100 is being used.
1. Display the [Printers and Faxes] folder or the [Printers] folder.

From the [Start] menu, select [Settings] ⋗ [Printers].


From the [Start] menu, select [Printers and Faxes].

From the [Start] menu, select [Control Panel], and then click [Printers and Other Hardware] ⋗ [Printers and Faxes].
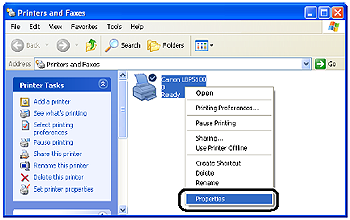
2. Right-click the icon for your printer, then select [Properties] from the pop-up menu.
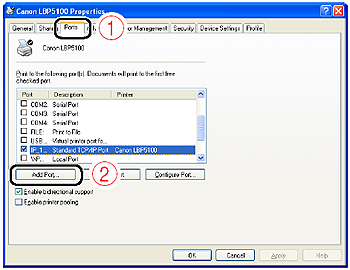
3. Display the [Ports] sheet (1), then click [Add Port] (2).
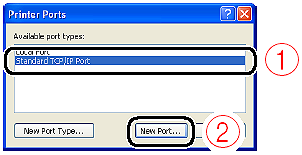
4. Select [Standard TCP/IP Port] (1), then click [New Port] (2).
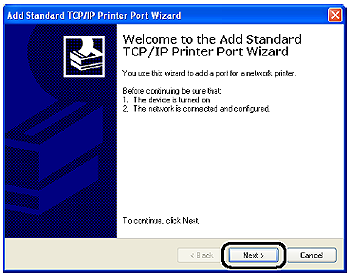
5. Click [Next].
6. Enter a new IP address or name of the printer (the DNS name to be registered on the DNS server (up to 78 characters)) in [Printer Name or IP Address] (1), and then click [Next] (2).
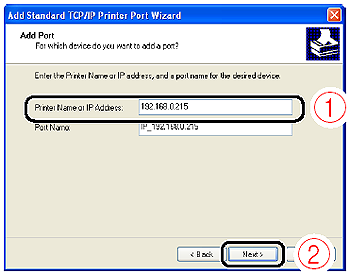
Depending on the method for setting the IP address of the printer, the value to be entered varies. For more details, see "Settings for Adding a Port" in "Chapter 5 Appendix" in Network Guide in the CD-ROM supplied with the printer or ask your network administrator.
Caution
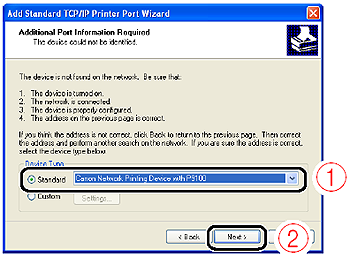
If the following screen appears, search for the printer following the instructions on the screen, or from [Device Type] select [Standard] ⋗ [Canon Network Printing Device with P9100] (1), and then click [Next] (2).
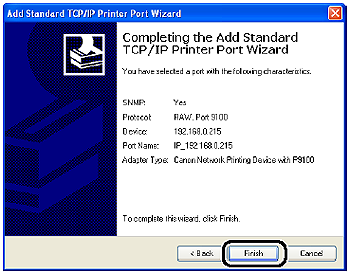
7. Click [Finish].
8. Click [Close].

9. Click [Apply].
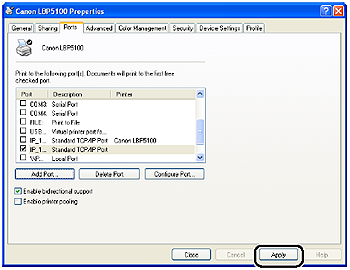
10. Click [OK].

Caution
If you want to delete an old port, select the port that you want to delete, and then click [Delete Port].