Solution
Installing the MF Driver and MF ToolboxInstalling using [Easy Installation]
Installing using [Custom Installation]
USB cable connection
Checking the installation results
Installing the MF Driver and MF Toolbox
Caution
Log on to your computer with administrator privileges.
Connect the USB cable after installation is complete.
Make sure that the machine is powered ON before connecting the USB cable.
* When you are in an IPv6 environment, you may not be able to use the installation procedure below to install the MF drivers.
* Note that you cannot use the scan functions in an IPv6 environment.
There are two ways to install the drivers. You can choose between [Easy Installation] and [Custom Installation].
Choose [Easy Installation] for quick and easy installation. Choose [Custom Installation] to install the following application and manual.
Caution
To use Printer Driver other than ⋖UFRII LT⋗ through the USB connection, you need to change the machine setting beforehand. Choose the PDL (Printer Driver) that you want to use and follow the procedures shown below.
- Press [ 
* The appropriate Printer Driver differs according to your machine.
Installing using [Easy Installation]
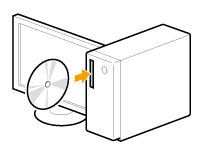
1. Insert the User Software CD-ROM into the slot on your computer.
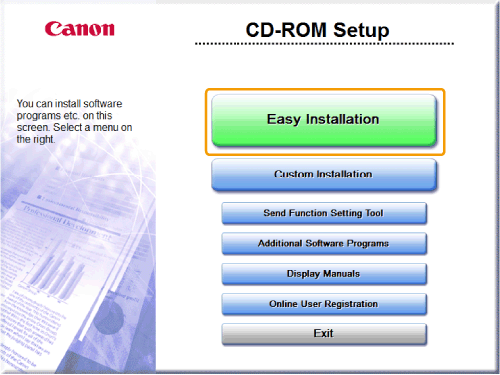
2. Click [Easy Installation].
Caution
* The CD-ROM drive name is indicated as "D:" in this manual. The CD-ROM drive name may differ depending on the computer you are using.
- Windows 2000/XP/Server 2003
1. From the [Start] (or [start]) menu, select [Run].
2. Enter "D:\Minst.exe", and then click [OK].
- Windows Vista/7/Server 2008
1. Enter "D:\Minst.exe" in [Search programs and files] (or [Start Search]) under the [Start] menu.
2. Press the [ENTER] key on the keyboard.
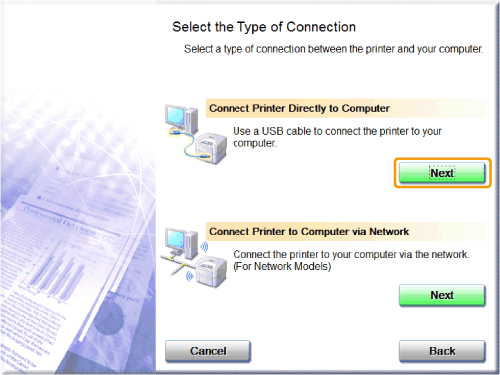
3. When the following screen appears, select the connection type.
Click [Next] for [Connect Printer Directly to Computer].
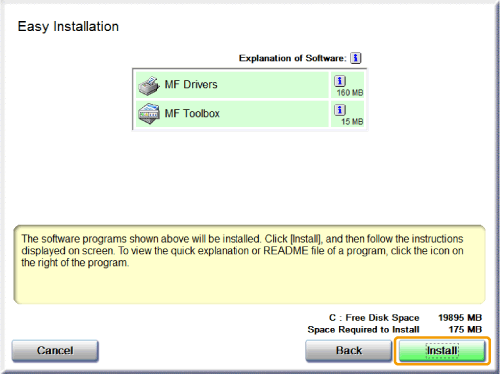
4.Click [Install].
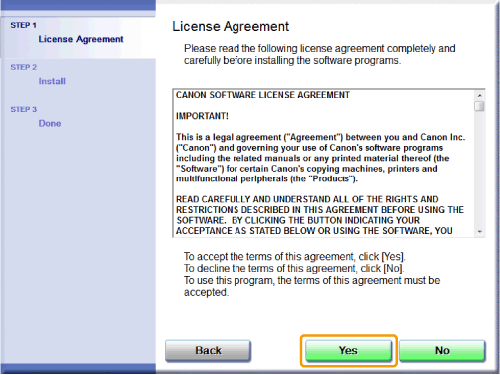
5. Read the License Agreement and click [Yes].
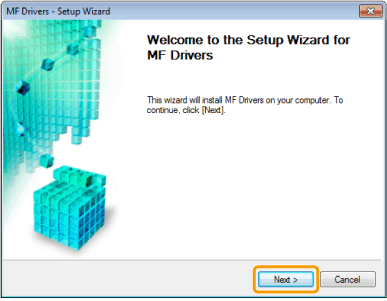
6. Click [Next].
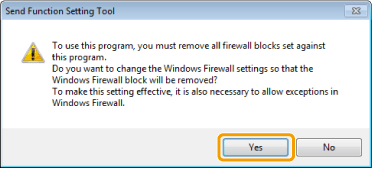
The following screen appears. Click [Yes].
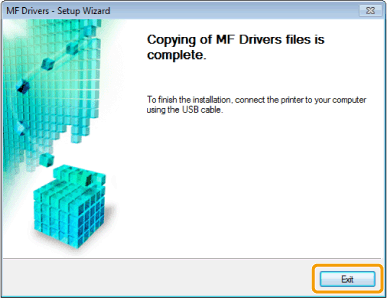
7. Click [Exit].
Caution
Continue with the steps in the procedure below to start installation of the MF Toolbox.
* The MF Toolbox cannot be installed on Windows 2000 Server/Server 2003/Server 2008 computers. Installation is skipped and proceed to Step 10.
8. Check [Start].
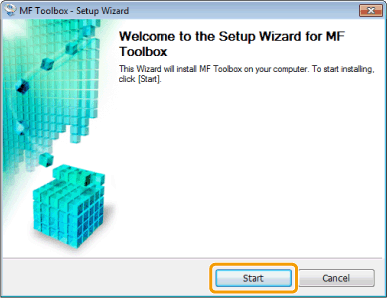
9. Click [Exit].
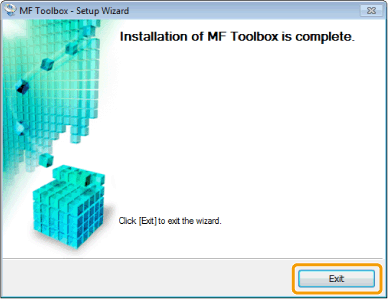
10. Confirm that the applications are selected [ 
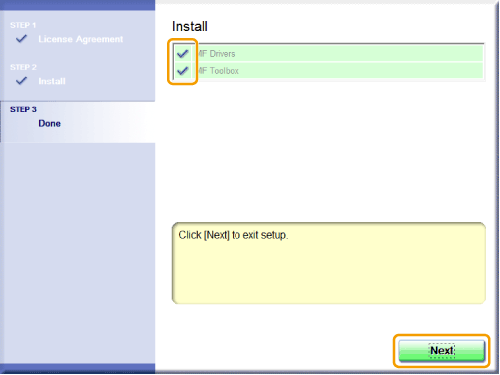
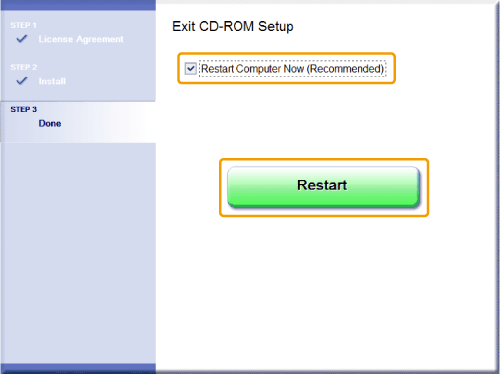
11. Restart your computer.
(1) Select the [Restart Computer Now (Recommended)] check box.
(2) Click [Restart].
* The CD-ROM can be ejected once this screen appears.
Caution
Wait until your computer is restarted.
Installing using [Custom Installation]
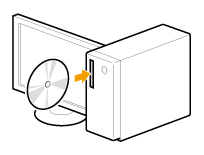
1. Insert the User Software CD-ROM into the slot on your computer.
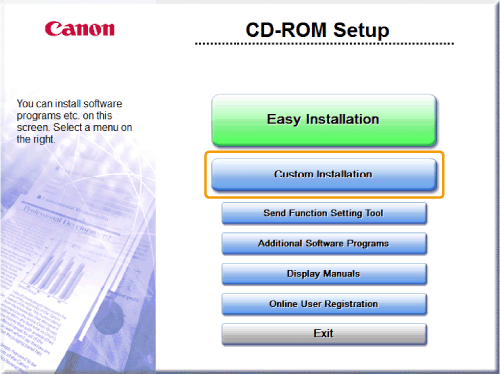
2. Click [Custom Installation].
Caution
* The CD-ROM drive name is indicated as "D:" in this manual. The CD-ROM drive name may differ depending on the computer you are using.
- Windows 2000/XP/Server 2003
1. From the [Start] (or [start]) menu, select [Run].
2. Enter "D:\Minst.exe", and then click [OK].
- Windows Vista/7/Server 2008
1. Enter "D:\Minst.exe" in [Search programs and files] (or [Start Search]) under the [Start] menu.
2. Press the [ENTER] key on the keyboard.
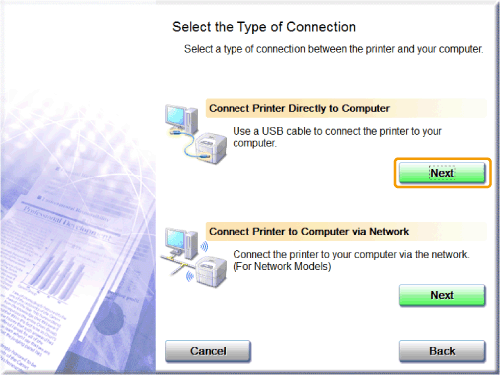
3. When the following screen appears, select the connection type.
Click [Next] for [Connect Printer Directly to Computer].
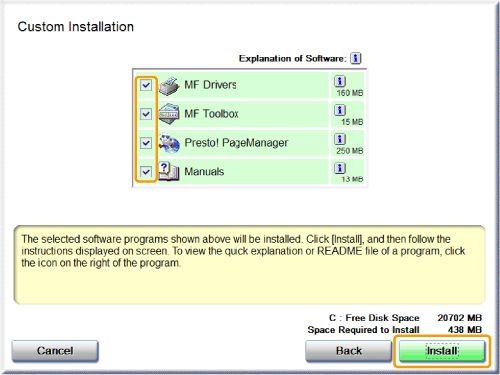
4. Select the check box next to the application you want to install and click [Install].
5. Read the License Agreement and click [Yes].
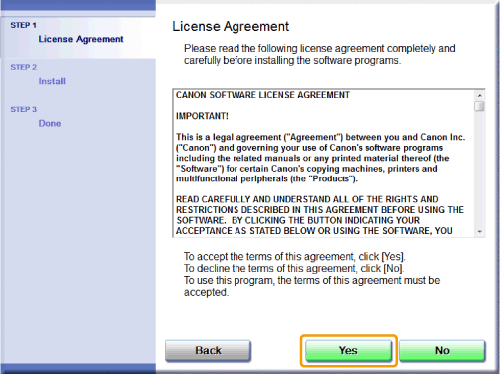
6. Click [Next].
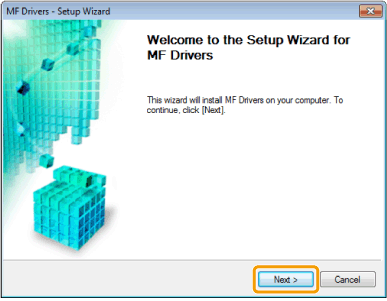
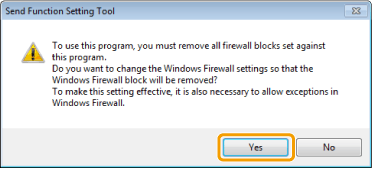
The following screen appears. Click [Yes].
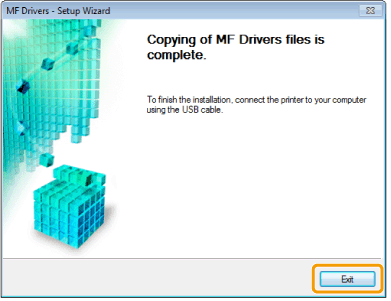
7. Click [Exit].
Caution
Continue with the steps in the procedure below to start installation of the MF Toolbox.
* The MF Toolbox cannot be installed on Windows 2000 Server/Server 2003/Server 2008 computers, or if the [MF Toolbox] check box is cleared in Step 4. Installation is skipped and proceed to Step 10.
8. Click [Next].
The screens appear successively to specify where to install the MF Toolbox and add it to the start menu. Click [Next] after you have made your selections.
Then, click [Start] in the displayed screen.
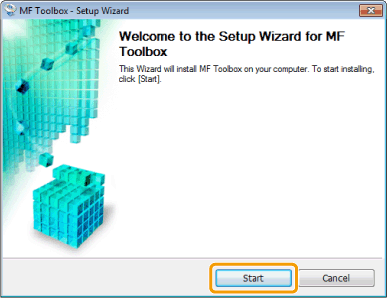
9. Click [Exit].
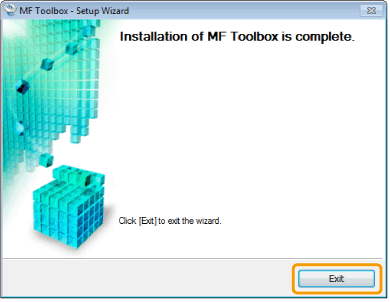
Caution
The applications of which check boxes were selected in Step 4. will be installed.
Follow the onscreen instructions.
10. Confirm that the applications are selected [ 
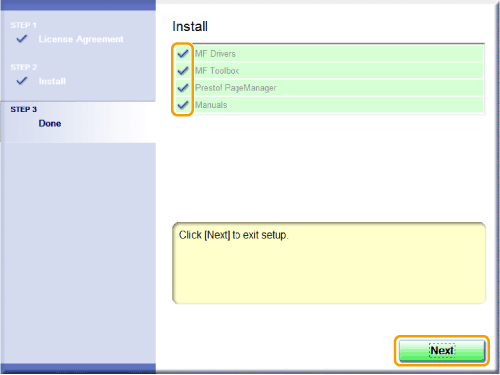
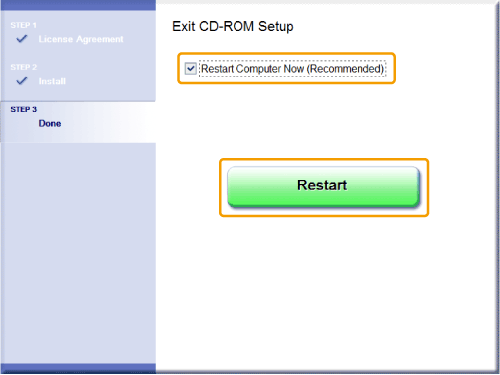
11. Restart your computer.
(1) Select the [Restart Computer Now (Recommended)] check box.
(2) Click [Restart].
* The CD-ROM can be ejected once this screen appears.
Caution
Wait until your computer is restarted.
USB cable connection
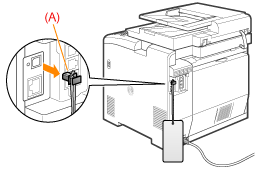
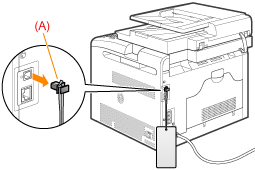
1. Remove the cap (A) on the USB port of the machine.
Pull the string forward to remove the cap, as shown below.
MF8380Cdw
MF8080Cw/MF8010Cn
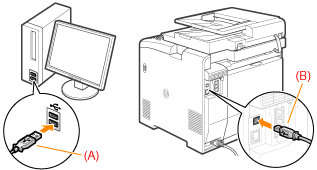
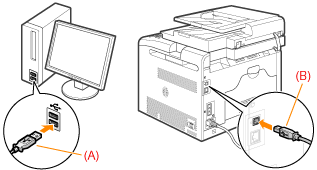
2. Connect the USB cable.
- Flat end (A): Connect (A) to the USB port on the computer.
- Square end (B): Connect (B) to the USB port on the machine.
MF8380Cdw
MF8080Cw/MF8010Cn
Caution
Checking the installation results
Check if the MF drivers, MF Toolbox, and the e-Manual are installed correctly.
Check if the following icons are displayed for the installed applications.
| Software | Location | Icon | |
| Printer driver | [Devices and Printers] folder •Windows 2000: From the [Start] menu, select [Settings] -> [Printers]. •Windows XP Professional/Server 2003: From the [Start] (or [start]) menu, select [Printers and Faxes]. •Windows XP Home Edition: From the [start] menu, select [Control Panel] -> [Printers and Other Hardware] -> [Printers and Faxes]. •Windows Vista: From the [Start] menu, select [Control Panel] -> [Printer]. •Windows 7/Server 2008 R2: From the [Start] menu, select [Devices and Printers]. •Windows Server 2008: From the [Start] menu, select [Control Panel] and then double-click [Printers]. |  | |
| Fax driver | [Devices and Printers] folder •Windows 2000: From the [Start] menu, select [Settings] -> [Printers]. •Windows XP Professional/Server 2003: From the [Start] (or [start]) menu, select [Printers and Faxes]. •Windows XP Home Edition: From the [start] menu, select [Control Panel] -> [Printers and Other Hardware] -> [Printers and Faxes]. •Windows Vista: From the [Start] menu, select [Control Panel] -> [Printer]. •Windows 7/Server 2008 R2: From the [Start] menu, select [Devices and Printers]. •Windows Server 2008: From the [Start] menu, select [Control Panel] and then double-click [Printers]. |  | |
| Scanner driver | [Scanners and Cameras] or [Scanners and Cameras Properties] folder •Windows 2000: From the [Start] menu, select [Settings] -> [Control Panel] and then double-click [Scanners and Cameras]. •Windows XP: From the [start] menu, select [Control Panel] -> [Printers and Other Hardware] -> [Scanners and Cameras]. •Windows Vista: From the [Start] menu, select [Control Panel] -> [Hardware and Sound] -> [Scanners and Cameras]. •Windows 7: Enter "scanner" in [Search programs and files] under the [Start] menu, and then click [View scanners and cameras]. |  | |
| MF Toolbox | Desktop |  | |
| Network Scan Utility | Taskbar |  |


