Solution
Caution
[ZoomBrowser EX] from the supplied Solution Disk must be installed on your computer for this operation.
Operations for Windows Vista are explained here. Images displayed or operation might differ slightly in Windows XP.
RAW images or movies cannot be trimmed.
1. Double-click the [ZoomBrowser EX] shortcut icon on your desktop to start ZoomBrowser EX.

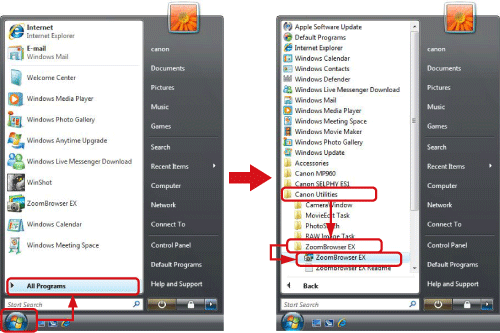
If you cannot find the [ZoomBrowser EX] shortcut icon on your desktop, click [Start] ( ) ⋗ [All Programs] or [Programs] ⋗ [Canon Utilities] ⋗ [ZoomBrowser EX] and select [ZoomBrowser EX] to start ZoomBrowser EX.
2. The following screen appears.
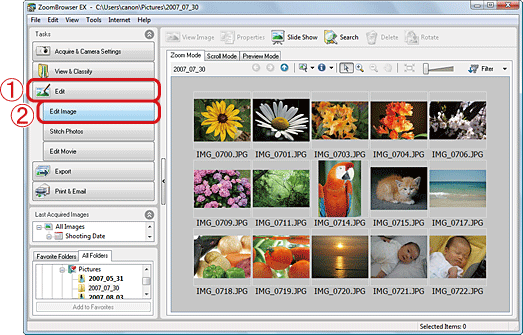
 Click [Edit].
 Click [Edit Image].
3. The following screen appears.
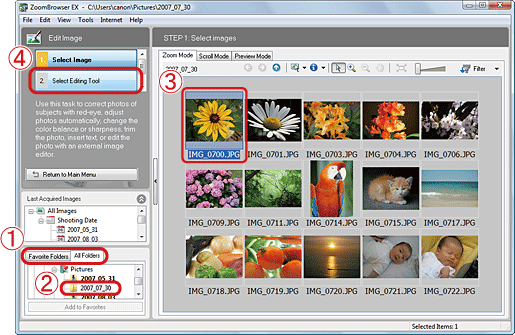
 Click either the [Favorite Folders] tab or the [All Folders] tab.
 Select the folder that contains the images to trim (Usually images are saved in the [Pictures] or [My Pictures]).
 Click the image to trim.
 Click [Select Editing Tool].
4. The following screen appears.
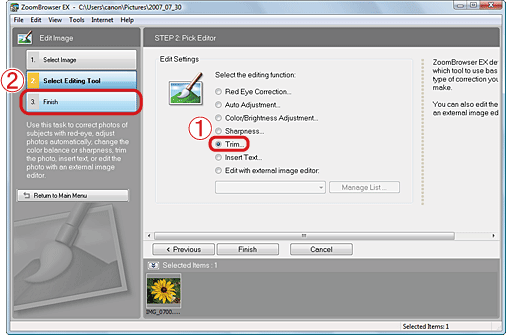
 Select [Trim].
 Click [Finish].
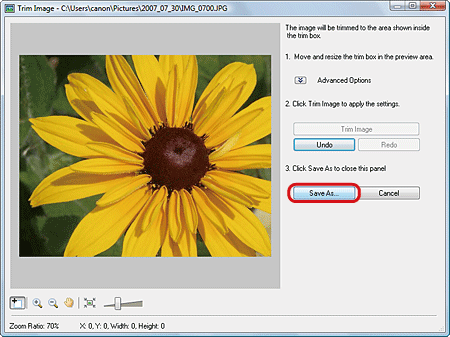
5. The trim area will be displayed on the [Trim Image] screen.
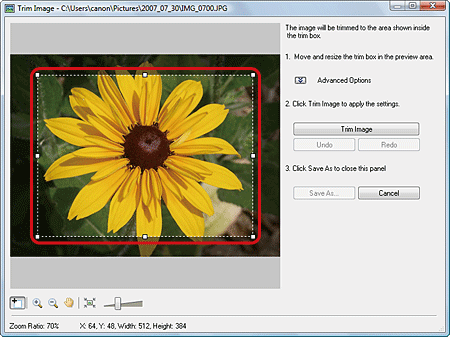
6. To change the trim area, select one of the selection handles ( ) on the trim area and drag it while holding the left mouse button down.
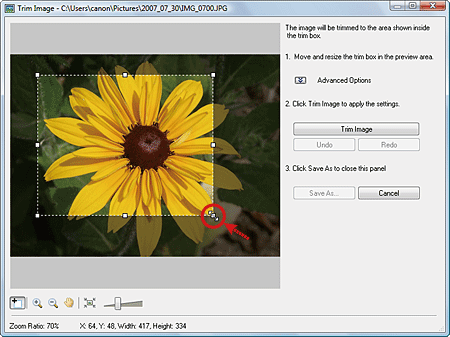
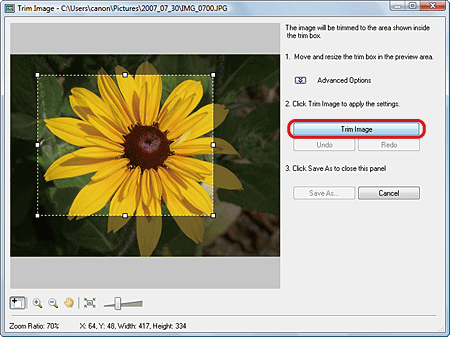
7. When you decide the trim area, click [Trim Image].
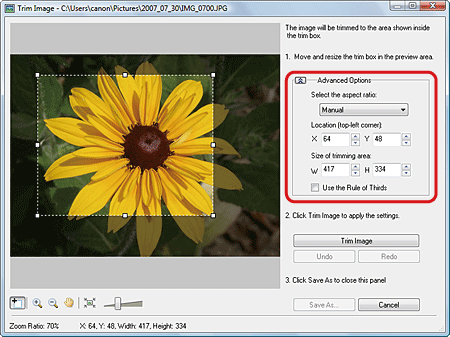
If you click [Advanced Options], you can specify the trim area using specific values and set the aspect ratio.
8. Click [Save As].
9. The following screen appears.
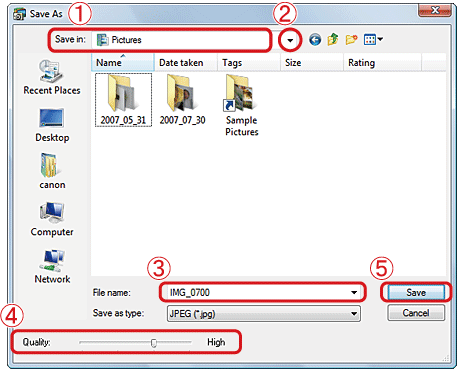
 Check the destination where the file will be saved.
 Click (
 ) to change the destination and select a new one.
 Name the file (If you don't change the file name, the original image will be overwritten).
 Set the image quality as desired.
 Click [Save] to save the image.

