

Raise the [ISO speed] to use a fast shutter speed when you wish to reduce the effects of camera shake or avoid blurry subjects, or to turn the flash off when shooting in a dark area.
Also, with [ISO AUTO] (
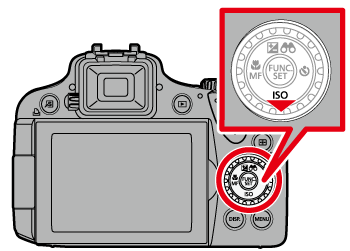
The position and shape of the operation buttons, screens displayed, and setting items may differ according to the model you use.
Changing the ISO Speed
Caution
 ) .
) .- [Custom1,2] (


1. Press the ⋖Power⋗ button on the camera.
2. Press the ⋖ISO⋗ (
3. The following screen appears on the LCD monitor.
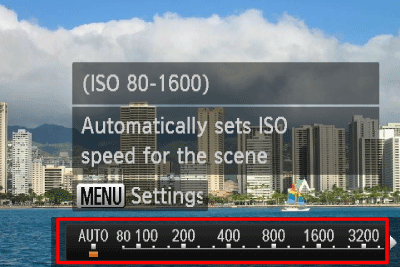
Operate the ⋖Directional buttons⋗ left or right to select an [ISO Speed]* of your choice.
After the selection is made, press the ⋖FUNC./SET⋗ (
* Select the appropriate [ISO Speed] for the shooting environment.
If the camera shake warning icon (
| Guidelines for changing the ISO speed | |
|---|---|
| Automatically adjusts the ISO speed to the Shooting mode and shooting conditions. |
     | Fine weather conditions, outdoor shooting. |
      | Cloudy, twilight |
            | Nightscapes, dark interiors |
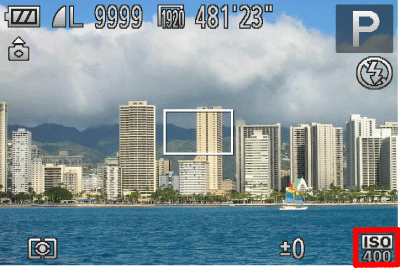
4. If the following icon is shown, the setting is complete (if setting [ISO Speed] to 400).
Caution
⋗, press the ⋖ ⋗ button on the setting screen. (PowerShot G15)⋗, press the ⋖
 ⋗ button on the setting screen. (PowerShot SX50 HS)
Changing the maximum ISO speed and the rate of change in the ISO Auto
Caution
) .- [Custom1,2] (
* For the [Shutter Speed Priority] (
) selected. 1. Press the ⋖MENU⋗ (
2. The following screen appears on the LCD monitor.
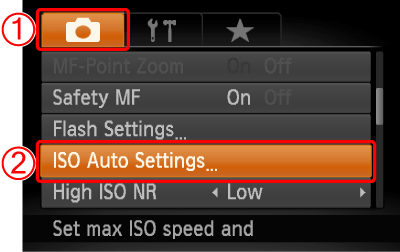


Press the ⋖FUNC./SET⋗ (
3. The following screen appears on the LCD monitor.
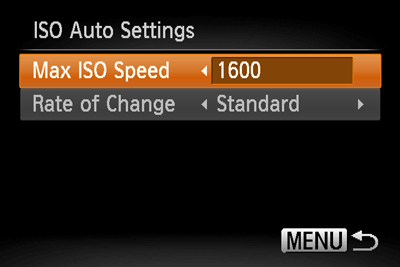
Select [Max ISO Speed], operate the ⋖Directional buttons⋗ left or right to select one of the speed settings.
Caution
You can set the [Max ISO Speed] to the speed settings between [ISO400] (
) selected. Select [Rate of Change] under [ISO Auto Settings].
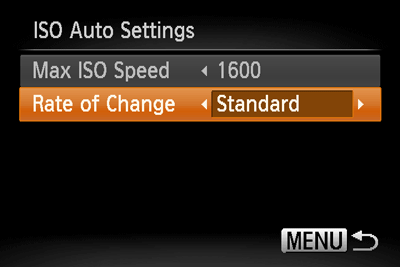
Operate the ⋖Directional buttons⋗ left or right to select one of the items.
Caution
You can select one of the three types, [Fast], [Slow], and [Standard] for the [Rate of Change].
After you set the [Rate of Change], press the ⋖MENU⋗ (
Caution
You can also access the [ISO Auto Settings] screen when the ISO speed setting screen is displayed, by pressing the ⋖