

Solution
Save/Save AsAdd thumbnail to image and save
Convert and save (Saving as a JPEG or TIFF Image)
Batch process
With Digital Photo Professional, you can perform the following types of saving according to your requirements.
| Save | Add adjustment contents (recipe) made with the tool palette to a RAW image and save. |
| Save as | Add adjustment contents (recipe) made with the tool palette to a RAW image and save as a separate RAW image. The original RAW image remains unaffected. |
| Add thumbnail to image and save | Create a new thumbnail image for the main window and save to each image. The quality of images in the main window improves and images redraw themselves more quickly. |
| Convert and save | Convert adjusted RAW image to a JPEG or TIFF image and save. The original RAW image remains unaffected. |
| Batch process | Convert in batches adjusted multiple RAW images to JPEG or TIFF images and save. The original RAW images remain unaffected. |
For details about each of the above saving methods, please refer to the following.
Save/Save As
All the contents (recipe) adjusted with the tool palette as well as the trimmed range information can be saved to a RAW image or to a separate RAW image.
The adjustments made with the tool palette and the dust erase processing can also be saved in a RAW image.
1. Select an image to save.
2. Select [Save] or [Save As] from the [File] menu.
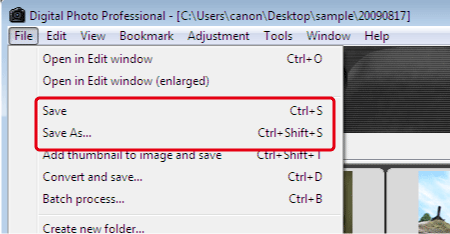
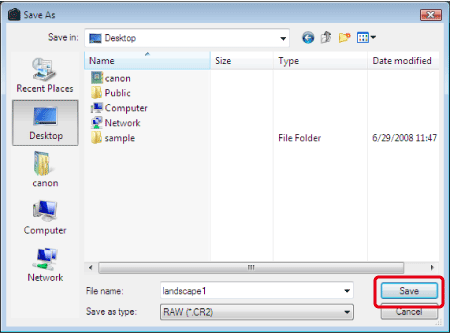
3. If [Save As] is selected, the following window appears. Specify a file name and location to save the image, and then click [Save].
Add thumbnail to image and save
Create a new thumbnail image for the main window and save to each image.
The quality of images in the main window improves and images redraw themselves more quickly.
1. Select an image to save.
2. Select [Add thumbnail to image and save] from the [File] menu.
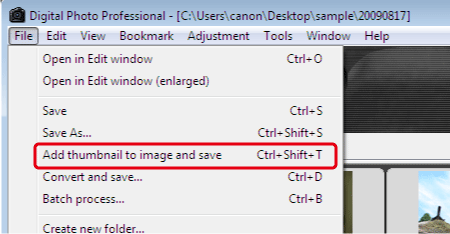
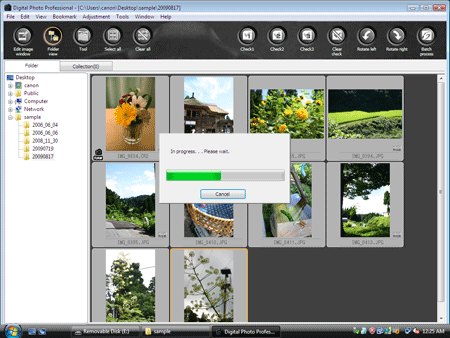
3. The following window appears, and the image is being saved.
Caution
You can specify a presetting for JPEG images to improve the quality of all main window thumbnails. For more information, please refer to the Software Instruction Manual (included on the CD-ROM) that came with your camera.
Convert and save (Saving as a JPEG or TIFF Image)
To view, edit and print a RAW image with software other than Digital Photo Professional, convert to a more versatile JPEG or TIFF image and save. The image is saved as a separate image, so the RAW image remains unaffected.
1. Select the image to be converted.
2. Select [Convert and save] from the [File] menu.
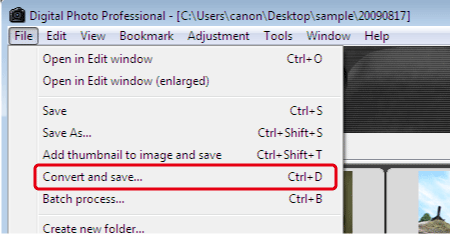
3. The [Convert and save] window appears. Specify a file name, a location to save the image, and the image type, and then click [Save].

4. The RAW image is converted to a JPEG or TIFF image which is then saved as a new image in the specified save destination.
Caution
Batch process
You can batch convert and save edited RAW images to highly versatile JPEG or TIFF images.
The images are saved as separate images, so the RAW images remain unaffected.
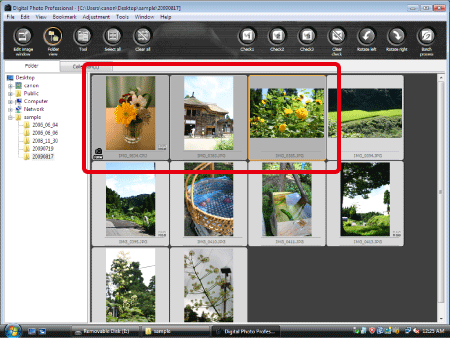
1. In the main window, select multiple images to be converted.
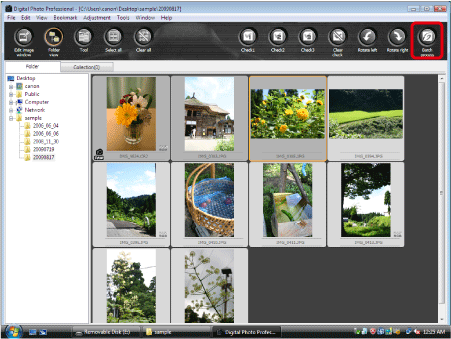
2. Click [Batch process] on the tool bar, or select [Batch process] from the [File] menu.
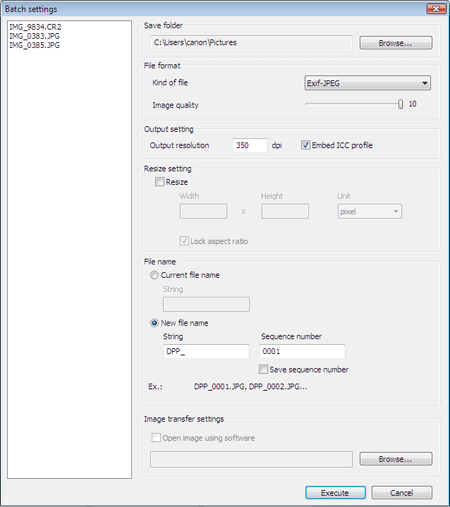
3. The [Batch settings] window appears. Specify the required settings, and then click the [Execute].
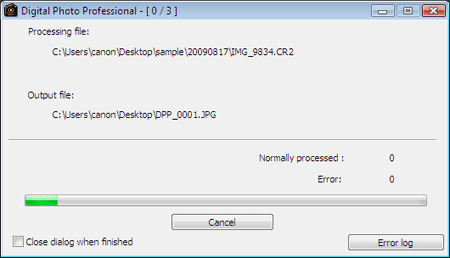
4. The following window appears, and the image is being saved.
Caution