

Phenomenon
Even when pushing the [Stop] button of the printer after deleting, holding, or pausing the print job in the print queue, the message "Processing... Please wait momentarily." continues to be displayed on the side of the printer.

Cause
This phenomenon occurs per specifications when Bonjour printing is enabled.
Solution: For Mac OS X 10.6
Turn OFF the printer, then back ON again.
Changing to the normal printing via network can also avoid this phenomenon.
Follow the procedures below to change the setting.
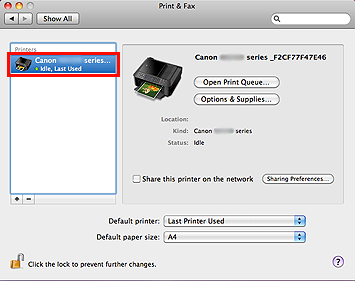
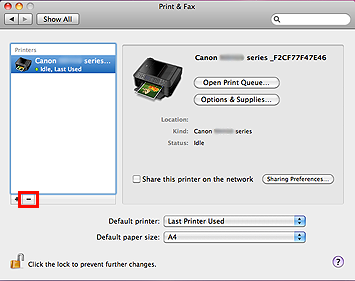
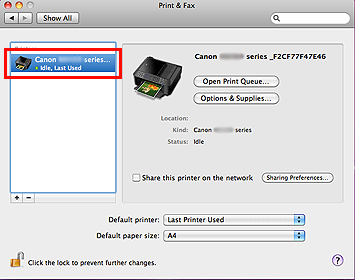
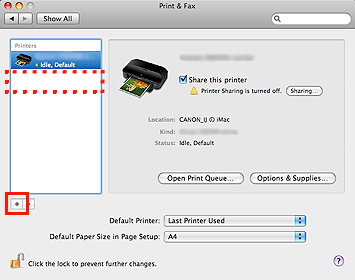
1. In the [Print & Fax] window, select the applicable print queue.
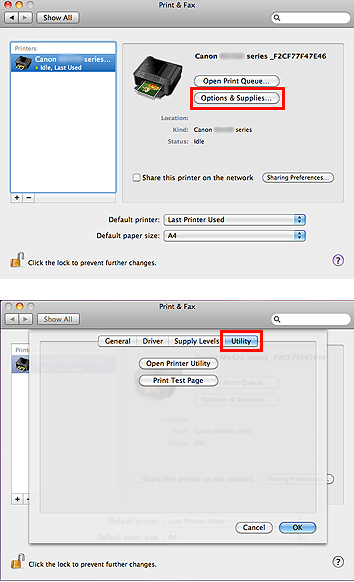
2. Click [Options & Supplies], then select [Utility].
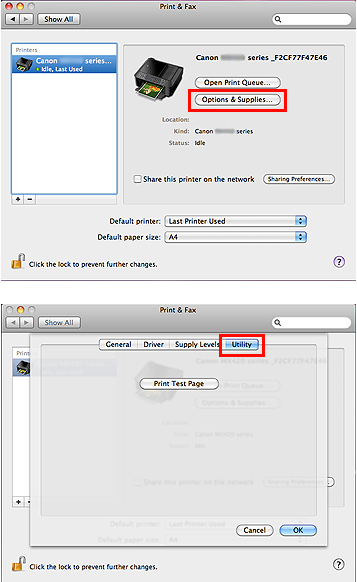
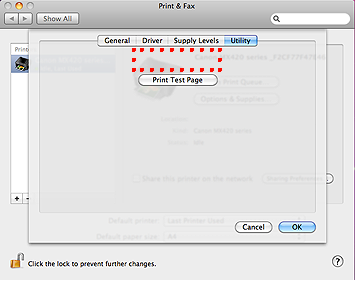
3. Confirm that there is no [Open Printer Utility] button.
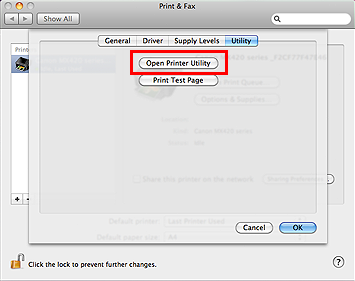
Caution
When the [Open Printer Utility] button is displayed, the print queue you selected is incorrect. Return to the Step 1 to select the correct print queue again.
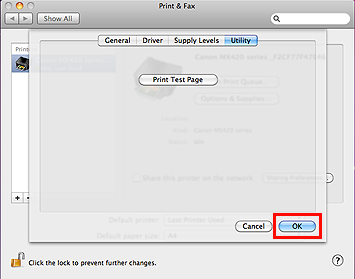
4. Click [OK], and return to the [Print & Fax] window.
5. Click [-].
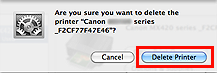
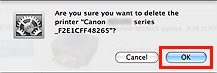
6. When the following message is displayed, click [Delete Printer].
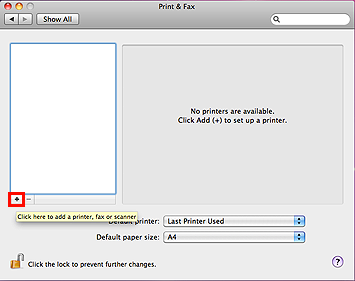
7. Click [+].
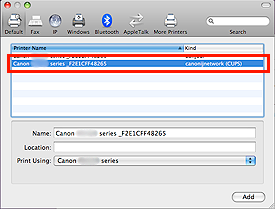
8. In the [Add Printer] window, select the printer with "canonijnetwork" in [Kind].
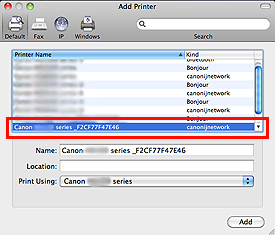
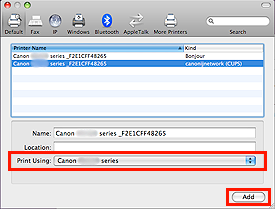
9. Confirm that the same printer is selected in [Print Using], then click [Add].

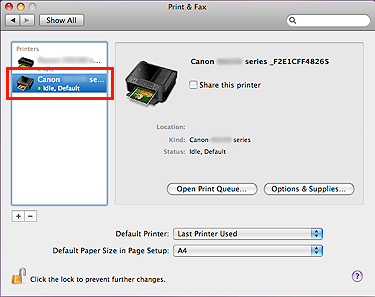
10. When you go back to the [Print & Fax] window, select the created print queue.
11. Click [Options & Supplies], then select [Utility].
12. When the [Open Printer Utility] button is displayed, the change to the normal printing via network in Mac OS X 10.6 is completed.
Solution: For Mac OS X 10.5
Turn OFF the printer, then back ON again.
Changing to the normal printing via network can also avoid this phenomenon.
Follow the procedures below to change the setting.
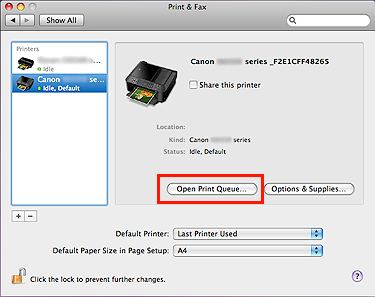
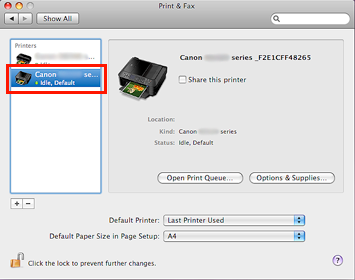
1. In the [Print & Fax] window, select the applicable print queue.
2. Click [Open Print Queue].
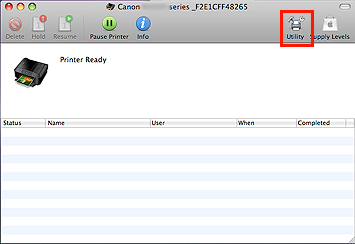
3. Click [Utility].
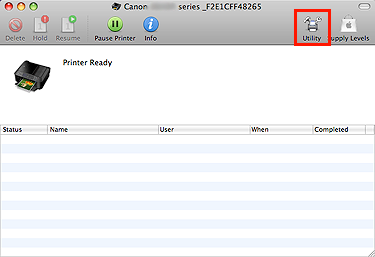
Caution
When the IJ Printer Utility dialog is displayed, the print queue you selected is incorrect. Return to the Step 1 to select the correct print queue again.
4. Close the print queue, and return to the [Print & Fax] window.
5. Click [-].
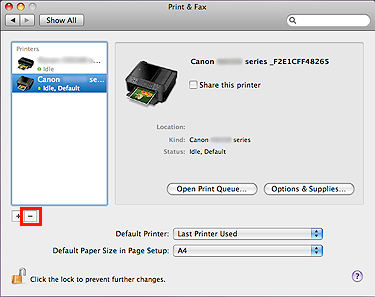
6. When the following message is displayed, click [Delete Printer].
7. Click [+].
8. In the [Add Printer] window, select the printer with "canonijnetwork" in [Kind].
9. Confirm that the same printer is selected in [Print Using], then click [Add].
10. When you go back to the [Print & Fax] window, select the created print queue.
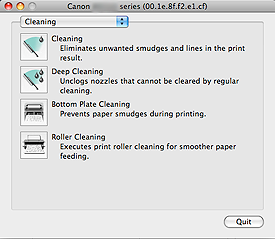
11. Click [Utility].
12. When the IJ Printer Utility dialog is displayed, the change to the normal printing via network in Mac OS X 10.5 is completed.
