

Solution
Connect the Camera to the ComputerChanging the Automatic Start-up Settings for Software Applications.
You can connect the camera to a computer via a USB cable, and save images to a computer running Windows OS without installing any additional software applications. The procedures for connecting the camera to the computer running Windows OS with a USB cable (camera end: Mini-B), and saving images to the computer are explained below.
Caution
Caution
The following two types of USB cables are available for compact digital cameras:
*For more information about the type of USB cable that can be used with your camera, please refer to the camera’s instruction manual.
Connect the Camera to the Computer
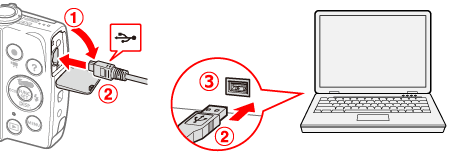
1. Connect the ⋖DIGITAL⋗ terminal of the camera to the computer's USB port using a USB cable (camera end: Mini-B).


Caution
Example procedures are shown on the PowerShot A2600/PowerShot A2500. The position and shape of the operation buttons, screens displayed, and setting items may differ according to the model you use.
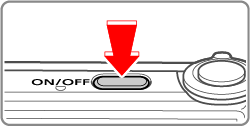
2. Press the power button to turn the camera on.
Caution
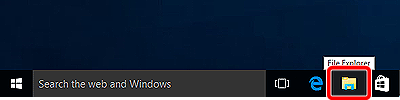
3. Click [File Explorer] on the taskbar appearing on the bottom of the screen.
4. When the following screen appears, select [This PC] from the menu items on the left side.
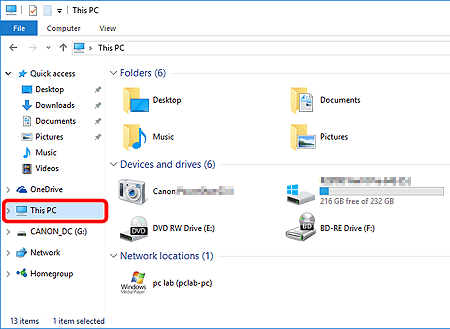
5. Select the camera connected to the PC (
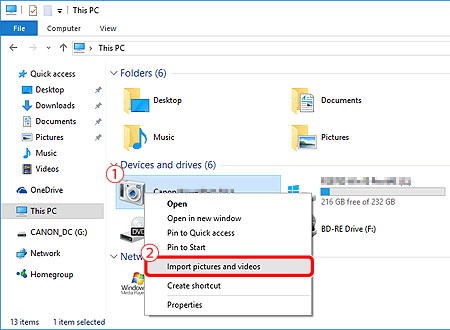
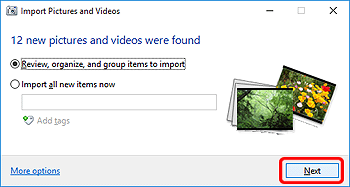
6. Click [Next] when the [Import Pictures and Videos] screen is displayed.
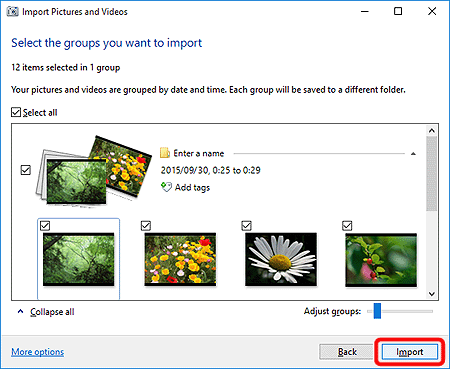
7. Click [Import] to begin image transfer.
Caution
 ].
].8. Image import (transfer) begins.
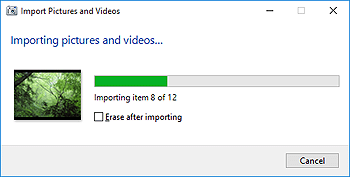
9. When image transfer is complete, a screen similar to the following one appears.
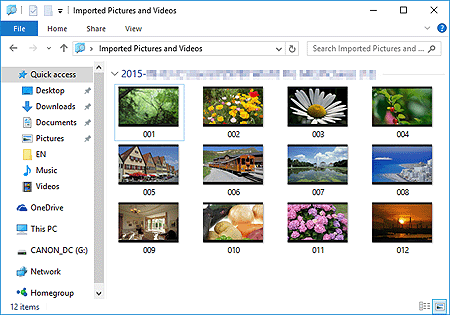
This completes the procedures for importing images.
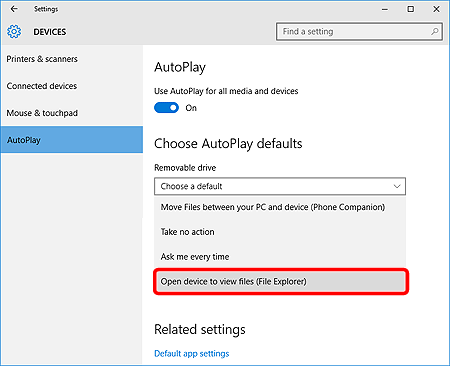
Changing the Automatic Start-up Settings for Software Applications.
To prevent software applications from starting automatically, follow the procedures below to change the [AutoPlay] settings.
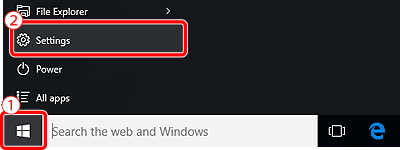
1. Click the [Start] button appearing at the bottom left of the screen (
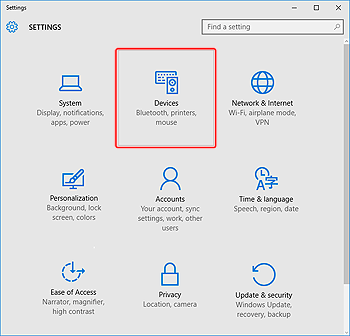
2. Choose [Devices] from the screen displayed.
3. Select [AutoPlay] (
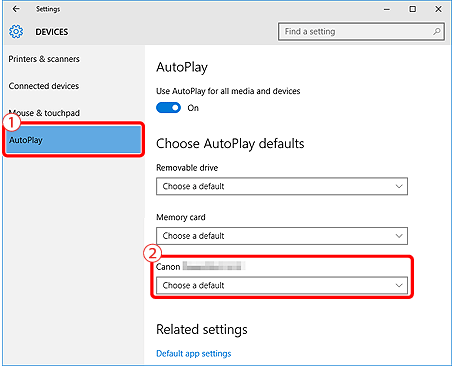
4. Make the settings.
This completes the procedure for changing the AutoPlay settings.