This section describes how to make the date and time settings on the camera.
Information you specify this way is recorded in image properties when you shoot, and it is used when you manage images by shooting date or print images showing the date.
Additionally, the shooting date can be added to images in the lower-right corner on some models. For more information, refer to 'Related Information' section at the end of the page.
Caution
The procedure is shown on a PowerShot ELPH 180 / IXUS 175 for the purposes of explanation. The position and shape of the operation buttons, screens displayed, and setting items may differ according to the model you use.
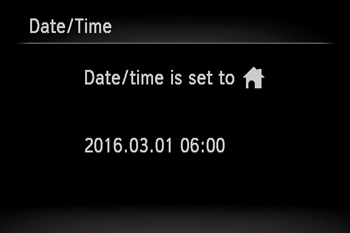
Unless you set the date, time, and home time zone, the [Date/Time] screen will be displayed each time you turn the camera on. Specify the correct information.
Setting the date and time for the first time
When you turn on the camera for the first time after purchase, the [Date/time] settings screen appears. Please be sure to set the current date and time correctly.
If the [Date/time] settings screen is not displayed, please refer to Changing the Date and Time.
1. Turn the camera on.
The [Date/Time] settings screen is displayed.
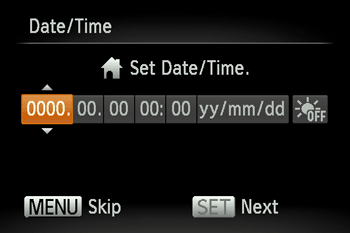
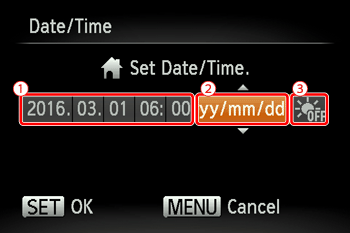
2. Set the [Date/Time].
Press the [  ] , [
] , [  ] buttons to choose an item, and then press the [
  ] , [
] , [  ] buttons to make the setting.
 : Set the year, month, date, and time.
 : Change the year, month, and date.
 : To set daylight saving time (1 hour ahead), choose [
  ] in step 2 and then choose [
  ] by pressing the [ ] , [ ] buttons.

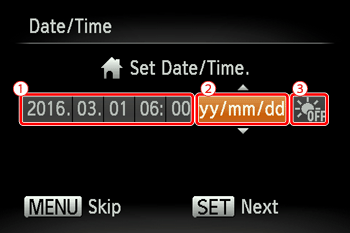
When finished, press the [

] button.
3. The [Time Zone] screen appears.
Press the [ ] , [ ] buttons to choose your home time zone.
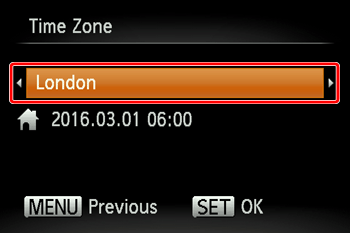
4. Press the [ ] button when finished. After a confirmation message, the setting screen is no longer displayed.
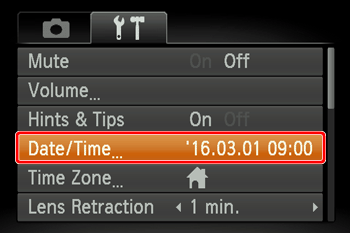
Changing the Date and Time
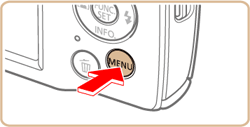
1. Turn the camera on.
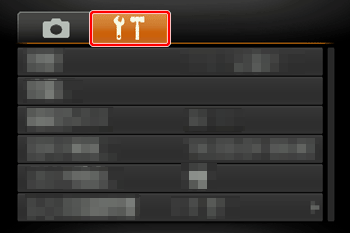
4. Set the [Date/Time].
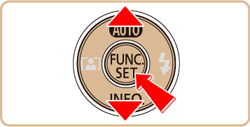
Press the [ ] , [ ] buttons to choose an item, and then press the [ ] , [ ] buttons to make the setting.
: Set the year, month, date, and time.
: Change the year, month, and date.
: To set daylight saving time (1 hour ahead), choose [ ] in step 4 and then choose [ ] by pressing the [ ] , [ ] buttons.
When finished, press the [
] button.
Caution
Date/time settings can be retained for about 3 weeks by the camera’s built-in date/time battery (backup battery) after the battery pack is removed.
The date/time battery will be charged in about 4 hours once you insert a charged battery pack or connect the camera to an AC adapter kit (sold separately), even if the camera is left off.
Once the date/time battery is depleted, the [Date/Time] screen will be displayed when you turn the camera on.