

Solution
Setting IPv4 AddressSetting IPv4 Address Automatically
Setting IPv4 Address Manually
Confirming IPv4 Address Settings
Checking Network Connection (IPv4)
Setting IPv6 Address
Setting the Use of IPv6
Setting the Use of Stateless Address
Setting IPv6 Address Manually
Setting the Use of DHCPv6
Confirming IPv6 Address Settings
Checking Network Connection (IPv6)
Setting the IP address to the machine allows it to communicate with computers on the network.
Setting IPv4 Address
If you assign static IP addresses to the network devices, manually assign a static address to the machine. If you use a router (a DHCP server) to assign IP addresses, you can set the machine to obtain an IP address automatically. After setting the machine to automatically obtain an IP address, check that the machine has successfully obtained an IP address and has been connected to the network.
The ⋖IP ADDRESS AUTO.⋗ of ⋖IPv4 SETTINGS⋗ is set to ⋖ON⋗ in the factory default. Therefore, choose one of the followings to set the IP address and connect to the Internet. Even when assigning IPv6 addresses to the machine, you must obtain an IPv4 address beforehand.
Caution
- the Scan to e-mail and I-fax (reception) function
- the Scan to File Server function
- the PC fax function
- the Network scan function
Setting IPv4 Address Automatically
If you use a network environment which can automatically assign IP addresses, such as a network with a router (a DHCP server), you can set the machine to automatically obtain an IPv4 address. In this setting, the machine will automatically obtain an IP address after being connected to the network for a few moments.
The default settings are as follows:
Caution
The IP address currently assigned to the machine may be changed when the server or machine is restarted. In these cases, check the IP address and make the necessary settings. Additionally, most routers have functions that can assign specific IP addresses even under a DHCP environment. Use of these functions are recommended.
1. Press 
2. Press 

If the System Manager ID and System Password have been set, enter the System Manager ID and System Password using 


3. Press
4. Press
5. Press 

6. Press
7. Press
8. Press
9. Press
Caution
You can select ⋖ON⋗ or ⋖OFF⋗ for each protocol independently. If the protocol you don't want to use is set to ⋖ON⋗, you need to set it to ⋖OFF⋗.
10. Press 
11. Turn OFF the main power switch on the right side of the machine, wait for at least 10 seconds, and then turn ON the power to restart the machine.
Setting IPv4 Address Manually
If you assign fixed IP addresses to the devices on the network, manually assign an IP address (IPv4) to the machine.
The default settings are as follows:
1. Press
2. Press
If the System Manager ID and System Password have been set, enter the System Manager ID and System Password using
3. Press
4. Press
5. Press
6. Press
7. Press
8. Press
9. Press
10. Use
11. Press
12. Use
13. Press
14. Use
15. Press
16. Turn OFF the main power switch on the right side of the machine, wait for at least 10 seconds, and then turn ON the power to restart the machine.
Confirming IPv4 Address Settings
To confirm IP address settings, follow the procedure below.
1. Press
2. Press
If the System Manager ID and System Password have been set, enter the System Manager ID and System Password using
3. Press
4. Press
5. Press
6. Press
7. Press
If the machine is not communicated with the network properly, the IPv4 address, subnet mask and gateway address are not displayed. Make sure that the network settings are properly set.
8. Press 
Checking Network Connection (IPv4)
To check that the IPv4 network connections are properly set using the IPv4 address, follow the procedure below.
Caution
Set ⋖REMOTE UI⋗ to ⋖ON⋗ in ⋖SYSTEM SETTINGS⋗.
1. Start the web browser.
2. Enter the IP address of the machine in the address bar, then press [Enter] on the keyboard.
Caution
3. Confirm that the Remote UI screen appears.
Even if you enter the IP address confirmed in step 2 and the Remote UI screen does not appear, check whether the machine is correctly connected to the computer.
Caution
If you connect the machine to a switching hub, the machine may not be able to connect to a network even though your network settings are appropriate. This problem may be resolved by delaying the startup of network communications for the machine.
The machine is successfully connected to the Internet using IPv4.
Setting IPv6 Address
The following explains the procedure for specifying IPv6 address settings. After specifying the IPv6 address settings, perform the procedure in "Checking Network Connection (IPv6)," in this content, check that the network settings are correct.
The machine can be assigned up to nine IPv6 addresses. With IPv6 communication, multiple IPv6 addresses can be assigned at the same time. If you manually assign a fixed address, the machine will be able to communicate even if stateless addresses or a stateful address cannot be obtained.

An address that is only valid within the same link. A link-local address is automatically set using a specific prefix (fe80::) and an interface identifier generated from the MAC address of the machine. When the machine is using the functions of IPv6, one link-local address is always registered.
A fixed address.
A stateless address is automatically set using the machine's MAC address and the prefix (information indicating the network it belongs to) included in the RA (Router Advertisement) notified by the router when the machine is started. The machine can automatically obtain stateless addresses and access the network without a DHCP server.
A stateful address can be obtained from a DHCP server using DHCPv6. Without a DHCP server, the machines cannot obtain a stateful address.
Caution
You cannot use the functions of IPv6 without using the functions of IPv4.
Setting the Use of IPv6
To set the use of IPv6, follow the procedure below.
The default setting is ⋖OFF⋗.
1. Press 
2. Press
If the System Manager ID and System Password have been set, enter the System Manager ID and System Password using 


3. Press
4. Press
5. Press
6. Press
7. Press
8. Press
9. Turn OFF the main power switch on the right side of the machine, wait for at least 10 seconds, and then turn ON the power to restart the machine.
Setting the Use of Stateless Address
To set IPv6 addresses using the DHCP server or to set IPv6 addresses without using DHCP server, follow the procedure below.
The default setting is ⋖ON⋗.
Caution
⋖STATELESS ADD SET⋗ can be selected when ⋖USE IPv6⋗ is set to ⋖ON⋗.
1. Press
2. Press
If the System Manager ID and System Password have been set, enter the System Manager ID and System Password using
3. Press
4. Press
5. Press
6. Press
7. Press
8. Press
9. Turn OFF the main power switch on the right side of the machine, wait for at least 10 seconds, and then turn ON the power to restart the machine.
Setting IPv6 Address Manually
To set IPv6 addresses manually, follow the procedure below.
The default settings are as follows:
Caution
⋖MANUAL ADD SET⋗ can be selected when ⋖USE IPv6⋗ is set to ⋖ON⋗.
1. Press
2. Press
If the System Manager ID and System Password have been set, enter the System Manager ID and System Password using
3. Press
4. Press
5. Press
6. Press
7. Press
8. Press
9. Press
10. Use 
11. Press
12. Press
13. Press
14. Use
15. Press
16. Turn OFF the main power switch on the right side of the machine, wait for at least 10 seconds, and then turn ON the power to restart the machine.
Setting the Use of DHCPv6
To set the use of DHCPv6, follow the procedure below.
The default setting is ⋖OFF⋗.
Caution
⋖USE DHCPv6⋗ can be selected when ⋖USE IPv6⋗ is set to ⋖ON⋗.
1. Press
2. Press
If the System Manager ID and System Password have been set, enter the System Manager ID and System Password using
3. Press
4. Press
5. Press
6. Press
7. Press
8. Press
9. Turn OFF the main power switch on the right side of the machine, wait for at least 10 seconds, and then turn ON the power to restart the machine.
Confirming IPv6 Address Settings
You can confirm IPv6 address settings below.
To confirm the link-local address settings, follow the procedure below.
Caution
The link-local address is automatically set when ⋖USE IPv6⋗ is set to ⋖ON⋗.
1. Press
2. Press
If the System Manager ID and System Password have been set, enter the System Manager ID and System Password using
3. Press
4. Press
5. Press
6. Press
7. Press
8. Press
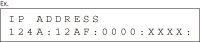
The current link-local address set in the machine is displayed.

9. Press
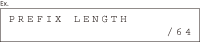
The current prefix length set in the machine is displayed.

10. Press
To confirm the stateless address settings, follow the procedure below.
Caution
The Stateless Address is automatically set when ⋖STATELESS ADD SET⋗ is set to ⋖ON⋗.
1. Press
2. Press
If the System Manager ID and System Password have been set, enter the System Manager ID and System Password using
3. Press
4. Press
5. Press
6. Press
7. Press
8. Press
The current stateless address set in the machine is displayed.

9. Press
The current prefix length set in the machine is displayed.
10. Press
To confirm the stateful address settings, follow the procedure below.
Caution
The Stateful Address is set when ⋖USE DHCPv6⋗ is set to ⋖ON⋗.
1. Press
2. Press
If the System Manager ID and System Password have been set, enter the System Manager ID and System Password using
3. Press
4. Press
5. Press
6. Press
7. Press
8. Press
The current stateful address set in the machine is displayed.
9. Press
The current prefix length set in the machine is displayed.

10. Press
To confirm the default router address settings, follow the procedure below.
Caution
The Default Router Address is set when ⋖USE IPv6⋗ is set to ⋖ON⋗.
1. Press
2. Press
If the System Manager ID and System Password have been set, enter the System Manager ID and System Password using
3. Press
4. Press
5. Press
6. Press
7. Press
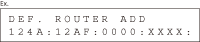
The current default router address set in the machine is displayed.
8. Press
Checking Network Connection (IPv6)
To check that the IPv6 network connections are properly set using the IPv6 address, follow the procedure below.
Caution
Set ⋖REMOTE UI⋗ to ⋖ON⋗ in ⋖SYSTEM SETTINGS⋗.
1. Start the web browser.
2. Enter the IP address of the machine in the address bar, then press [Enter] on the keyboard.
Caution
The IP address to enter is the one that was confirmed in "Confirming IPv6 Address Settings," in this content.
3. Confirm that the Remote UI screen appears.
Even if you enter the IP address confirmed in step 2 and the Remote UI screen does not appear, check whether the machine is correctly connected to the computer.
Caution
If you connect the machine to a switching hub, the machine may not be able to connect to a network even though your network settings are appropriate. This problem may be resolved by delaying the startup of network communications for the machine.
The machine is successfully connected to the Internet using IPv6.
To use the Print function, it is necessary to install the drivers.