

Solution
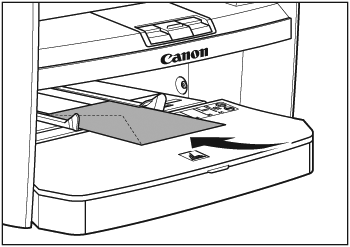
1. Spread the paper guides a little wider than the actual paper width.2. When setting an envelope, gently insert the envelope into the multi-purpose tray with the print side up and the right edge (i.e., closer to the stamp) first.
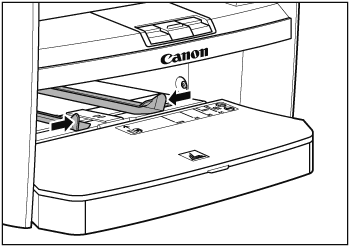
3. Slide the paper guides so that they fit to both sides of the paper.
4. Set the Print Command.
5. Select the Printer.
6. Adjust Preferences.
7. Click [Print] or [OK].
Use the multi-purpose tray when you want to print on an envelope. Load an envelope one by one in the multi-purpose tray.
Caution
The recommended envelopes are COM 10(#10), MONARCH, DL, and ISO-C5. Using other envelopes may affect the quality of the printout.
Make sure that you install correct printer driver. To check if the driver is installed, see Installing the software using Network connection and Installing the Software using USB connection.
1. Spread the paper guides a little wider than the actual paper width.
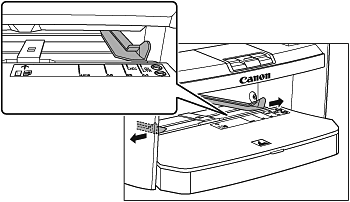
2. When setting an envelope, gently insert the envelope into the multi-purpose tray with the print side up and the right edge (i.e., closer to the stamp) first.
3. Slide the paper guides so that they fit to both sides of the paper.
Caution
If the paper guides do no fit the size of paper, it may cause jamming and poor print quality.
4. Set the Print Command.
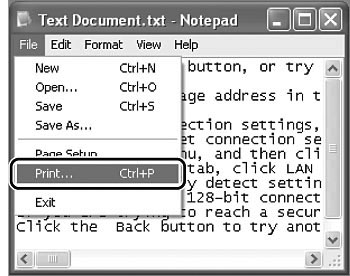
From an open document on an application, click [File] → [Print].
5. Select the Printer.
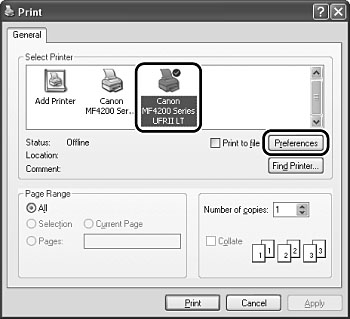
Select the printer icon for the machine ([Canon MF4200 Series UFRII LT]), then click [Preferences] or Properties] to open the dialog box.
6. Adjust Preferences.
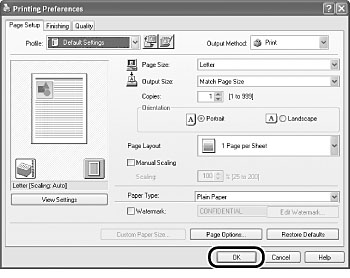
Please click "Output Size" and select "envelope". After finished setting, please click "OK".
7. Click [Print] or [OK].
