

Solution
Cautions When Printing on a Printable DiscBefore Placing a Printable Disc
Placing a Printable Disc
Removing a Printable Disc
Printing Disc Labels and Case Covers
Printing Labels on Discs Directly
Cautions When Printing on a Printable Disc
To stop the printing operation, detach the disc tray from the printer, then close the inner cover. After approximately three minutes have elapsed, open the inner cover, attach the disc tray to the printer, then resume printing.
Before Placing a Printable Disc
The following items are needed to print onto the printable disc:

"G" is on the upper side.

Needed only when printing on 3.15 inches (8 cm) printable discs.
Attached to the disc tray when shipped.

Obtain a printable disc with a label surface compatible with inkjet printing.
Caution
Caution
Placing a Printable Disc
To print onto a printable disc, place it on the disc tray supplied with the machine, then insert it into the machine.
This procedure also applies to printing from a computer.
Caution
Do not attach the disc tray until the message asking you to load the printable disc is displayed. Doing so can damage the machine.
1. Open the paper output tray (A).
2. Make sure that the message asking you to load the printable disc is displayed, then open the inner cover (B).

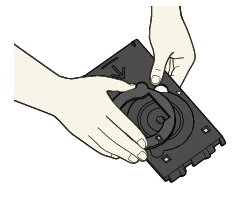
3. Place the printable disc on the disc tray.
Caution
4.72 inches (12 cm) printable disc:
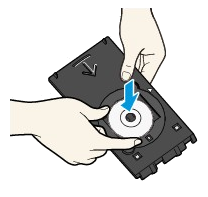
(1) Place the printable disc on the disc tray with the printable surface facing up.

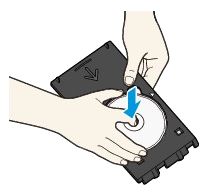
3.15 inches (8 cm) printable disc:
(1) Align the protrusions on both edges of the 3.15 inches (8 cm) disc adapter with indentations on the disc tray.
(2) Place the 3.15 inches (8 cm) printable disc on the disc tray with the printing surface facing up.
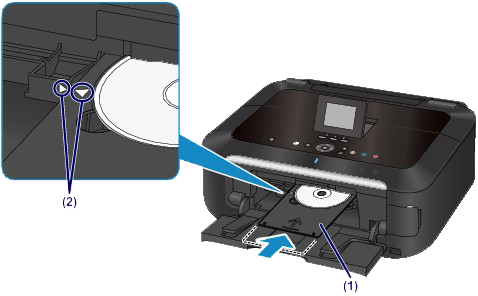
4. Attach the disc tray to the machine.
Caution
The disc tray may be ejected after a specified period of time has elapsed. In this case, follow the on-screen instructions to attach the disc tray.
(1) Place the disc tray on the inner cover.
(2) Insert the disc tray straight until the arrow ( 

Caution
Do not insert the disc tray beyond the arrow (
Removing a Printable Disc
1. Pull out the disc tray.
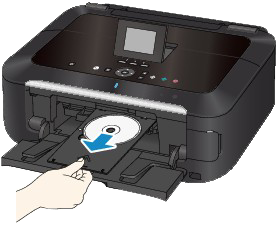
2. Close the inner cover.
Caution
If the inner cover is opened, you cannot print on paper as it will not feed properly. Make sure that the inner cover is closed.

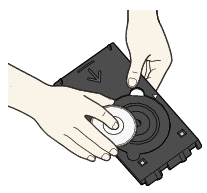
3. Remove the printable disc from the disc tray.
Caution
Do not touch the printing surface when removing the disc from the disc tray.
Caution
Dry the printing surface sufficiently before removing the disc. If you see printing on the disc tray or the transparent parts on inner or outer diameter of the printable disc, wipe them off after the printing surface has dried.
4.72 inches (12 cm) printable disc:
(1) Remove the printable disc from the disc tray.
3.15 inches (8 cm) printable disc:
(1) Remove the 3.15 inches (8 cm) disc adapter from the disc tray.
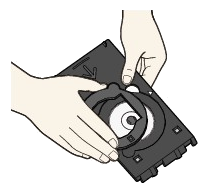
(2) Remove the 3.15 inches (8 cm) printable disc from the disc tray.
Caution
The disc tray cannot be used if it becomes warped. Be sure to keep the disc tray on a flat place.
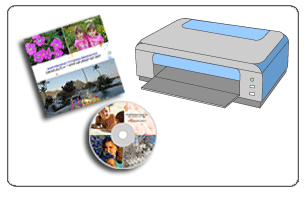
Printing Disc Labels and Case Covers
You can print your own disc labels and case covers using your favorite photos.
Caution
Do not set the disc tray until a message prompting you to load a printable disc appears. Loading a printable disc while the machine is operating may damage the machine.
Steps
1. Start Easy-PhotoPrint EX.
2. Click Disc Label/Case Cover from Menu.
The Page Setup screen appears.
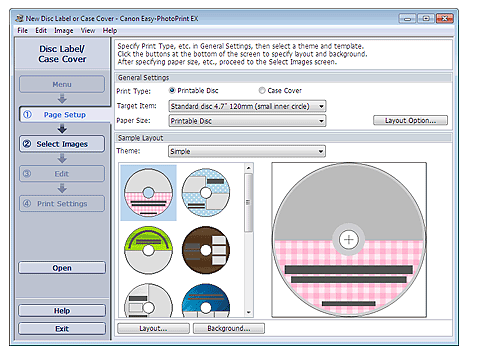
3. Set Print Type, Target Item or Paper Size, etc. in the General Settings section.
Caution
4. Select the theme and the layout you want to use from Theme in Sample Layout.
5. If you want to change the layout, click Layout....
The Change Layout dialog box appears.
Caution
The layouts that can be selected may vary depending on the Print Type or Target Item.
6. If you want to change the background, click Background....
The Change Background dialog box appears.
In the Change Background dialog box, you can paint the background in a single color or paste an image file to it.
7. Click Select Images in the step button area on the left side of the screen.
The Select Images screen appears.
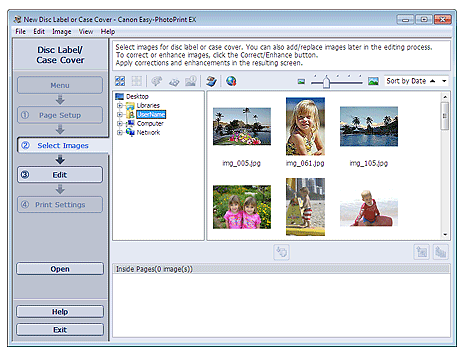
8. Select the folder that contains the image you want to print from the Folder Tree area.
The images in the folder will be displayed as thumbnails (miniatures).
Caution
If Easy-PhotoPrint EX is started from another application (MP Navigator EX), the Folder Tree area will not be displayed.
The images selected in MP Navigator EX will be displayed as thumbnails.
Caution
9. Select the image(s) you want to print, and click 
The selected image(s) is (are) displayed in the selected image area.
You can also select the image(s) you want to print by dragging it (them) into the selected image area.
Caution
To delete an image in the selected image area, select the image you want to delete and click 
To delete all images from the selected image area, click 
10. Click Edit in the step button area on the left side of the screen.
The Edit screen appears.
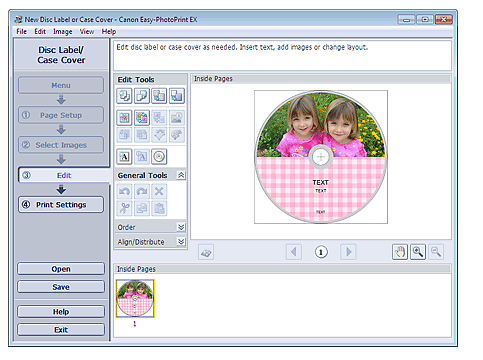
11. Edit your disc label/case cover if necessary.
Caution
The edit information will be discarded if you exit Easy-PhotoPrint EX without saving the edited disc label/case cover. It is recommended that you save the item if you want to edit it again.
Caution
When Printable Disc is selected for Print Type in the Page Setup screen, 
12.Click Print Settings in the step button area on the left side of the screen.
The Print Settings screen appears.
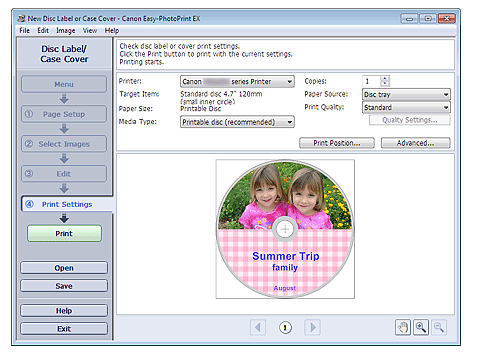
13. Set Media Type, Paper Source, etc. according to the printer and paper to be used.
Caution
14. Click Print in the step button area on the left side of the screen.
Caution
Crop marks may not be printed depending on the selected target item and paper size.

Printing Labels on Discs Directly
You can print labels on printable discs.
If you want to edit the details, return to Menu and select Disc Label/Case Cover. Refer to [ Printing Disc Labels and Case Covers ] within this webpage, for details.
Caution
Do not set the disc tray until a message prompting you to load a printable disc appears. Loading a printable disc while the machine is operating may damage the machine.
1. Make sure that the machine is turned on.
2. Start Easy-PhotoPrint EX.
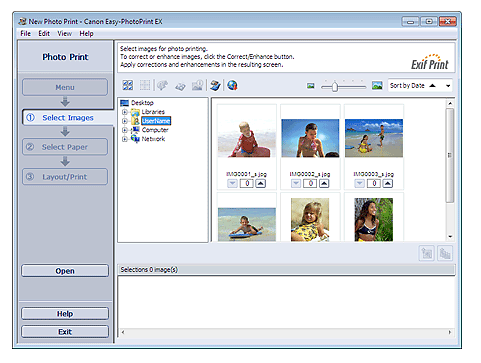
3. Click Photo Print from Menu.
The Select Images screen appears.
Caution
The thumbnails (reduced images) displayed in the screen may appear as follows:
- A black line appears along an edge of the image.
- An edge of the image appears cropped.
However, such images will be displayed normally when enlarged or previewed, and print results will not be affected.
4. Select the folder that contains the image you want to print from the Folder Tree area.
The images in the folder will be displayed as thumbnails (miniatures).
Caution
If Easy-PhotoPrint EX is started from another application (MP Navigator EX, ZoomBrowser EX or Digital Photo Professional), the Folder Tree area will not be displayed.
The images selected in the application will be displayed as thumbnails.
Caution
5. Click the image you want to print.
The number of copies appears as "1" below the clicked image, while the selected image itself will appear in the selected image area.
Caution
 (Delete Imported Image).
To delete all images from the selected image area, click 
 (Up arrow) until the number of copies you want is reached. To reduce the number of copies shown in the box, click
  (Down arrow).
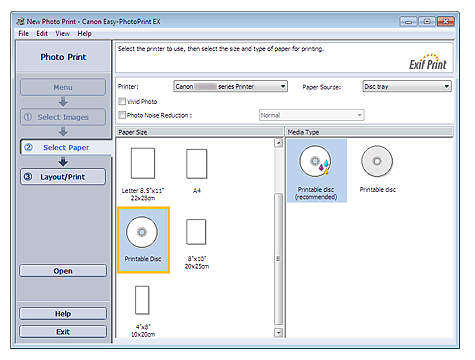
6. Click Select Paper in the step button area on the left side of the screen.
The Select Paper screen appears.

7. Set the Printer in the Select Paper screen.
8. Select Printable Disc for Paper Size.
Set the Media Type according to the printable disc to be used.
Caution
When Printable Disc is selected for Paper Size, only Disc tray will be selectable for Paper Source.
9. Click Layout/Print.
The Layout/Print screen appears.

10. Select a layout you want to use.
11. Enter the title(s) and specify the details of the layout in Advanced.
Caution
Items that can be set may vary depending on the selected layout.
12. Click Print.
Follow the message to load a printable disc, then start printing.
Printing starts from the top of the image displayed in Preview.
Caution
 (Adjust Print Area/Print Position).
 (Settings) or select Preferences... from the File menu.