Loading Plain Paper / Photo Paper
Caution
If you cut plain paper into small size such as 4" x 6" / 10 x 15 cm, 4" x 8" / 101.6 x 203.2 mm, 5" x 7" / 13 x 18 cm, or 2.16" x 3.58" / 55.0 x 91.0 mm (Card size) to perform trial print, it can cause paper jams.
Caution
1. Prepare paper.
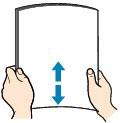
Align the edges of paper. If paper is curled, flatten it.
Caution
2. Load paper.
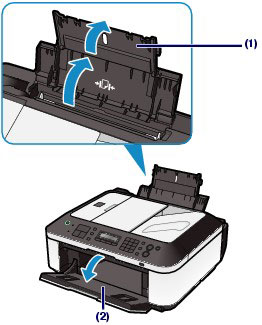
(1) Open the Paper Support, and open the support as an extension.
(2) Open the Paper Output Tray gently.
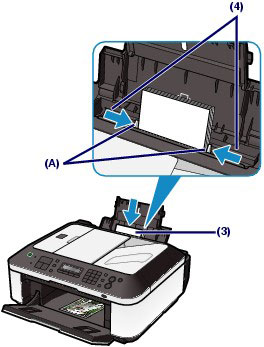
(3) Slide the Paper Guides (A) to open them, and load the paper in the center of the Rear Tray WITH THE PRINT SIDE FACING YOU.
(4) Slide the Paper Guides (A) to align them with both sides of the paper stack.
Do not slide the Paper Guides too hard. The paper may not be fed properly.
Caution
Caution
Caution
After loading paper
Loading Documents in the ADF
You can load documents to copy, fax, or scan in the ADF.
Caution
To scan a document at optimum quality, load it on the Platen Glass.
1. Make sure that any original has been removed from the Platen Glass.
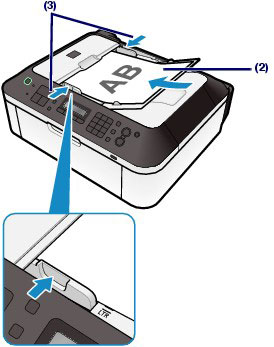
2. Load a document in the ADF.
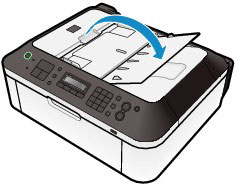
(1) Open the Document Tray.
(2) Insert the document in the Document Tray until you hear a beep sound.
Load the document WITH THE SIDE TO SCAN FACING UP in the Document Tray.
Caution
When you set the alarm to be silent in Device user settings of Device settings, the alarm will not beep even if the document is inserted in the Document Tray.
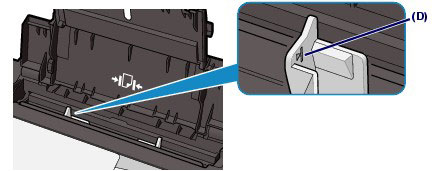
(3) Adjust the Document Guides to match the width of the document.
Do not slide the Document Guides too hard. The document may not be fed properly.