

Solution
Before Replacing the Toner CartridgeReplacing the Toner Cartridge
Precautions on Replacing the Toner Cartridge
This section describes how to replace or handle the toner cartridges and precautions on storing them.
Contact the store where you purchased the printer to obtain replacement toner cartridges.
Caution
No message appears in the display even if the toner cartridge is nearing the end of its life. The case where white streaks appear on printed paper in longitudinal direction, or printed paper comes out faint or uneven can be used to estimate when the toner cartridge will need to be replaced. When you are replacing the toner cartridge, be sure to use a toner cartridge designed for this printer.
Caution
* "ISO/IEC 19752" is the global standard related to "Method for the determination of toner cartridge yield for monochromatic electrophotographic printers and multi-function devices that may contain printer components" issued by ISO (International Organization for Standardization).
Before Replacing the Toner Cartridge
Toner cartridges are consumable products. When there is not enough toner, this may cause the case where white streaks appear on the printed paper in longitudinal direction, or the printed paper comes out faint or uneven. If this type of symptom may occur, perform the following procedure before replacing the toner cartridge. You may be able to print for a while until the toner is used up completely.
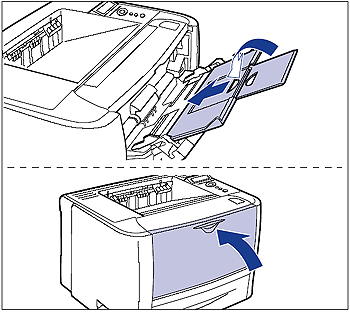
1. If you are using the multi-purpose tray, close it.
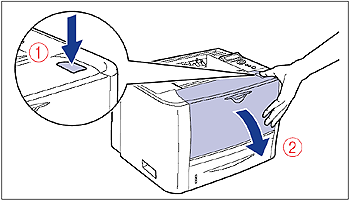
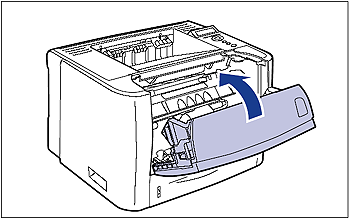
2. Open the front cover.
While pressing the open button on the top of the front cover (1), open it gently (2).
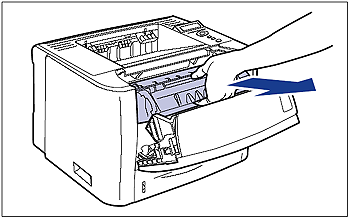
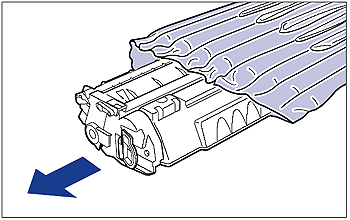
3. Remove the toner cartridge from the printer.
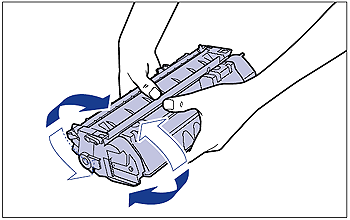
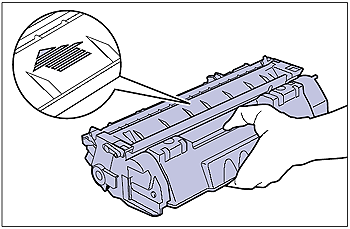
4. Hold the toner cartridge as shown in the figure and shake it gently 5 or 6 times to evenly distribute the toner inside the cartridge.
Be careful not to spill the toner.

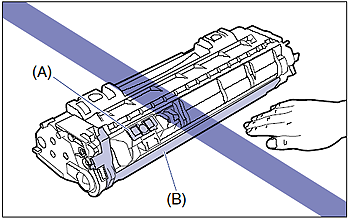
5. Hold the toner cartridge properly with the arrowed side facing up as shown in the figure.

6. Install the toner cartridge.
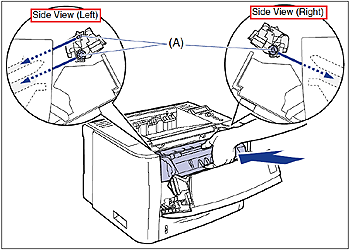
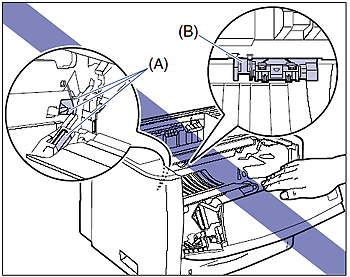
Push the toner cartridge into the printer firmly until it touches the back of the printer while aligning (A) on both sides of the toner cartridge with the toner cartridge guides inside the printer.
7. Close the front cover.
Close the front cover gently and firmly.
If the print is too thin even after performing the operation above, replace the toner cartridge with a new one.
Replacing the Toner Cartridge
1. If you are using the multi-purpose tray, close it.
2. Open the front cover.
While pressing the open button on the top of the front cover (1), open it gently (2).
3. Remove the toner cartridge from the printer.
4. Take the new toner cartridge out of the box.
5. Take the toner cartridge out of the protective bag.
There is a cut near the arrow on the protective bag, so you can open it by hand. However, if you cannot open it by hand, use scissors to open the protective bag so as not to damage the toner cartridge.
6. Hold the toner cartridge as shown in the figure, and shake it gently 5 or 6 times to evenly distribute the toner inside the cartridge.
7. Place the toner cartridge on a flat surface.
8. Pull out the sealing tape.
While holding the toner cartridge steady (1), hook your fingers into the tab and fold it back.
Pull out the sealing tape (approx. 45 cm long) straight in the direction of the arrow gently (2).

Caution
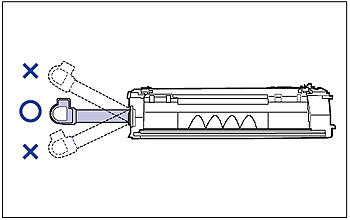
9. Hold the toner cartridge properly with the arrowed side facing up as shown in the figure.
10. Install the toner cartridge.
Push the toner cartridge into the printer firmly until it touches the back of the printer while aligning (A) on both sides of the toner cartridge with the toner cartridge guides inside the printer.
11. Close the front cover.
Close the front cover gently and firmly.
Precautions on Replacing the Toner Cartridge
Caution
Caution