Solution
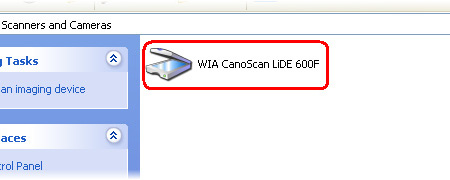
Open [Scanners and Cameras] in the Control Panel.In [Scanners and Cameras], the scanner currently connected to the computer is displayed as an icon.
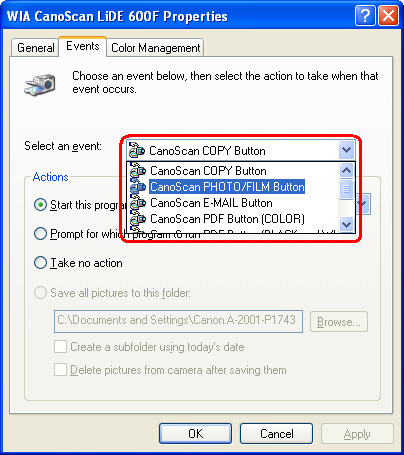
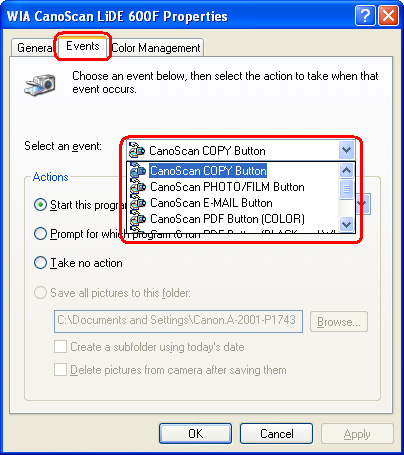
In the "WIA CanoScan LiDE 600F Properties" dialog box, select the [Events] tab.
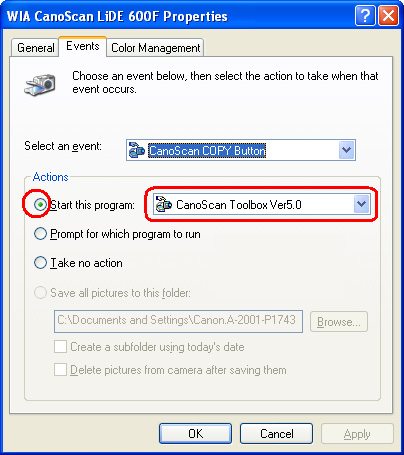
Make sure that "Start this program" is checked and [CanoScan Toolbox VerX.x] is selected.
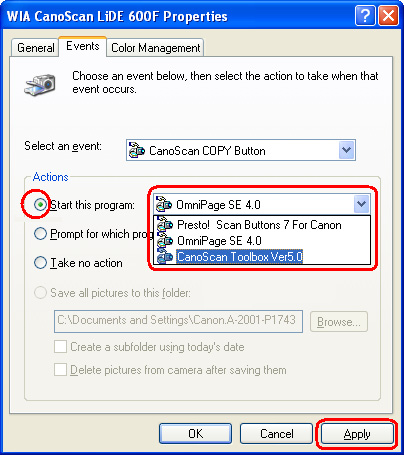
If any of the settings is not correct, select it again and click [Apply].
To set up another scanner button,
Repeat the procedure and check all of the scanner buttons.
In the following example, CanoScan LiDE600F will be set to start Toolbox when a Scanner Button is pressed.
Caution
* Before this procedure, make sure that the scanner is connected to your computer.
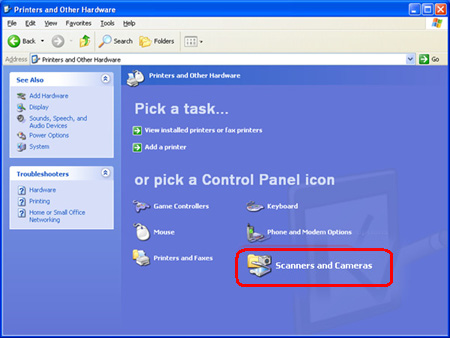
Open [Scanners and Cameras] in the Control Panel.
Click [Start] and [Control Panel].
(If the Control Panel is displayed by category,) Click [Printers and Other Hardware] and [Scanners and Cameras] in the Control Panel.
In [Scanners and Cameras], the scanner currently connected to the computer is displayed as an icon.
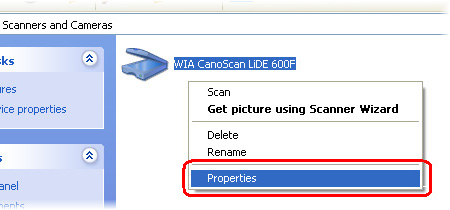
Right-click the icon of your scanner.
Click [Properties] from the menu displayed by the right-click.
In the "WIA CanoScan LiDE 600F Properties" dialog box, select the [Events] tab.
Select a Scanner Button from the pull-down menu on the right of "Select an event" in the [Event] tab.
Make sure that "Start this program" is checked and [CanoScan Toolbox VerX.x] is selected.
If any of the settings is not correct, select it again and click [Apply].
To set up another scanner button,
Select a scanner button other than the one selected in the above step from the pull-down menu on the right of "Select an event".