

Solution
Charging the BatteryInserting the Battery and the Memory Card
Setting the Date and Time
Shooting Still Images
Follow the below steps to get started with your new camera.
Charging the Battery
Before use, charge the battery with the included charger. Be sure to charge the battery initially, because the camera is not sold with the battery charged.
1. After aligning the 


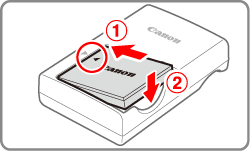
2.
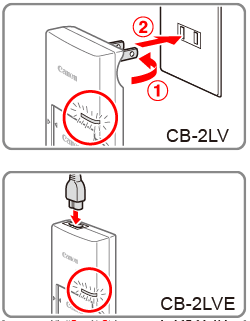
-CB-2LV: Flip out the plug
-CB-2LVE: Plug the power cord into the charger, then plug the other end into a power outlet.
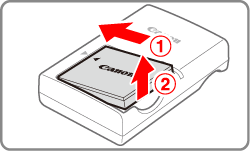
3. After unplugging the battery charger, remove the battery by pushing it in
Caution
To protect the battery and keep it in optimal condition, do not charge it continuously for more than 24 hours.
Caution
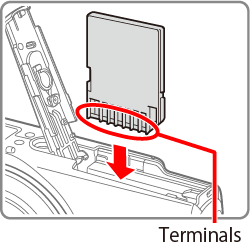
Inserting the Battery and the Memory Card
Insert the included battery and a memory card (sold separately).
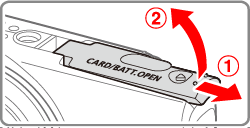
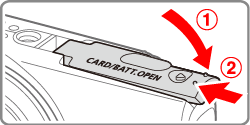
1. Slide the cover
2. Insert the battery.
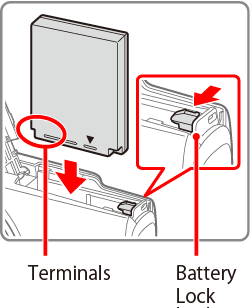
3. Insert the memory card.
4. Close the cover.
Lower the cover
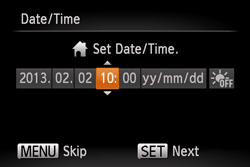
Setting the Date and Time
Set the current date and time correctly as follows if the [Date/Time] screen is displayed when you turn the camera on. Information you specify this way is recorded in image properties when you shoot, and it is used when you manage images by shooting date or print images showing the date.
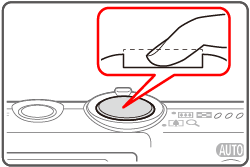
1. Press the power button to turn the camera on.
The [Date/Time] screen is displayed.
2. Set the date and time.
 ⋗⋖
⋗⋖ ⋗ buttons to choose an option.⋗⋖
 ⋗buttons to specify the date and time.
 ) button.
3. Set the home time zone.

Press the ⋖
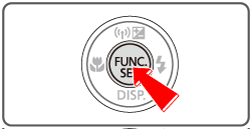
4. Press the ⋖FUNC./SET⋗ (
Shooting Still Images
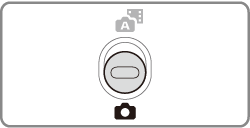
1. Set the mode switch to ⋖
2.Press the ⋖FUNC./SET⋗ (

Press the ⋖

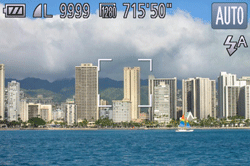
Aim the camera at the subject. The camera will make a slight clicking noise as it determines the scene.
・Icons representing the scene and image stabilization mode are displayed in the upper right of the screen.
・Frames displayed around any detected subjects indicate that they are in focus.
3. Compose the shot.
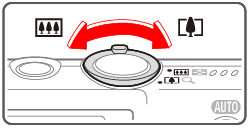
To zoom in and enlarge the subject, move the zoom lever toward ⋖

4. Focus.
Press the shutter button lightly, halfway down. The camera beeps twice after focusing, and AF frames are displayed to indicate image areas in focus.

5. Shoot.
Press the shutter button all the way down.
sound ends.
Caution
 ], the camera automatically records a movie clip of the scene immediately before each shot (Hybrid Auto Mode).
This concludes the guide to getting started with your new camera