

Connecting the Computer and Camera
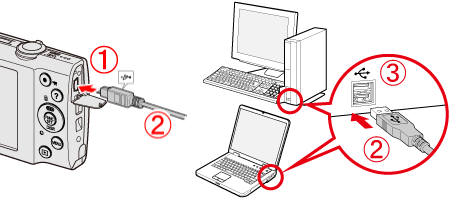
1. Connect the [DIGITAL Terminal] to the computer's USB terminal by using the [Interface Cable] that came with your camera.


Caution
A USB cable (camera end: Mini-B) may not be included with some camera models.
If you have more than one Canon camera, please check the items bundled with the additional camera(s) to see whether an USB cable is included. In some cases, USB cables from other Canon camera models can be used to make connections. If you do not have more than one Canon camera, or if a USB cable is not included with any of the Canon cameras you own, please purchase the Interface Cable IFC-400PCU (sold separately).
Caution
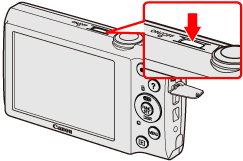
2. Press the ⋖Power⋗ button on the camera.
Caution
When the camera and computer become capable of communicating, CameraWindow will start. Proceed to the "Operate CameraWindow" step below.
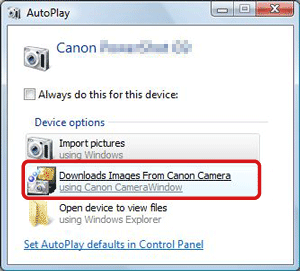
When the [AutoPlay] screen* appears, click [Downloads Images From Canon Camera].
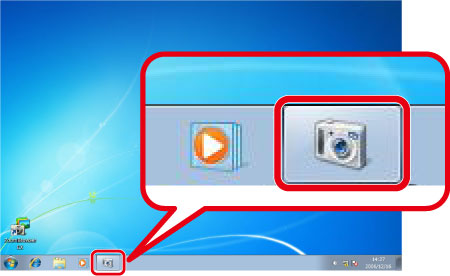
If the screen does not appear, click [Start] (
* Sometimes this appears even if you are using Windows 7.
After that, proceed to the "Operate CameraWindow" step below.
3. Click the (
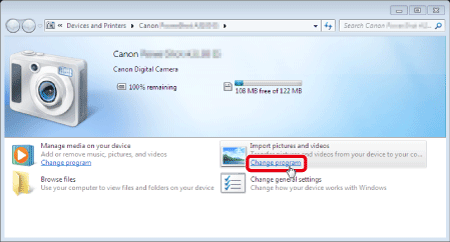
4. The following window appears.
Click [Change Program] under [Import pictures and videos] (
Caution
If [Downloads Images From Canon Camera] (
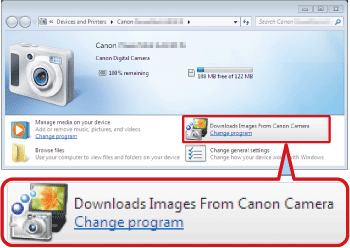
5. The following window appears.

Select
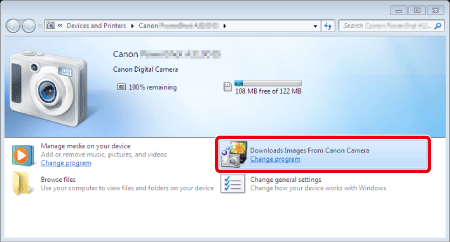
6. Clicking [OK] in the previous step returns you to the screen shown below.
Double-click [Downloads Images From Canon Camera].
Operate CameraWindow
1. The following window appears.
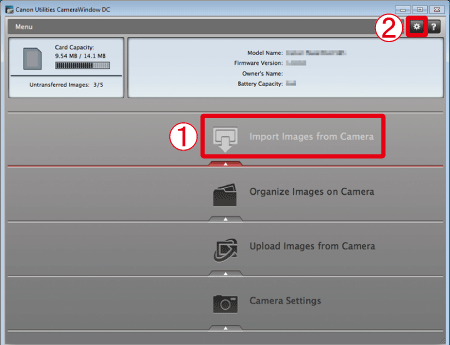
2. The [CameraWindow] menu appears. Click
Caution
By default, the imported images will be saved separated by each shooting date in the picture folder.
To change the destination folder, click 
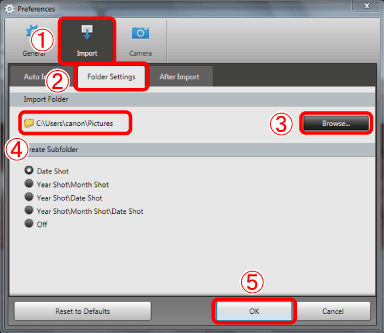
Click
Confirm the destination folder 
Then, click 
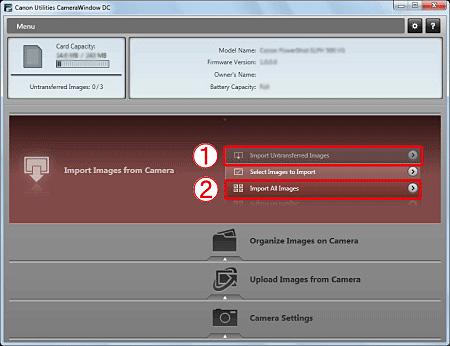
3. A window like the one shown below appears, so click
Caution
3-1. To select and import images, click [Select Images to Import] in Step 3.
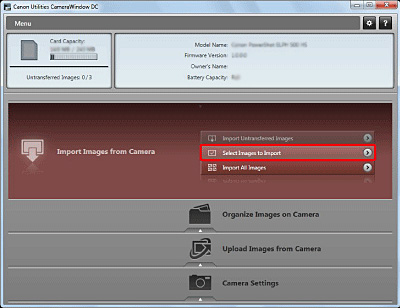
3-2. Select 
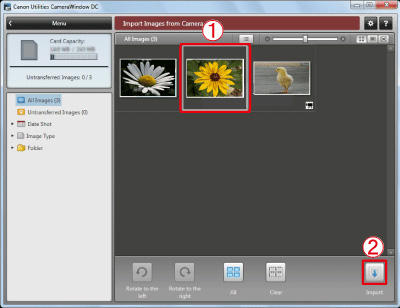
3-3. The software starts importing images. After this step, please follow the subsequent procedures below.
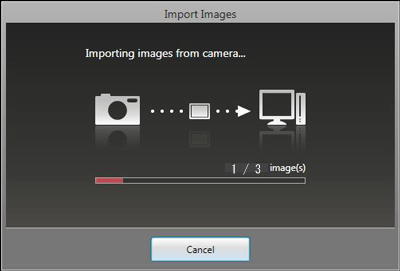
4. The following window appears, and the computer starts to transfer images from the camera.
5. Click [OK].
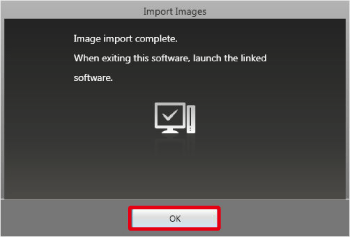
6. The following window appears.
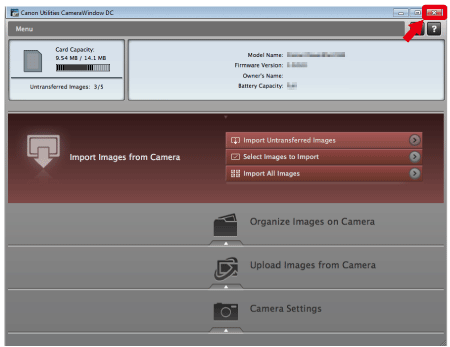
Click the (
Caution
A related application ([ImageBrowser EX] by default) will start automatically and the imported images are displayed.