

Solution
Preparing to ShootSettings Required the First Time You Turn the Camera On (Date/Time/Zone Settings)
Shooting Photographs
Finishing Shooting
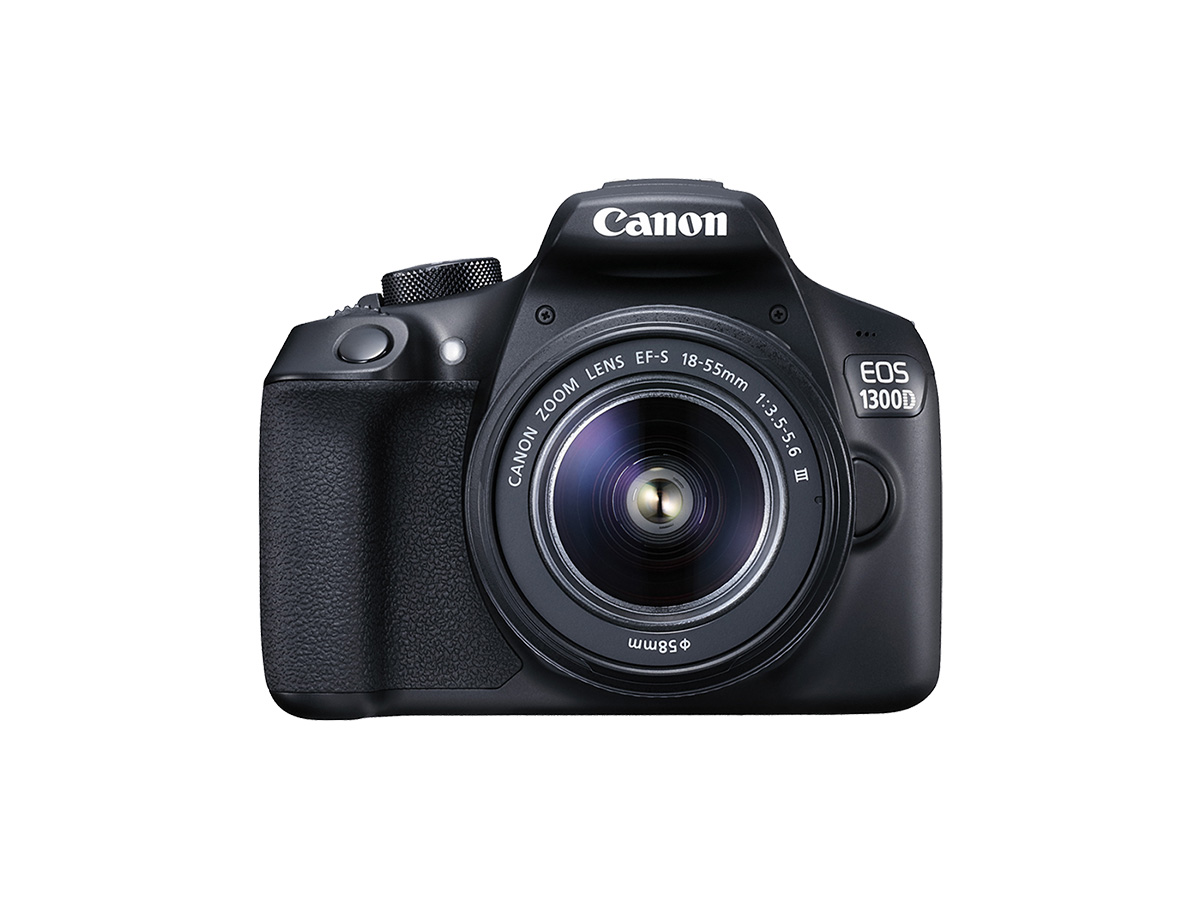
This article describes the setup procedure and basic operations for shooting photos.
Caution
SD Memory Cards
On this page, "card" refers to SD memory cards, SDHC memory cards, and SDXC memory cards.
Preparing to Shoot
Load a fully-charged Battery Pack LP-E10 into the camera. You can use an SD, SDHC, or SDXC memory card (sold separately) with the camera. The captured images are recorded onto the card.
1. Insert the battery and card.
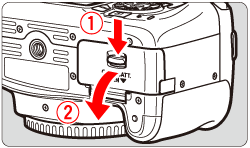
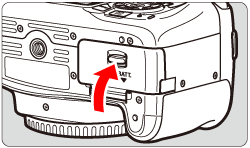
1-1. Slide the lever on the card slot/battery compartment cover as shown by the arrows and open the cover.
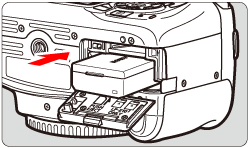
1-2. Insert the end with the electrical contacts. Insert the battery until it locks in place.
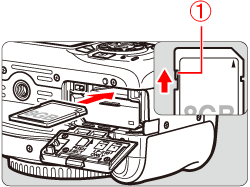
1-3. Insert the card.
As shown by the illustration, face the card's label side toward the back of the camera and insert it until it clicks in place.

Caution
Make sure the card's write-protect switch is set upward to enable writing/erasing.
1-4. Close the card slot/battery compartment cover.
Press the cover until it snaps shut.
Caution
After opening the card slot/battery compartment cover, be careful not to forcefully swing it back further. Otherwise, the hinge may break.
Caution
When purchased, the battery is not fully charged. For information on how to charge the battery, see Battery charging procedure and time required (EOS Kiss X80)
Caution
Caution
The camera does not come with a card. Please purchase it separately.
Caution
-Removing the card.
-Removing the battery.
-Shaking or banging the camera around.
-Unplugging and connecting a power cord (when household power outlet accessories (sold separately) are used).
2. Attach a lens to the camera.
Caution
Do not look at the sun directly through any lens. Doing so may cause loss of vision.
2-1. Remove the rear lens cap and the body cap by turning them as shown by the arrows.
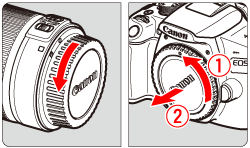
2-2. Align the lens's red or white index with the camera's index matching the same color. Turn the lens as shown by the arrow until it clicks in place.

Caution
Please keep the following cautions regarding dust in mind when using the camera.
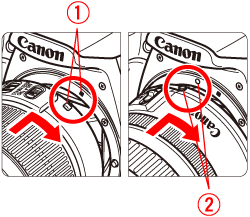
3. Set the lens's focus mode switch to ⋖AF⋗.
Caution

4. Remove the front lens cap.
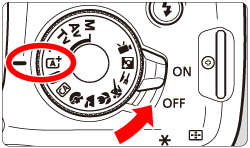
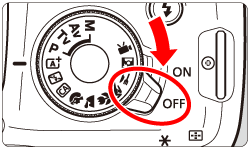
5. Set the power switch to ⋖ON⋗, and select ⋖ 
All the necessary camera settings will be set automatically. The number of possible shots will appear on the LCD monitor.
Settings Required the First Time You Turn the Camera On (Date/Time/Zone Settings)
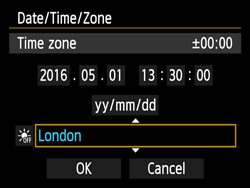
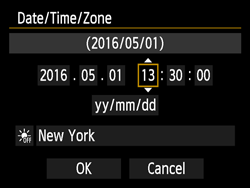
1. When you turn on the power for the first time, the date/time/zone setting screen will appear. Follow the steps below to set the time zone first. Note that the date/time appended to recorded images will be based on this date/time setting. Be sure to set the correct date/time.
Caution
To change the date/time/zone after they have been set, refer to the instruction manual included with the camera.
2. Press the ⋖ 

[London] is set by default.
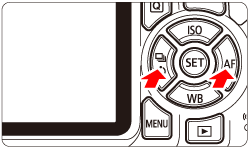

3. Press ⋖ 

4. Press the ⋖ 


Caution
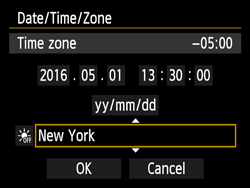
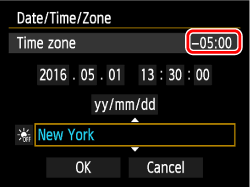
The time displayed on the upper right of the screen is the time difference compared with Coordinated Universal Time (UTC). If you do not see your time zone, set the time zone while referring to the difference with UTC.
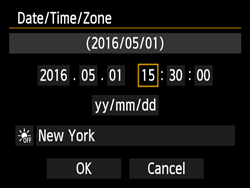
5. Set the date and time.
Press ⋖
6. Press ⋖
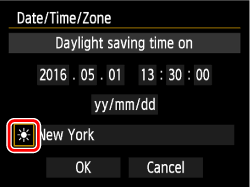
7. Set the daylight saving time if necessary.
Press ⋖ 
Press the ⋖ 
Caution
When the daylight saving time is set to [
If [
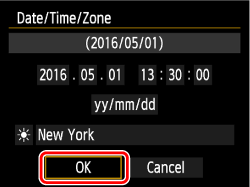
8. Press the ⋖
The date/time/area and daylight saving time settings are now complete and shooting can be performed.
Caution
The date/time/zone settings may be reset in the following cases. If this happens, set the date/time/zone again.
-When the camera is stored without the battery.
-When the camera's battery becomes exhausted.
-When the camera is exposed to below freezing temperatures for a prolonged period.
Caution
⋗ in step 8.Shooting Photographs
1. Look through the viewfinder and aim the viewfinder center over the subject.
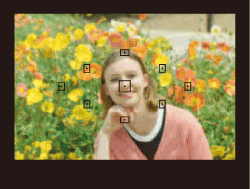
2. Press the shutter button halfway, and the camera will focus on the subject.
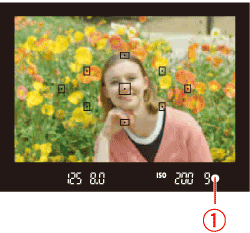
When focus is achieved, the dot inside the AF point that achieved flashes briefly in red. At the same time, the beeper will sound and the focus indicator [ 
If necessary, the built-in flash will be raised automatically.
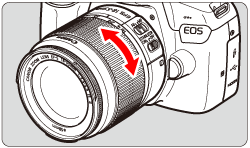
3. Zoom as necessary. To zoom, turn the zoom ring on the lens with your fingers.
Caution
4. Press the shutter button completely to take the picture.
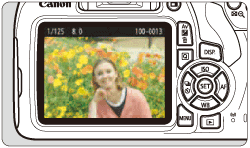
5. The captured image will be displayed for approx. 2 sec. on the LCD monitor.
Caution

Finishing Shooting
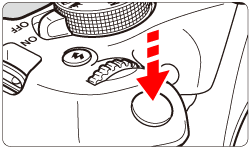
1. After you finish shooting, push down the built-in flash with your fingers.
2. Set the power switch to ⋖OFF⋗ to turn off the camera.
3. Attach the lens cap to the lens.
Caution
Caution
Camera Care
LCD Monitor
Cards
To protect the card and its recorded data, note the following:
Lens
Smudges Adhering to the Front of the Sensor