

How to Add the Date to Images
This camera cannot record the shooting date directly on the images it takes.
When printing images, you can add the date to the images.
To add the date to the images, use the DPOF (Digital Print Order Format) settings by referring to the following note or the supplied ZoomBrowser EX application.
Caution
The DPOF format is a digital camera recording format for saving information about image sizes, trimming settings, the camera used, and date/time settings to the image data.
With a camera that supports DPOF, you can select the images to be printed, set the number of copies and information to be printed in advance, and save these settings to a memory card.
If this memory card is installed into a printer that supports the DPOF format, you can print out the images with the date without making any additional settings. In addition, if you order prints from a digital photo finishing lab that accepts the DPOF format, the date can be printed with the images based on the information saved on the memory card.
For details about the DPOF settings, please refer to the instruction manual that is bundled with your camera.
Using ZoomBrowser EX or ImageBrowser for printing
You can insert those dates when printing images in ZoomBrowser EX. When doing so, you can also choose whether to insert the date or time and select the character style (font) for both.
Caution
If you are using a Macintosh computer, please use ImageBrowser for printing. The printing procedures for ImageBrowser and ZoomBrowser EX are very similar. The following section provides explanations for printing with ZoomBrowser EX.
1. Start ZoomBrowser EX or ImageBrowser.
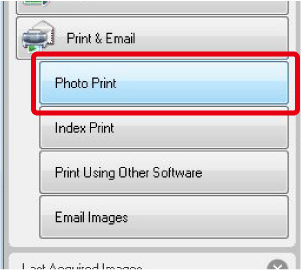
2. Select the image to be printed, and then click [Print & Email].
 ⋗ key) on the keyboard while clicking the images.
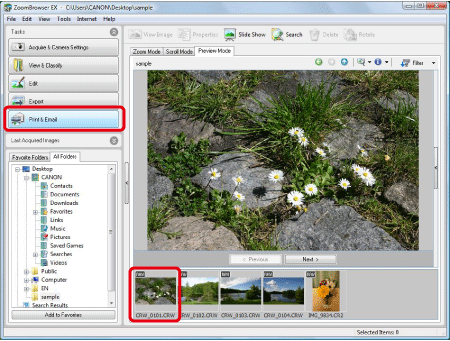
Caution
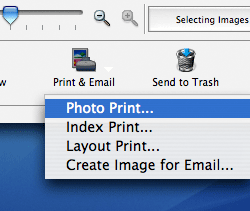
In case of ImageBrowser, select the images to be printed, and then click [Print & Email] in the lower part of the browser window to select [Photo Print] from the menu that appears.
After the above operation, carry out procedures from step 4 to step 6.
3. From the items shown, click [Photo Print].
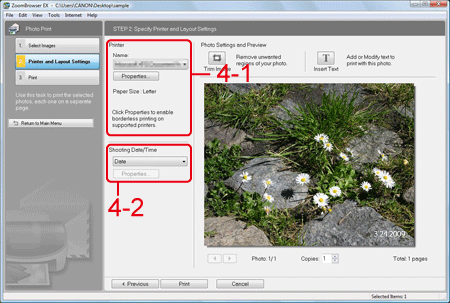
4. When the [Photo Print] screen appears, make the following settings.
4-1. Make printer settings.
-Zoombrowser EX
Select the printer to use in [Printer Name], and then set the [Media Type] and [Paper Size] for the paper to be used.
Also, if making settings for borderless prints, check the [Borderless] box ( 
-ImageBrowser
Select the printer to use in [Printer Name].
If making settings for borderless prints, check the [Borderless] option, and then click [Page set up] to make settings as needed.
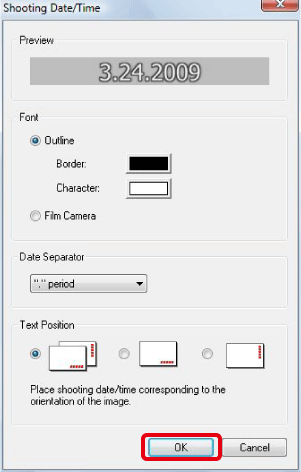
4-2. Set the shooting date/time and style
Click the down arrow ( 
5. When the [Shooting Date/Time] dialog box appears, set the styles for the dates to be entered.
When the settings are finished, click [OK] to close the dialog box.
Caution
If you select [Film Camera] in [Font], the character style will be set as shown below.
6. Make other settings as necessary, and then click [Print].
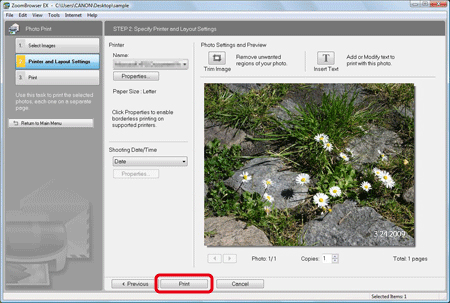
This completes the process of printing images with dates.