Solution
Select a Transmission ChannelPosition The Slave Unit(s) within Range of the Master Unit.
Aim the Slave Unit’s Receiver at the Master Unit.
Wireless Flash Shooting
Failure of slave flash units to fire when using wireless flash for shooting may be caused by the following problems.
In these cases, refer to the following information to check flash unit settings and placement.
Caution
Caution
Icons used on this page:
・Flash
⋖ZOOM/


・Camera
⋖


Select a Transmission Channel
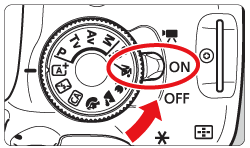
1. Camera (Master) unit set-up.
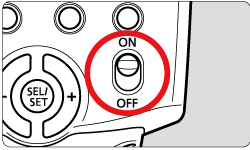
Set the camera's power switch to ⋖ON⋗.
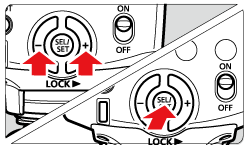
2. Press the ⋖
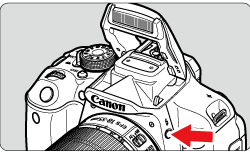
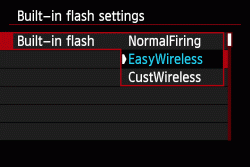
For wireless flash shooting, be sure to raise the built-in flash.
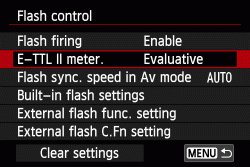
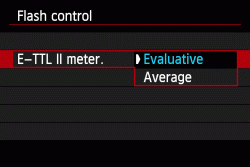
3. Press the ⋖MENU⋗ button and then use the ⋖
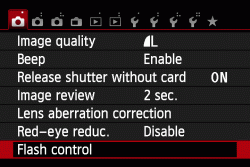
4. Press the ⋖
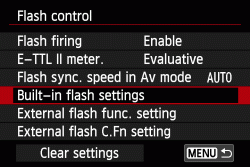
5. Press the ⋖

6. Press the ⋖

7. Press the ⋖
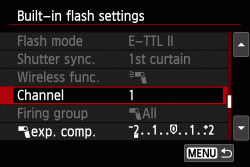
8. Select the transmission channel (1-4), then press ⋖

9. External flash (Slave) unit set-up.
Set the External flash unit’s power switch to ⋖ON⋗.
10. Press the ⋖ZOOM /
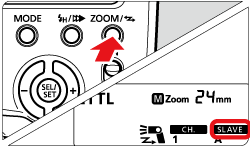
11. Press the ⋖ZOOM /

12. Press the ⋖

This concludes the channel settings.
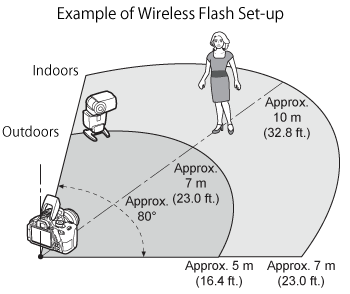
Position The Slave Unit(s) within Range of the Master Unit.
Position the camera and slave unit(s) within the range shown below.
Caution
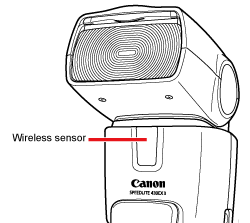
Aim the Slave Unit’s Receiver at the Master Unit.
Use the bounce feature to swing the slave unit’s flash body so that the wireless sensor faces the master unit.
Caution
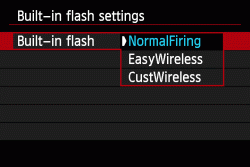
Wireless Flash Shooting
The following section provides an overview of the basic and easy full-automatic wireless flash shooting mode.
Caution
1. Set the powers switches of the flash and camera to ⋖ON⋗.
2. Press the ⋖MENU⋗ button and then use the ⋖
3. Press the ⋖
4. Press the ⋖
5. Press the ⋖

6. Press the ⋖

7. Press the ⋖
Caution
8. Set [Channel] for the master and slave units.
For more information, refer to step 6 of Select a Transmission Channel.
9. Position the slave unit(s) within the master unit’s wireless transmission range.
For more information, refer to Position the Slave Unit(s) within Range of the Master Unit.
Aim the Slave Unit’s Receiver at the Master Unit.
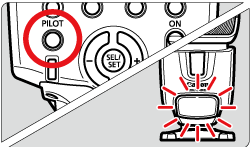
10. Check that the flash is ready.
When the slave unit(s) is ready to fire (fully charged), the AF-assist beam will blink at 1-sec. intervals.
11. Set the camera in the same way as with normal flash shooting.
12. To exit wireless flash shooting, select [NormalFiring] for [Built-in flash].