Solution
1-1. Preparations on the camcorder to save in high-definition1-2. Preparations on the camcorder to save in standard-definition
2.Connecting to the DW-100 DVD Burner and Creating a Disc
Using the optional DW-100 DVD burner, you can save your precious movies in high-definition to AVCHD discs (high-definition).
Also, if you down-convert the movie to standard-definition with the camcorder, you can create DVDs in standard-definition (DVD-Video standard).
Caution
Be sure to operate the camcorder and the DVD burner using the supplied compact power adapter and AC adapter.
1-1. Preparations on the camcorder to save in high-definition
1. Press the ⋖ 
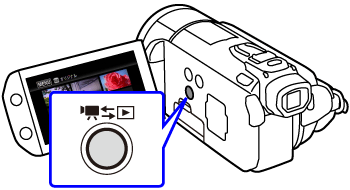
2. Open the index screen that contains the recordings you want to add to the disc.
 ], select the built-in memory (
  /
/  ), Card A, or Card B, and then select Original or Playlist to display the index screen.
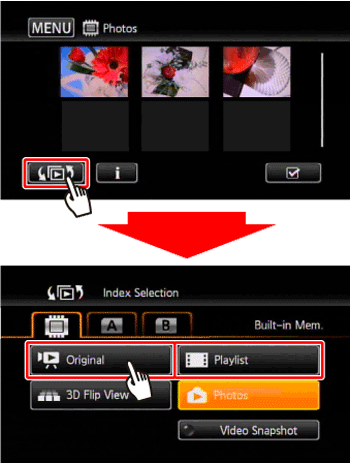
3. For original recordings only: Choose whether to add to the disc all the scenes or only scenes that have not been previously added to a disc.
When you create the disc from the [Playlist] index screen (including the playlist of video snapshot scenes), the disc will contain the entire playlist.
3-1. Touch [ 
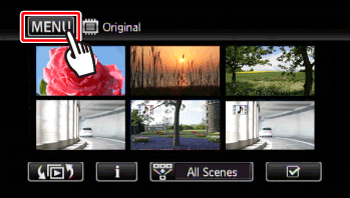
3-2. Touch [ 
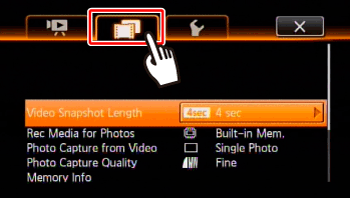
3-3. 

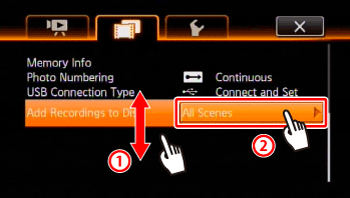
3-4. Touch [All Scenes] or [Remaining Scenes].
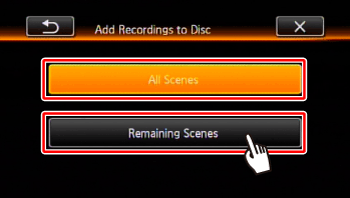
Caution
Scenes that are currently displayed (original or playlist) will be selected.
3-5. Touch [ 
1-2. Preparations on the camcorder to save in standard-definition
Convert high-definition scenes in the built-in memory ( 

1.Make sure there is a memory card in slot 
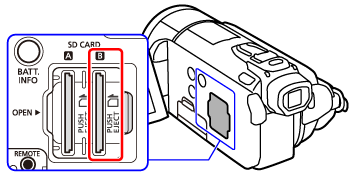
Caution
You cannot down-convert movies to standard definition to a memory card in slot 
2. Press the ⋖ 
3. Touch [ 


Open the [Original], [Playlist] or [Video Snapshot] index screen.
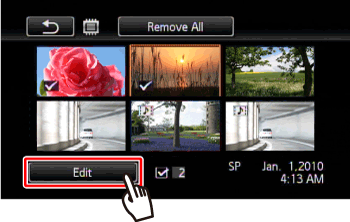
4. Select the scene you want to convert.
4-1. Touch [ 

To select all the scenes at once: Touch [Select All] instead of touching individual scenes. (Remove in advance any checkmarks from scenes you may have selected individually.)
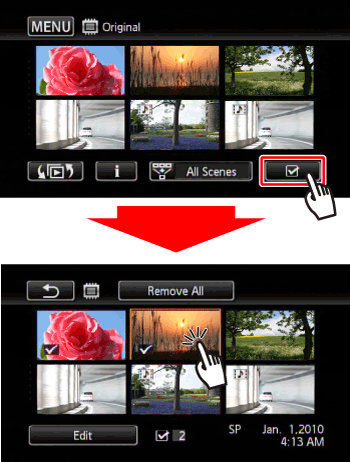
4-2. Touch [ Edit ].
4-3. Touch [ Convert HD

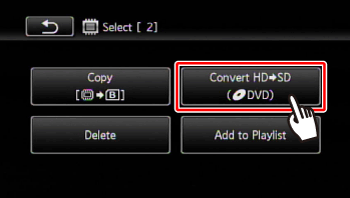
If a copyright notice appears, read it carefully and touch [OK] if you agree.
4-4. Information necessary for conversion will appear on the display, touch [ Yes ].
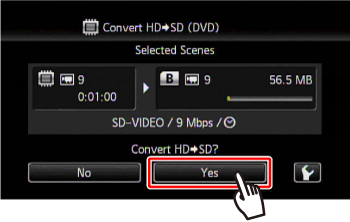
If the following settings are required, touch [ 
・Embed Date/Time: The recording date and time will always be displayed on the converted scene.
・Bit Rate (Quality): Using a higher bit rate will result in better video quality for the converted scenes.
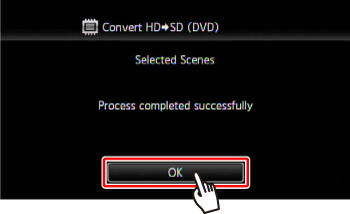
4-5. When the conversion is completed, a confirmation screen will appear. Touch [ OK ].
5. Touch [ 

The scene after the conversion to standard definition is shown.
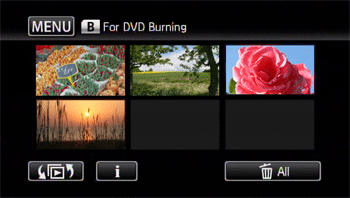
Caution
In [ 
Caution
The time required to convert scenes is approximately equal to the total playback time of the converted scenes. In most cases this is still faster than converting the scenes in the computer so we recommend you convert scenes in the camcorder.
Caution
When converting scenes in the playlist or video snapshot index screen:
- The scenes are converted with the selected background music instead of the original sound.
When converting scenes in the playlist index screen:
- All the scenes are merged into one converted scene.
- If the converted scene is too large, it will be split into 2 GB-sized scenes.
- The playlist cannot be converted when its total playback time exceeds 2 hours and 30 minutes.
2.Connecting to the DW-100 DVD Burner and Creating a Disc
Caution
Please perform these operations while watching the camcorder's LCD monitor.
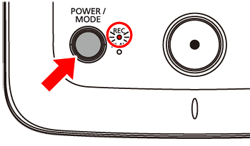
1. Press the ⋖ POWER/MODE ⋗ button on the DVD burner to turn it on.
Each time the ⋖ POWER/MODE ⋗ button is pressed, the mode changes, so be sure the REC lamp (red) is on.
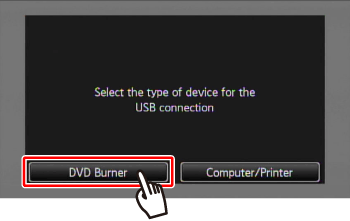
2. Connect the camcorder to the DVD burner using the supplied USB cable.
If the device type selection screen appears, touch [ DVD Burner ].
Caution
If the [USB Connection Type] in the menu is set to [ Computer / Printer ], the [ 
3. When the connection is completed, [ No disc ] will be displayed.
3-1. Use the ⋖ OPEN/CLOSE ⋗ button on the DVD Burner to open and close the disc tray.
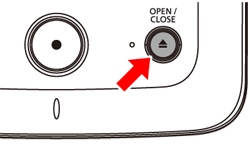
3-2. Insert a brand new disc into the DVD Burner.
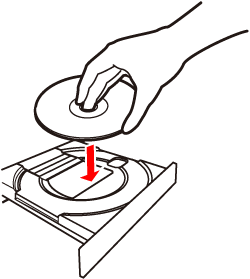
If you inserted a DVD-RW disc that already contains data, [The disc already contains data.] will be displayed. To overwrite the data (erasing the previous content of the disc), touch [OK] and select [Yes] .
Caution
If data is overwritten, it is deleted completely.
Before overwriting data, please check the contents recorded on a disc carefully, and then save them to your computer.
After the disc is recognized, an information screen will display the type of DVD you are creating and the estimated time and number of discs it will require (based on the disc you inserted).
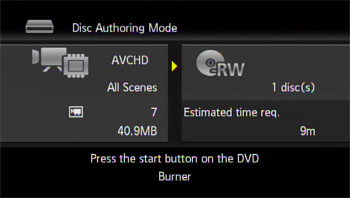
4. Press the start button on the DVD burner.
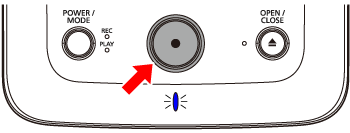
A progress bar will be displayed on the screen.
After pressing the start button (while the disc is being written) the operation cannot be canceled.
After a disc is finalized, it will be ejected automatically and a message will appear. Insert the next disc and close the disc tray.
After the operation is finished, insert a brand new disc, close the disc
tray and repeat the operation.
Caution
- Do not open the memory card slot cover.
- Do not disconnect the USB cable.
- Do not disconnect the power source or turn off the camcorder or the DVD burner.
Caution


