

Digital Lens Optimizer
The Digital Lens Optimizer function enables the resolution of images to be increased by removing any remaining aberration related to image-forming capability or any deterioration of resolution resulting from diffraction phenomena. These optical phenomena cannot be corrected under Lens aberration correction. Correction is achieved using the designed value of each lens. The images that can be corrected are RAW images shot using any of the compatible lenses and cameras.
JPEG, TIFF, S-RAW, and M-RAW images cannot be corrected. To use this function, [Lens data] for the lens used to shoot images first needs to be downloaded to your computer. Before using the Digital Lens Optimizer, it is recommended that you set [Sharpness] or [Strength] for [Unsharp mask] for images to 0.
Caution
Using the Digital Lens Optimizer
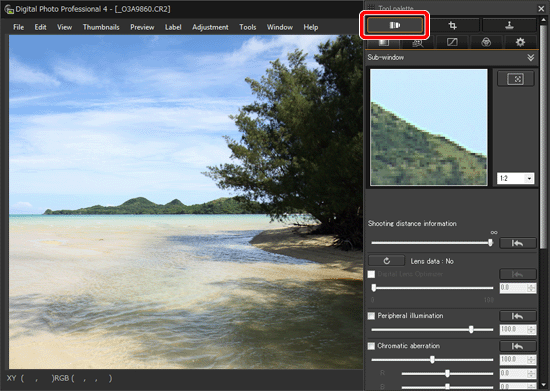
1. Start Digital Photo Professional Ver.4.x, then display the RAW image you would like to edit.
2. Display the tool palette, and then switch to the [ 
Caution
If the tool palette cannot be displayed, select [Tool palette] from the [View] menu on the tool bar.
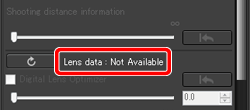
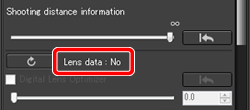
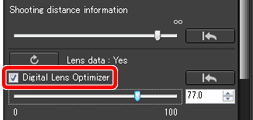
3. Check the status of [Lens data] for [Digital Lens Optimizer].
・[Not Available]
[Not Available] is displayed for an image shot with a non-compatible camera or lens, or for a non-compatible image such as a JPEG, TIFF, S-RAW, or M-RAW image. The function cannot be used for these images.
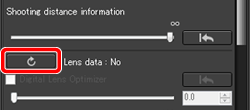
・[No]
To use the function, you need to download the lens data for the lens used when shooting the image. It is recommended that you check the lens used when shooting the image beforehand. The lens used can be checked using the image information and shooting information displays. You can also check it with the menu that appears when you right-click with the mouse on an image.
Proceed to step 4.
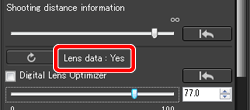
・[Yes]
Proceed to step 7.
4. Download the lens data.
Click [ 
Caution
Before you click the [
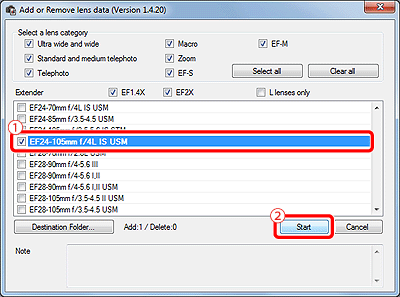
5. The [Add or Remove lens data] window appears.
Checkmark the checkbox ( 

Caution
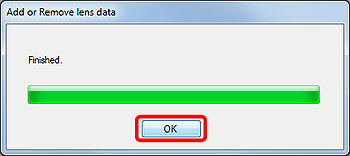
6. Click [OK] after download of the lens data has finished.
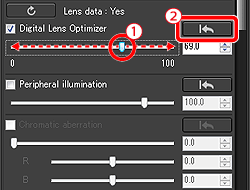
7. Checkmark the [Digital Lens Optimizer] checkbox on the tool palette and adjust the image.
Caution
When applying the Digital Lens Optimizer, the effect of [Sharpness] or [Unsharp mask] may become excessive. It is recommended that you set [Sharpness] or [Strength] for [Unsharp mask] for images to 0 before using the Digital Lens Optimizer. Adjust [Sharpness] or [Unsharp mask] again after applying the Digital Lens Optimizer to images.
8. Perform adjustments to the items on the tool palette.

Caution
Images cannot be corrected for [Chromatic aberration] in the lens aberration correction tool palette if the Digital Lens Optimizer has been applied.
9. In the main window, the [ 
Caution
If you display the [ 
This concludes the procedure for using the Digital Lens Optimizer in Digital Photo Professional Ver.4.x.