Solution
Shooting Time-lapse MoviesTotal Possible Time for Time-lapse Movie Shooting
Using a Remote Controller
Still photos shot at a set interval can be stitched together automatically to create a 4K or Full HD time-lapse movie. A time-lapse movie shows how a subject changes in a much shorter period of time than the actual time it took. It is effective for a fixed-point observation of changing scenery, growing plants, celestial motion, etc.
Time-lapse movies will be recorded in the MOV format at the following quality: 


Note that the frame rate will be switched automatically according to the [ 
Shooting Time-lapse Movies
1. Set the camera's power switch to ⋖ON⋗.
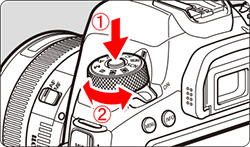
2. Turn the Mode Dial to select the shooting mode.
 ⋗, ⋖
⋗, ⋖  ⋗, ⋖
⋗, ⋖  ⋗, ⋖
⋗, ⋖  ⋗, ⋖
⋗, ⋖  ⋗ and ⋖
  ⋗ modes, autoexposure shooting takes effect. In the ⋖
  ⋗ mode, manual exposure shooting takes effect.

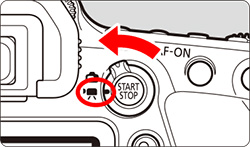
3. Set the Live View shooting/Movie shooting switch to ⋖ 
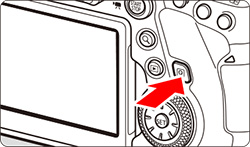
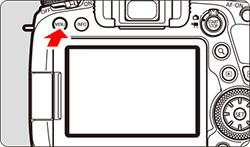
4. Press the ⋖MENU⋗ button to display the menu screen.
5. Press the ⋖ 

6. Under the [ 


 ⋗, ⋖
⋗, ⋖  ⋗
⋗
 ⋗, ⋖
⋗, ⋖  ⋗ modes
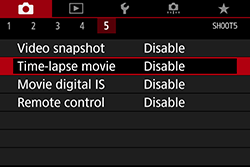
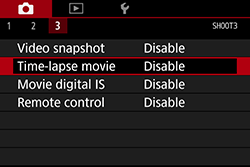
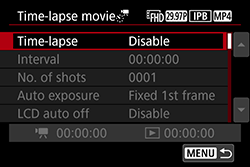
7. Select [Time-lapse].
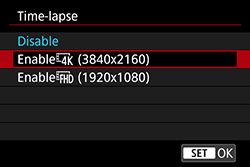
8. Select [Enable 

 (3840×2160)
The movie is recorded in 4K quality. The aspect ratio is 16:9. The frame rate of the recorded movie is 29.97fps (


 (1920×1080)
The movie is recorded in Full High-Definition (Full HD) quality. The aspect ratio is 16:9. The frame rate of the recorded movie is 29.97fps (


9. Select [Interval].
10. Select the hour, minute, or second, then press ⋖ 

11. Set the desired number, then press ⋖ 

 : Time required] (
  ) and [
  : Playback time] (
  ) displayed at the bottom of the screen to set the number.
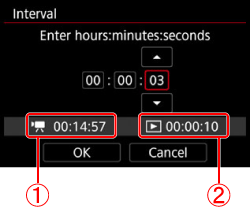
12. Select [OK] to set the shooting interval.
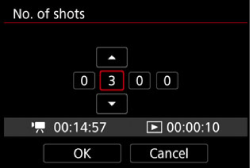
13. Select [No. of shots].
14. Select the digit, press ⋖ 

15. Set the desired number, then press ⋖ 

 : Time required] and [
  : Playback time] displayed at the bottom of the screen to set the number.
16. Check that [ 
Caution
Interval
Settable in the range from [00:00:01] to [99:59:59].
Number of shots
Settable in the range from [0002] to [3600]. Set one digit at a time. If the number of shots is set to 3600, the time-lapse movie will be approx. 2 min. in NTSC and approx. 2 min. 24 sec. in PAL.
17. Select [Auto exposure].
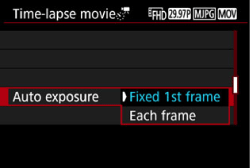
18. When you select the exposure’s setting method, press ⋖ 
| Item | Details |
| Fixed 1st frame | When taking the first shot, metering is performed to set the exposure automatically to match the brightness. The exposure setting for the first shot will be applied to subsequent shots. Other shooting-related settings for the first shot will also be applied for subsequent shots. |
| Each frame | Metering is also performed for each subsequent shot to set the exposure automatically to match the brightness. Note that if functions such as Picture Style and white balance are set to [Auto], they will be set automatically for each subsequent shot. |
19. Select [LCD auto off].
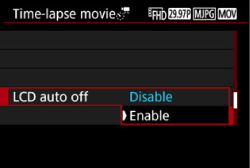
20. Set whether the image is to be displayed, then press ⋖ 
| Item | Details |
| Disable | Even during time-lapse movie shooting, the image will be displayed. (The LCD monitor turns off only at the time of shooting.) Note that the LCD monitor will turn off when approx. 30 min. elapse after the shooting started. |
| Enable | The LCD monitor will turn off when approx. 10 sec. elapse after the shooting started. |
Caution
During time-lapse movie shooting, you can press the ⋖INFO⋗ button to turn on/off the LCD monitor.
21. Select [Beep as img taken].
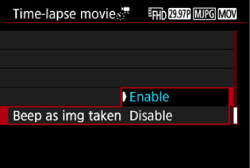
22. Set the beeper.
Caution
If [ 
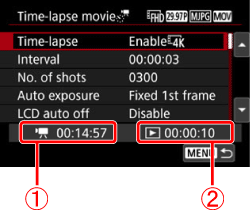
23. Check the settings.

Indicates the time required to shoot the set number of shots with the set interval. If it exceeds 24 hours, "*** days" will be displayed.

Indicates the movie recording time (time required to play back the movie) when creating the time-lapse movie in 4K movie or Full HD movie from the still photos taken with the set intervals.
24. Press the ⋖MENU⋗ button to turn off the menu screen.
25. Read the message and select [OK].
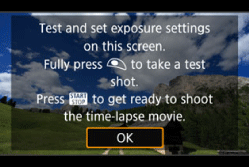
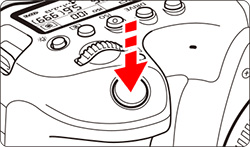
26. As with Live View shooting, set the exposure and shooting functions, then press the shutter button halfway to focus.
27. Press the shutter button completely to take test shots. The still photos will be recorded to the card.
28. Press the ⋖ 
To return to step 25, press the ⋖ 

29. Press the ⋖INFO⋗ button and check again the "Time required" and "Interval" displayed on the screen.


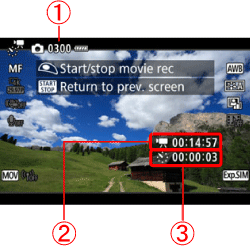
30. Press the shutter button halfway to check the focus and exposure.
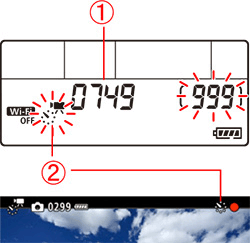
31. Press the shutter button completely to start shooting the time-lapse movie.
 ⋗ will blink on the LCD panel. Also, ⋖
  ⋗ will appear on the left of "
 ".
".

Caution
 ⋗, ⋖
⋗, ⋖  ⋗, ⋖
⋗, ⋖  ⋗, and ⋖
  ⋗ modes or with the ⋖
  ⋗ mode + ISO Auto setting, you can set the maximum limit for the ISO speed to be set automatically for time-lapse movie shooting. The default setting is [Max.:12800]. You can set the maximum limit within [Max.:400] to [Max.:25600].
 ⋗ icon will blink.
 : Time-lapse movie] to [Disable]. If it is set to [Enable], the camera cannot communicate with the computer.
 - Selecting either [Clean manually] or [Clean now] under [ 

- Selecting the ⋖ 


 ⋗ temperature warning is displayed, the image quality of the time-lapse movie may deteriorate. It is recommended that you start time-lapse movie shooting after the white ⋖
  ⋗ disappears (camera’s internal temperature decreases).
 ⋗ all the way to the right), every other frame will be skipped for playback.
- Autoexposure shooting: Shutter speed, Aperture
Caution
 : Movie rec. size] setting, 4K time-lapse movies are recorded in

 (NTSC)/

 (PAL), while Full HD time-lapse movies are recorded in

 (NTSC)/

 (PAL).
 ⋗ button ([Disable] will be set). The time-lapse movie shot so far will be recorded on the card.
 ⋗ and ⋖
  ⋗ modes, the scene icon for the scene detected by the camera is displayed on the upper left of the screen.
Total Possible Time for Time-lapse Movie Shooting
You can shoot time-lapse movies with a fully-charged Battery Pack LP-E6N for roughly as long as shown in the table below (approx. time from start of shooting until the battery becomes exhausted). The possible movie shooting time varies depending on the shooting conditions.
| Time-lapse Movie Shooting | Room Temperature (23°C / 73°F) | Low Temperatures (0°C / 32°F) | |
| Interval | LCD monitor | ||
| 1 sec. | Turned on | 5 hr. 10 min. | 4 hr. 30 min. |
| Turned off | |||
| 10 sec. | Turned on | 3 hr. 10 min. | 2 hr. 50 min. |
| Turned off | 7 hr. 00 min. | 6 hr. 20 min. | |
Using a Remote Controller
You can use Remote Controller RC-6 (sold separately) or Wireless Remote Control BR-E1 (sold separately) to start and stop the timelapse movie shooting. Set [ 
● With Remote Controller RC-6
| Camera Status/Remote Control Setting | < 2 > (2-sec. delay) | <  >(Immediate release) >(Immediate release) |
Test-shooting screen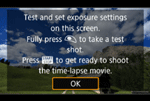 | To shooting-ready | Shoots still photo |
Shooting-ready | To test-shooting screen | Starts shooting |
During time-lapse movie shooting | Ends shooting | Ends shooting |
● With Wireless Remote Control BR-E1
 ⋗ (immediate release) or ⋖2⋗ (release after 2-sec. delay).
 ⋗, the time-lapse movie shooting cannot start.
| Camera Status/ Remote Control Setting | <2> (2-sec. delay) <  > (Immediate release) > (Immediate release) | <  > (Movie shooting) > (Movie shooting) |
Test-shooting screen | Shoots still photo | To shooting-ready |
Shooting-ready | Starts shooting | To test-shooting screen |
During time-lapse movie shooting | Ends shooting | Ends shooting |


