Solution
This section describes how to install the printer driver on your Macintosh.
(The printer driver is software that is required to connect the printer to the Macintosh.)
Caution
1. Quit all running applications.
2. Load the [COMPACT PHOTO PRINTER Solution Disk] CD-ROM that came with your printer into the computer's CD-ROM drive.
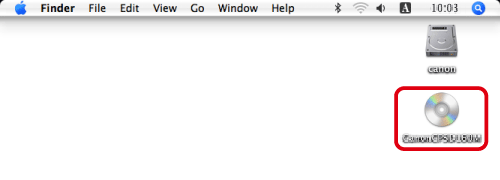
3. Double-click the CD-ROM icon that appears on the desktop.
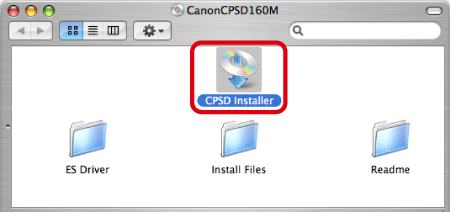
4. The following window will appear, so double-click on [CPSD Installer] to start it.
5. The following screen appears.
6. When the following screen appears, click on the area in which you live.
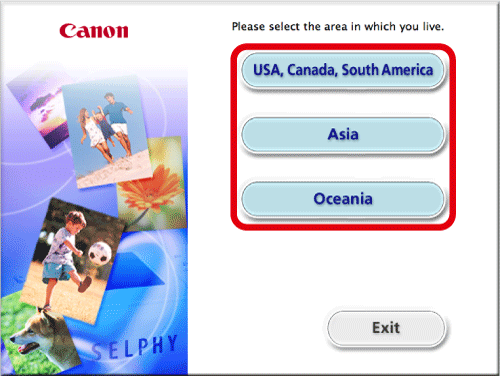
If [Asia] or [Oceania] is chosen, this setup procedure will proceed to Step 8.
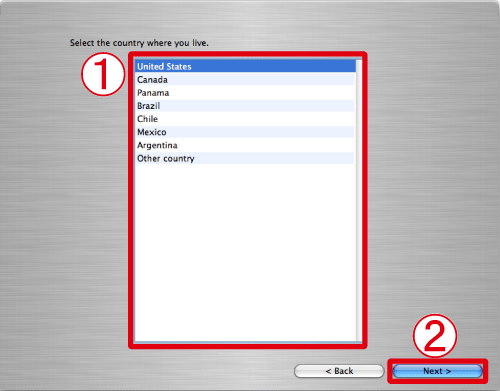
7. The following screen will appear.


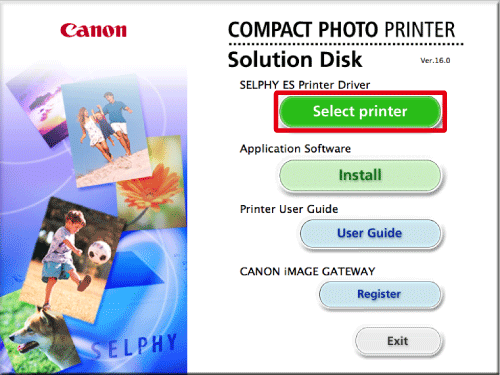
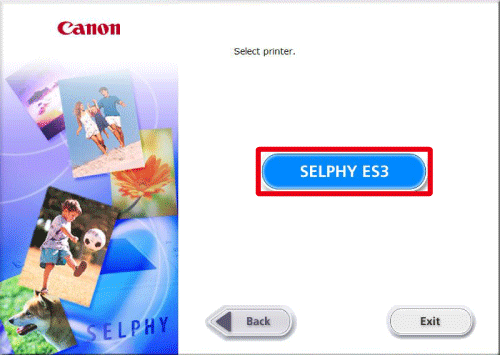
8. The following screen will appear. Click [Select printer].
9. The following screen will appear. Click [SELPHY ES3] or [SELPHY ES30].
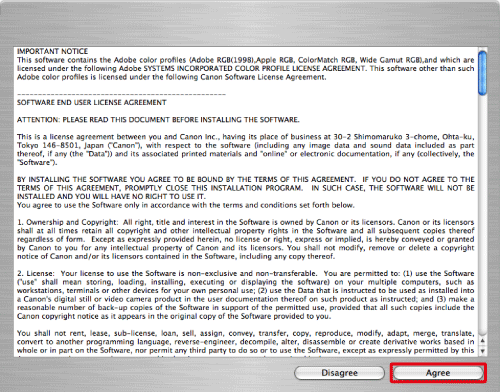
10. The following screen will appear. Read the content carefully, and then click [Agree].
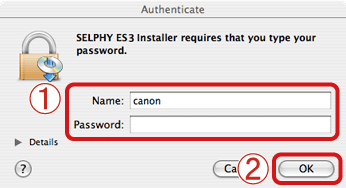
11. If the following screen appears, enter the name and password set for your Macintosh.
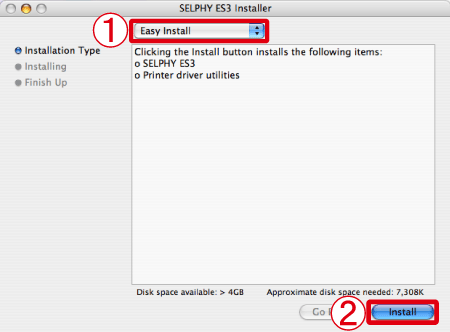
12. The following screen appears.
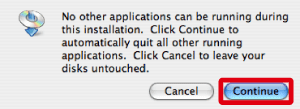
13. If the following screen appears, click [Continue].
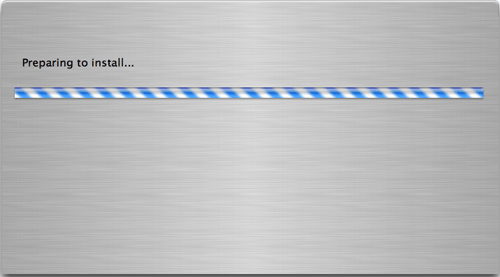
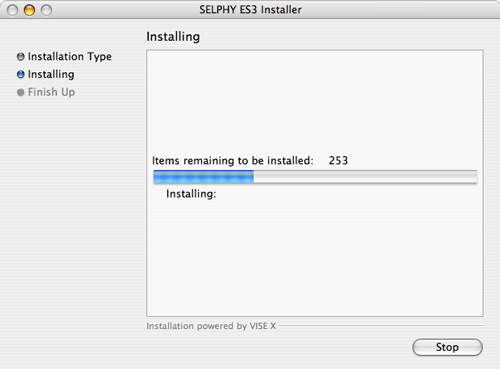
14. The following screen appears, and installation starts.
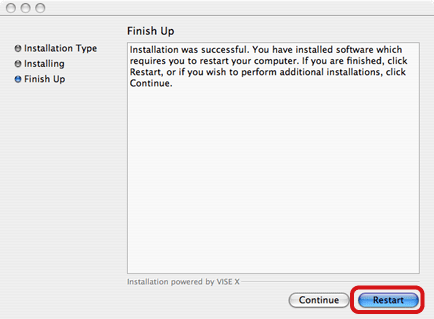
15. The following screen appears. Click [Restart] to restart the Macintosh.
16. When the Macintosh restarts, connect the printer to the Macintosh with a commercially available USB cable (A-B type), and then turn the printer on.
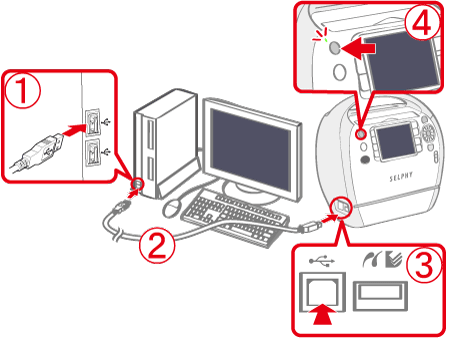


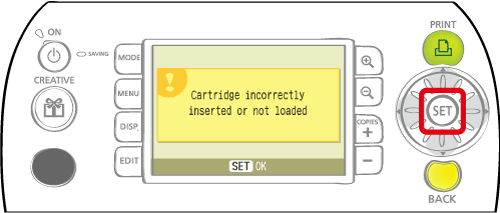
17. If the following screen appears on the printer's LCD monitor when you connect the printer to the Macintosh, press the ⋖SET⋗ (
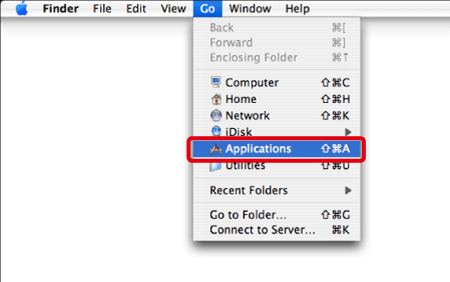
18. From the [Go] menu, select [Applications].
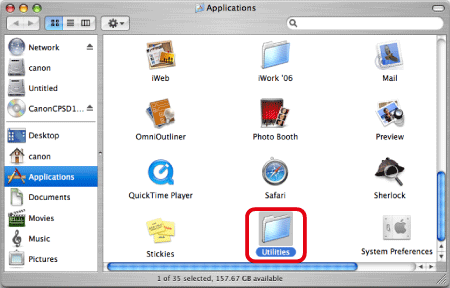
19. The screen below will appear, so double-click [Utilities].
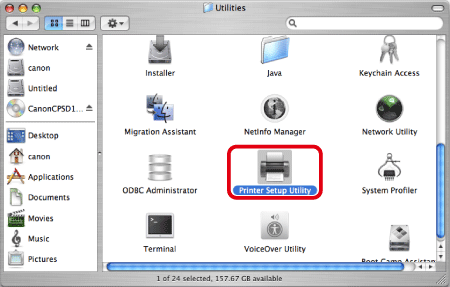
20. The screen below will appear, so double-click [Printer Setup Utility].
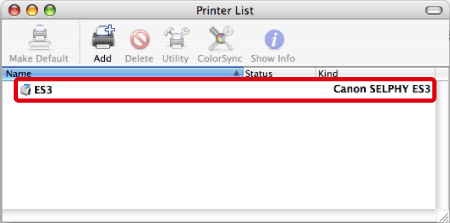
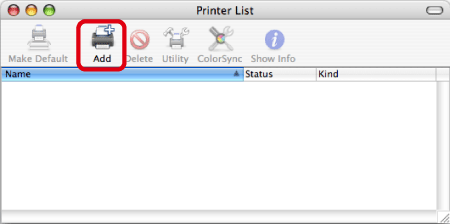
21. The screen below will appear, so click [Add].
22. The following screen appears.
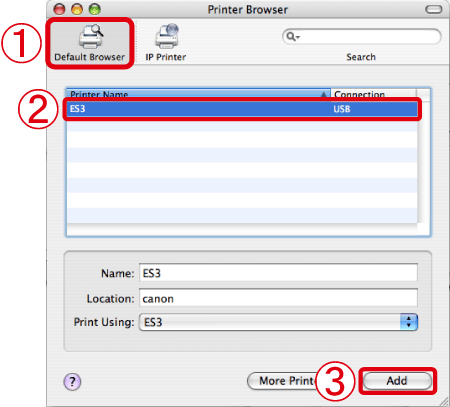
If your printer does not appear here, restart the Macintosh with the printer connected.
23. Confirm that the printer you added in Step 21 appears. Close this window after you have confirmed that it does.