Introduction
Send images to a smartphone as follows.
Connecting to a Bluetooth-compatible Smartphone via Wi-Fi
By connecting to a Bluetooth-compatible smartphone via Bluetooth in advance, you can connect via Wi-Fi simply by performing an operation on the camera or smartphone.
Wi-Fi Connection Without Using Bluetooth
You can use Wi-Fi to connect to a smartphone that is not compatible with Bluetooth or a smartphone that cannot use its Bluetooth function.
Caution
To connect the camera to a smartphone, a smartphone on which Android or iOS is installed is necessary. In addition, the dedicated app Camera. Connect (free of charge) must be installed on the smartphone.
Interface or functions of the camera and Camera Connect are subject to change for firmware update of the camera or application update of Camera Connect, Android, iOS, etc. In such a case, features of the camera or Camera Connect may differ from sample screens or operation instructions in this manual.
Wireless communication is not available while the camera is connected via an interface cable to a computer or other device.
The camera cannot be connected via Wi-Fi if there is no card in the camera.
Caution
In the following explanation, smartphone setting procedures are indicated by the

, and camera setting procedures are indicated by the

icon.
For convenience, smartphones, tablets, and other compatible devices are collectively referred to as "smartphones".
The setting procedures and items may differ depending on the smartphone model you use and its OS. For more information, refer to your smartphone's instruction manual.
On the screen, wireless signal strength is indicated by the following icons:
- [  ] high, [
  ] medium, [
  ] low, [
  ] weak.
Preparing the Camera
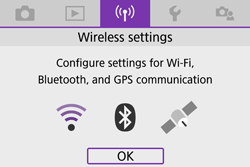
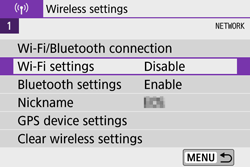
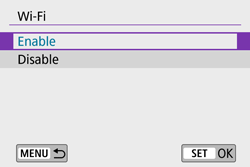
Configure necessary settings before using the wireless LAN functions of the camera.
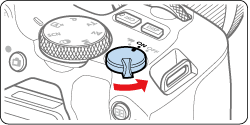
1. Set the camera's power switch to ⋖ON⋗.
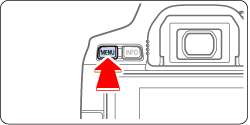
2. Press the ⋖  ⋗ button.
7. Press the ⋖  ⋗ button.
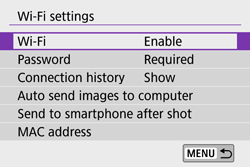
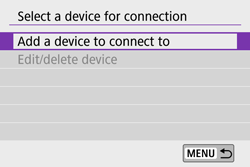
9. Press the ⋖  ⋗ ⋖
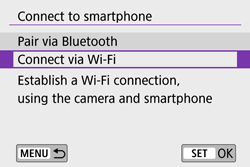
⋗ ⋖  ⋗ buttons to select [
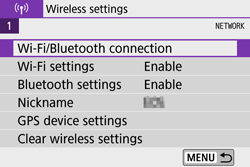
  Connect to smartphone ], and press ⋖
  ⋗.
⋗.
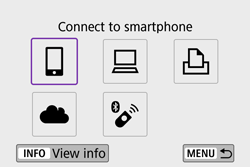
Caution
If the history is displayed, switch the screen with the ⋖

⋗ ⋖

⋗ keys.
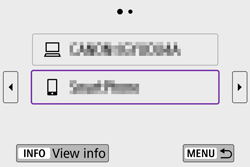
Connecting to a Bluetooth-compatible Smartphone via Wi-Fi
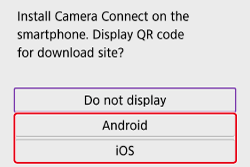
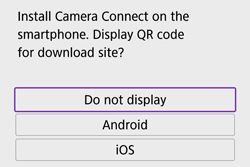
 1. Install Camera Connect.
Caution
Camera Connect can be installed from Google Play or the App Store.Google Play or App Store can also be accessed using the QR codes that appear when the camera is paired or connected via Wi-Fi to a smartphone.
 2. Press the ⋖
  ⋗ ⋖
⋗ ⋖  ⋗ buttons to select [ Pair via Bluetooth ], and press ⋖
  ⋗.
⋗.
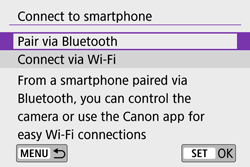
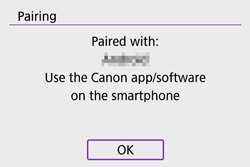
Pairing now begins.
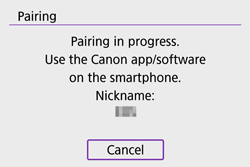
Caution
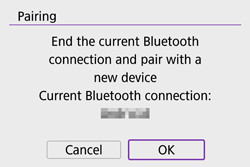
To pair with a different smartphone after pairing with one initially, select [OK], then press ⋖  ⋗.
⋗.
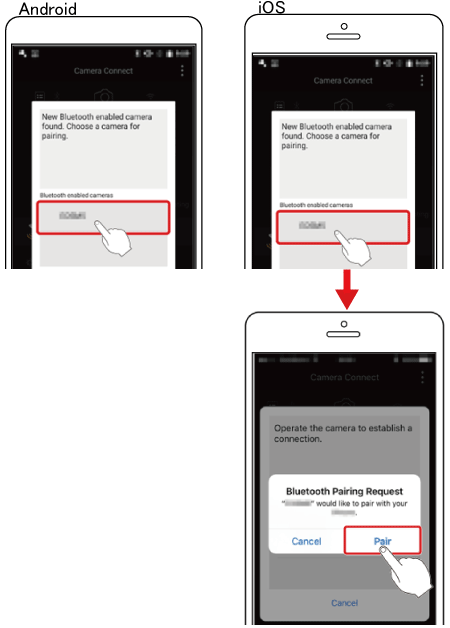
 3. Activate Bluetooth on the smartphone, and then start Camera Connect on the smartphone.

After the camera is recognized, a camera selection screen is displayed.
 4. Complete the pairing process for the smartphone.
 5. Press the ⋖
  ⋗ ⋖
⋗ ⋖  ⋗ buttons to select [ OK ], and press ⋖
  ⋗.
⋗.
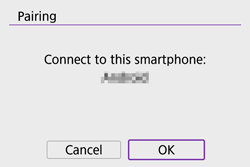
On the pairing notification screen, press ⋖

⋗.
Caution
The camera cannot be connected to two or more devices at the same time via Bluetooth.
Bluetooth connection consumes battery power even after the camera’s auto power off is activated. Therefore, the battery level may be low when you use the camera.
Keeping pairing records for previously paired cameras on your smartphone will prevent it from pairing with this camera. Before you try pairing again, remove pairing records for previously paired cameras from your smartphone’s Bluetooth settings screen.
 6. Choose [Images on camera] in Camera Connect.
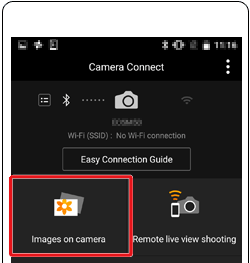
For Android, it will automatically switch to the Wi-Fi connect screen.
For iOS, when the following screen appears, touch [Copy password].
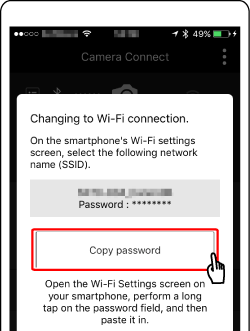
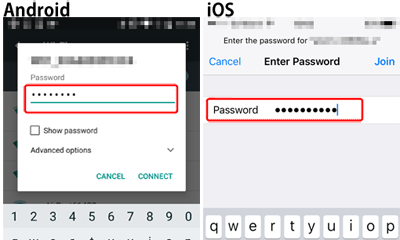
In the Wi-Fi menu, choose the SSID displayed on the camera, paste the copied password.
Caution
[

Wi-Fi on ] is displayed on the camera.
 7. When the camera is connected to the smartphone, a list of the images on the camera will appear in Camera Connect. Tap [Select] appearing in the upper right of the screen.
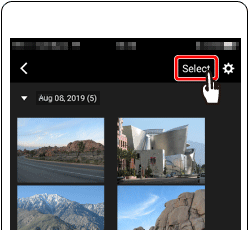
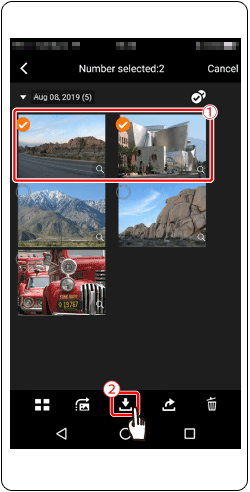
 8. After the screen refreshes, choose the desired images (
  ), and then touch [
  ] (
] (  ) on the bottom of the screen.
To select all images at once, press the [

] icon in the upper right of the screen.
Caution
A screen to set an "Image save size" option may be displayed, so choose an option and touch [OK].
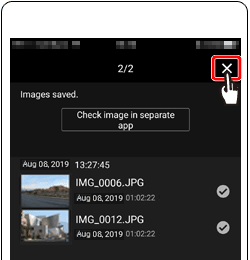
 9. After the images have been saved, touch [
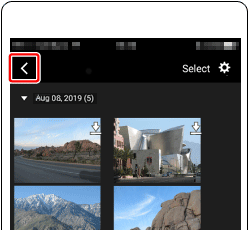
  ] appearing in the upper right of the screen, and then touch [
  ] in the upper left of the screen to return to the menu screen.

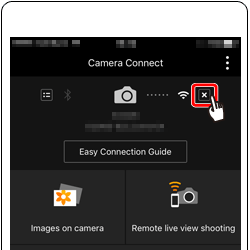
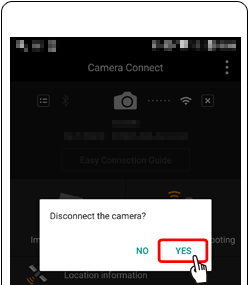
 10. To end the connection, touch the [
  ] icon displayed in the upper right of the screen, and then touch [YES].

Caution
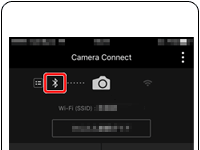
To switch to Bluetooth, disable the Wi-Fi connection on the smartphone.
Wi-Fi Connection Without Using Bluetooth
These steps show how to use the camera as an access point, but you can also use an existing access point.
 1. Install Camera Connect.
Caution
Camera Connect can be installed from Google Play or App Store. Google Play or App Store can also be accessed using the QR codes that appear when the camera is paired or connected via Wi-Fi to a smartphone.

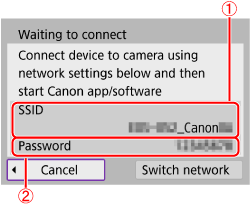
 4. Turn Wi-Fi settings to ON in your smartphone, choose the SSID (
  ) from step 3.
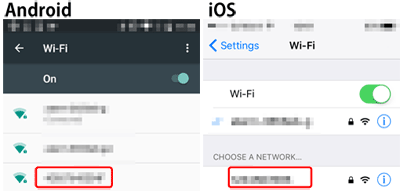
In the password field, enter the password checked in step 3 (

).

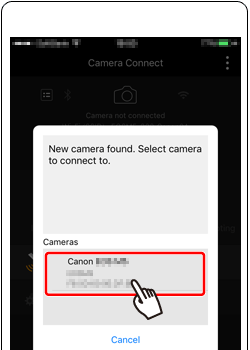
 6. On the camera selection screen displayed on the smartphone, choose the camera to begin pairing.
 7. Select [ OK ], then press ⋖
  ⋗.
⋗.
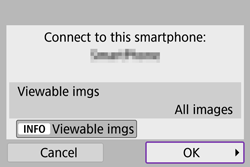
[

Wi-Fi on ] is displayed on the camera.
 8. Touch [Images on camera] in Camera Connect.

 9. When the camera is connected to the smartphone, a list of the images on the camera will appear in Camera Connect. Tap [Select] appearing in the upper right of the screen.

 10. After the screen refreshes, choose the desired images (
  ), and then touch [
  ] (
] (  ) on the bottom of the screen.
To select all images at once, press the [

] icon in the upper right of the screen, and then touch [

] on the bottom to save them on your smartphone.

Caution
A screen to set an "Image save size" option may be displayed, so choose an option and touch [OK].
 11. After the images have been saved, touch [
  ] appearing in the upper right of the screen, and then touch [
  ] in the upper left of the screen to return to the menu screen.


 12. To end the connection, touch the [
  ] icon displayed in the upper right of the screen, and then touch [YES].


Caution
Press the ⋖

⋗ cross keys to move within

and

-

.
Press ⋖

⋗ to confirm input or when switching input modes.
 , and camera setting procedures are indicated by the
  icon.
icon. 








 ⋗ ⋖
⋗ ⋖  ⋗ keys.






 ⋗.
⋗.
 Wi-Fi on ] is displayed on the camera.


 ] icon in the upper right of the screen.




 ).
).


 Wi-Fi on ] is displayed on the camera.


 ] icon in the upper right of the screen, and then touch [
  ] on the bottom to save them on your smartphone.


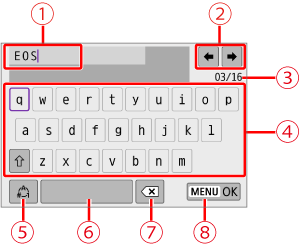
 ⋗ cross keys to move within
  and
and  -
-  .
. ⋗ to confirm input or when switching input modes.


