

Solution
What are Time-lapse movies?Shooting Time-lapse movies
Total Possilbe Time for Time-lapse Movie Shooting
When Using Remote Controller RC-6
What are Time-lapse movies?
Still photos shot at a set interval can be stitched together automatically to create a time-lapse movie. A time-lapse movie shows how a subject changes in a much shorter period of time than the actual time it took. It is effective for a fixed-point observation of changing scenery, growing plants, celestial motion, etc. Regardless of the [ 


Caution
: Video system] correctly to For NTSC (North America, Japan, Korea, Mexico, etc.) or For PAL (Europe, Russia, China, Australia) (depending on the video system of your TV set).Shooting Time-lapse movies
1. Set the camera’s power switch to [ON].
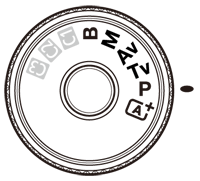
2. Set the shooting mode.
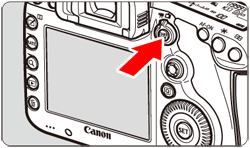
3. Set the Live View shooting/Movie shooting switch to [ 
The image will appear on the LCD monitor.

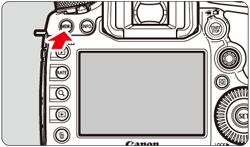
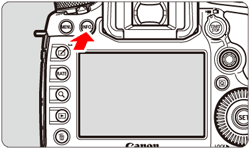
4. Press the [MENU] button to display the menu screen.
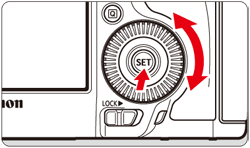
5. Press the [ 

6. Turn the [ 

7. Turn the [ 

Caution
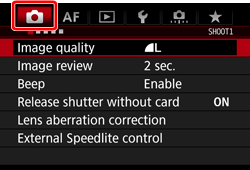
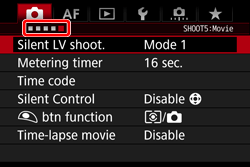
 ] mode, the settings can be made from the [
  ] tab.
 ] button to enable movie shooting. Then perform step 7 again.
8. Turn the [
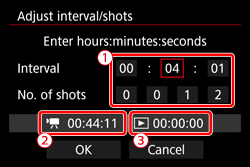
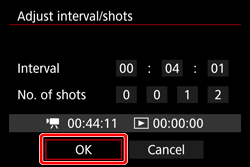
9. Set the shooting interval and number of shots.
: Time required (  ) ] and [
  : Playback time (
  )] displayed at the bottom of the screen to set the shooting interval and number of shots.
 ) ), then press [ ] so [
  ] is displayed. ]. (Returns to [
  ]).
]).
Caution
Settable from [00:00:01] to [99:59:59].
Settable from [0002] to [3600]. Set one digit at a time. If 3600 is set, the time-lapse movie will be approx. 2 min. for NTSC and approx. 2 min. 24 sec. for PAL.
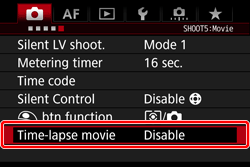
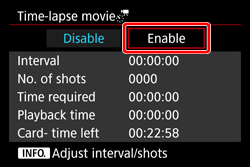
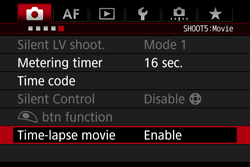
10. Select [Enable], then press [
11. With [Time-lapse movie] selected on the screen in step 7, press [
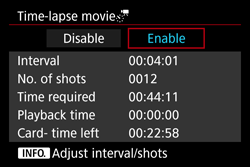
12. The current settings will be displayed.
Caution
Indicates the time required to shoot the set number of shots at the set interval. If it exceeds 24 hours, "*** days" will be displayed.
Indicates the playback time (time required to play back the movie) of the time-lapse movie that will be created from the still photos taken at the set interval and recorded in
The total length of a time-lapse movie that can be recorded on the card based on its remaining capacity.
13. Press the [MENU] button to turn off the menu screen.
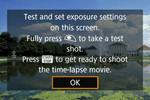
14. Read the message, select [OK], and press [
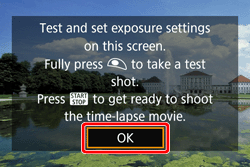
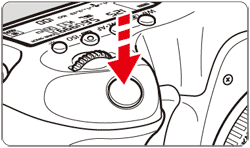
15. Take test shots.
16. Pressing the [
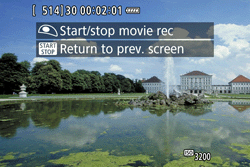
17. Shoot the time-lapse movie.
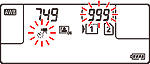
 ] will blink on the LCD panel. (: Shots remaining / : Time-lapse movie )
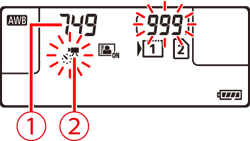
Caution
 : Movie rec. size] and [ : Video system].
 : Time-lapse movie] to [Disable]. If it is set to [Enable], the camera cannot communicate with the computer.
- Selecting [ 
- Selecting [C1], [C2], or [C3] shooting modes
 ] is displayed, the image quality of the time-lapse movie may deteriorate.
Caution
] button ([Disable] is set). The time-lapse movie shot so far will be recorded on the card.Total Possilbe Time for Time-lapse Movie Shooting
You can perform time-lapse movie shooting with a fully-charged Battery Pack LP-E6N for the durations (from start of shooting until the battery is exhausted) listed in the table below.
| Room Temperature (23°C / 73°F) | Low Temperatures (0°C / 32°F) | |
|---|---|---|
| Shooting interval: 1sec. | 2 hr. 15 min. | 2 hr. 10 min. |
| Shooting interval: 10sec. | 4 hr. 5 min. | 3 hr. 55 min. |
When Using Remote Controller RC-6
If you use Remote Controller RC-6, you can start or stop the time-lapse movie shooting with the drive mode set to [ 

| Camera Status | Remote Control Setting | |
|---|---|---|
| [ : 2-sec. delay ] | [ : Immediate shooting ] | |
 : Test-shooting screen : Test-shooting screen | To shooting-ready | Shoots still photo |
 : Shooting-ready : Shooting-ready | To test-shooting screen | Starts shooting |
 : During time-lapse movie shooting : During time-lapse movie shooting | Ends shooting | Ends shooting |
Caution
If you make the following settings for Remote Controller RC-6, you can perform the same operations as with the shutter button and [
 ] (Shoot immediately) button on the RC-6: Shutter button ] button
For more information on shooting with a remote controller, please refer to Compatible Remote Controllers and Remote Switches (Still Images/Movies) (EOS 5DS / EOS 5DS R).