Solution
Remote Controller and Remote SwitchRemote Shooting with Wireless Remote Control BR-E1 (Sold Separately)
Remote Shooting with Remote Controller RC-6 (Sold Separately)
Connecting the Remote Switch
Remote Controller and Remote Switch
You can use the Remote Controller RC-6 ( 


Caution
 ) or RC-5 (
  ) (each sold separately).
Remote Shooting with Wireless Remote Control BR-E1 (Sold Separately)
You can use a Bluetooth® connection with Bluetooth low energy technology-compatible Wireless Remote Control BR-E1 for remote control operations. In order to use the BR-E1, you first need to pair the camera and remote controller (registering the device to the camera).
Caution
After pairing is complete, the battery will be consumed even during auto power off, so the remaining battery level may be low when using the camera.
1. Set the camera's power switch to ⋖ ON ⋗.
2. Press the ⋖ MENU ⋗ button to display the menu on the LCD monitor.
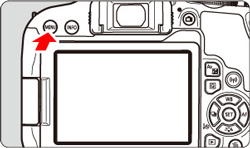
3. Under the [ 

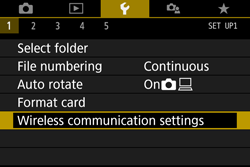
4. Select [Bluetooth function].
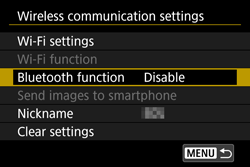
5. Select [Bluetooth function].
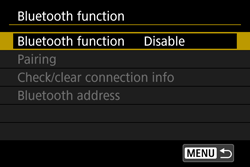
6. Select [Remote].
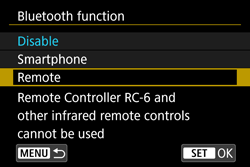
Caution
If a message "Register a nickname to identify the camera." appears, press ⋖ 
7. Select [Pairing].
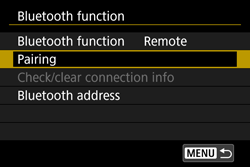
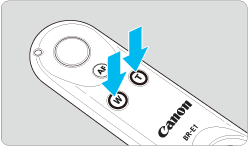
8. Press and hold the BR-E1's ⋖W⋗ button and ⋖T⋗ button simultaneously for 3 sec. or more.
Pairing starts. After the pairing is complete, the remote controller is registered to the camera.

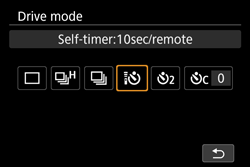
9. Set up the camera for remote control shooting.
 ].
].
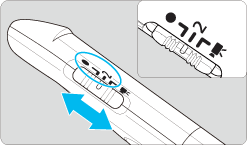
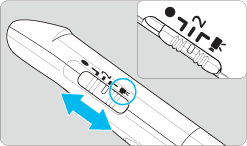
10. Set the release timing/movie shooting switch on the remote controller.
 ⋗ (immediate release) or ⋖2⋗ (2-sec. delay release) position.
 ⋗ position.
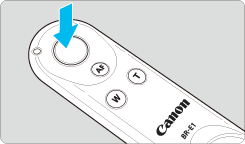
11. Shooting still photos (or Shooting movies)
Caution
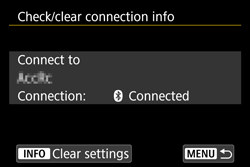
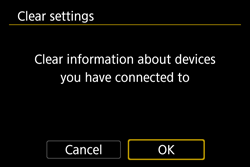
To pair with another BR-E1, clear the connection information of the remote controller currently connected. You can check the connection status of the camera and remote controller from the [Check/clear connection info] screen in step 6.
1. Set the camera's power switch to ⋖ ON ⋗.
2. Press the ⋖ MENU ⋗ button to display the menu on the LCD monitor.

3. Under the [ 


4. Select [Bluetooth function].
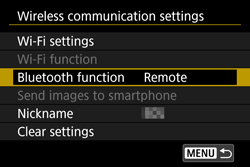
5. Select [Check/clear connection info].
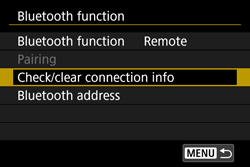
6. Press the ⋖INFO⋗ button.
7. Select [OK], then press ⋖ 
The remote controller’s connection information will be cleared.
Remote Shooting with Remote Controller RC-6 (Sold Separately)
Remote Controller RC-6 (Sold Separately) enables you to take pictures wirelessly up to approx. 5 meters/16.4 feet away from the camera. You can either shoot immediately or with a 2-sec. delay.
1. Flip out the LCD monitor, and set the camera's power switch to ⋖ ON ⋗.
2. When the camera is ready to shoot, press the ⋖ 
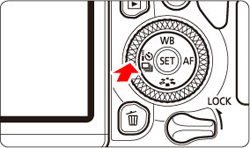
3. Press the ⋖ 


4. Point the remote controller toward the camera’s remote control sensor ( 

5. The camera is focused, the self-timer lamp lights up and a picture is taken.
Caution
Cautions for Remote Control Shooting
Caution
Shooting Movies
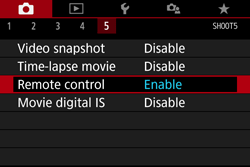
 ⋗, press ⋖ MENU ⋗ and choose the [
  ] tab from the displayed menu. Set [Remote control] to [Enable].
 ⋗ (immediate release), the [
  btn function ] setting will be applied.
Connecting the Remote Switch
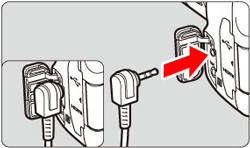
Remote Switch RS-60E3 (sold separately) comes with an approx. 60 cm/2.0 ft cord. When connected to the camera’s remote control terminal, it can be pressed halfway and completely, just like the shutter button.
1. Open the terminal cover.
2. Connect the plug to the remote control terminal.
Caution
Shooting Movies with RS-60E3 (sold separately)
Set the camera's power switch to ⋖ 


