You can connect your camera to a printer and print using Wi-Fi.
When establishing a wireless connection with a printer, you can either use the camera as an access point (Camera Access Point Mode) or use another access point.
Caution
Caution
To connect using another access point, please refer to Sending images to a computer (Wi-Fi function).
Connecting your camera and printer via Wi-Fi
Register the printer you want to connect to using Wi-Fi.
Caution
The procedure is shown on a PowerShot ELPH 190 / IXUS 180 for the purposes of explanation. The position and shape of the operation buttons, screens displayed, and setting items may differ according to the model you use.
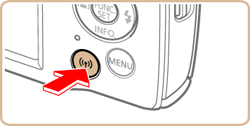
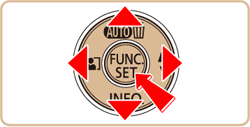
1. Press the [ 
Caution
 ] [
] [  ] buttons to choose [OK], and then press the [
  ] button.
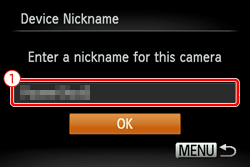
 ) is displayed. ] [ ] buttons to choose the [Nickname] field, press the [ ] button to display the keyboard, and then enter the desired nickname. After you have finished entering the nickname, press the [MENU] button to return to the registration screen, press the [ ] button, choose [OK], and then press the [ ] button.
2. Press the [ 


3. Press the [

Caution
 ] button to open the Wi-Fi menu after the first time, recent destinations will be listed first when you access the Wi-Fi menu. You can easily connect again by pressing the [ ] , [ ] buttons to choose the device and then pressing the button [
  ]. To add a new device, display the device selection screen by pressing the [ ] , [ ] buttons and configure the setting. If you prefer not to display recent target devices, choose [MENU]
  [
[  ] tab [Wireless settings] [Wi-Fi Settings] [Target History] [Off].
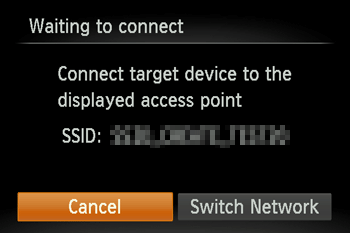
 4. Choose the displayed SSID (network name) from the printer's Wi-Fi setting menu.
Caution
If you open the [
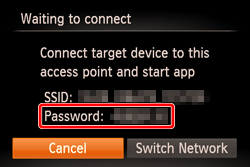
5. Once the printer is ready for the connection, the printer’s name will be displayed on the camera. Press the [
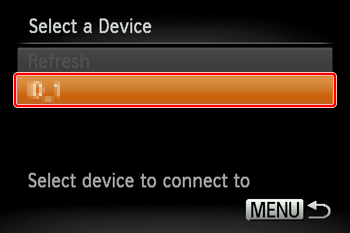
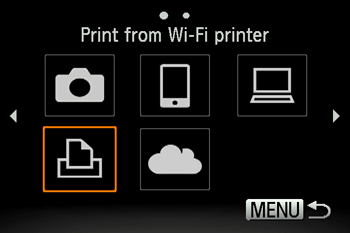
6. After the printer has been registered, a screen similar to the following one will be displayed.
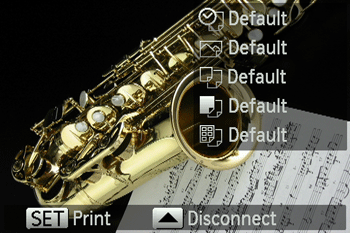
Printing Images
7. Press the [


8. The menu items will be displayed.
Press the [ 
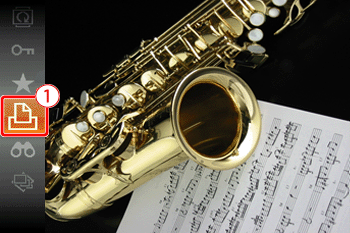
9. The screen for specifying the print settings appears.
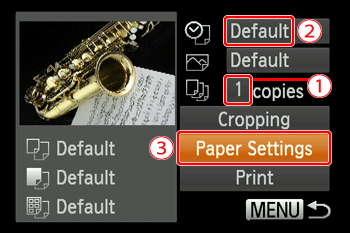
] , [ ] buttons to choose ( ). Then, press the [ ] button and make the settings. ] , [ ] buttons to choose ( ). Then, press the [ ] button and make the settings. ] , [ ] buttons to choose [Paper Settings], (
  ) and then press the [ ] button.
10. The screen for setting the paper size appears.
Press the [
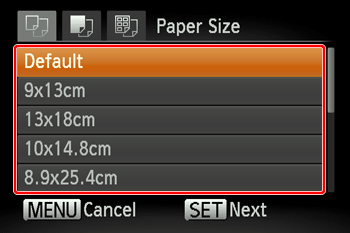
11. The screen for setting the paper type appears.
Press the [
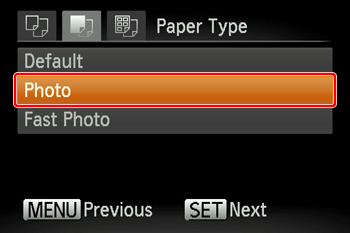
12. The layout (border) settings screen appears.
Press the [
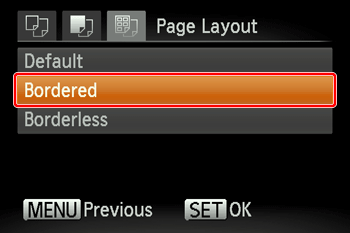
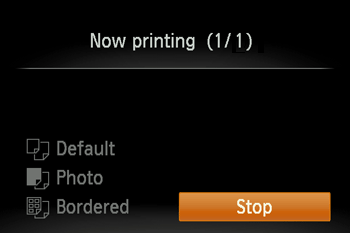
13. The camera returns to the print setting screen.


14. Printing now begins.