
- Post-Production Tips for Canon Shooters Using Adobe Creative Cloud
-

Hello!
We've noticed that you are in .
Visit Canon .
A reliable workflow is the backbone of any successful creative endeavour. It saves time, protects your creativity, and ensures that you can consistently produce high-quality work. This guide covers everything from in-camera setup to offloading and editing in Adobe's Lightroom and Premiere Pro, designed to keep your process fast, consistent, and creatively focused.
• Camera: For both photography and videography, the Canon R5 Mark II stands out as an unbeatable choice. Its cinema-like video quality and exceptional photo performance make it the perfect hybrid tool for creators who need versatility in a single body.
• Photos: Shooting in Canon's compressed RAW format offers a great balance between quality and storage efficiency. It provides flexibility in editing without noticeable quality loss.
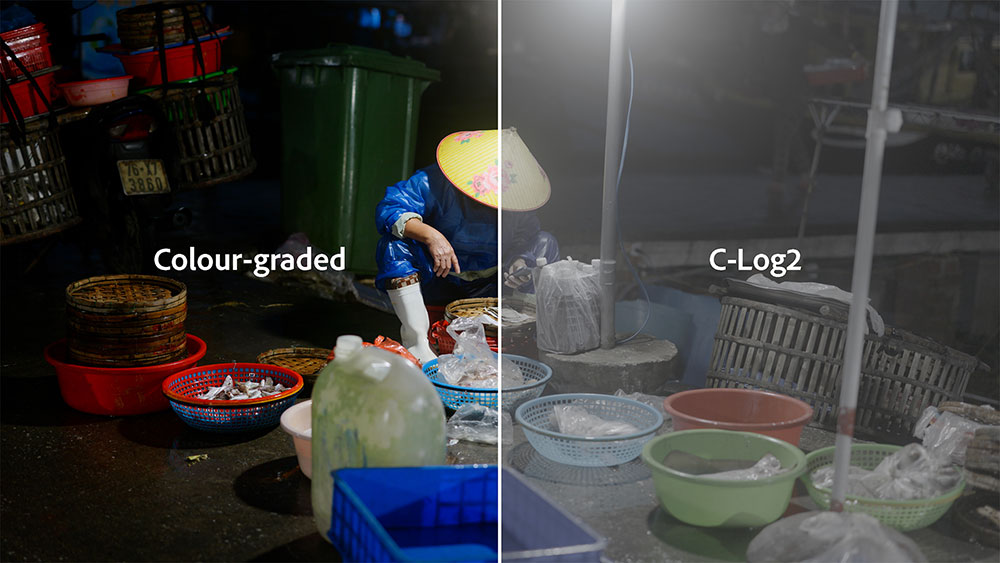
• Video: Utilising C-Log2 maximises dynamic range and post-production flexibility. For accurate exposure, rely on waveforms or histograms rather than the standard exposure meter.
• Custom Modes: Set up custom video modes for quick frame rate switching - C1 for 100fps, C2 for 50fps, and C3 for 25fps—each with a matching 180-degree shutter angle.
• File Naming: Custom camera file names help keep footage organised, allowing you to quickly identify which camera was used without diving into metadata.
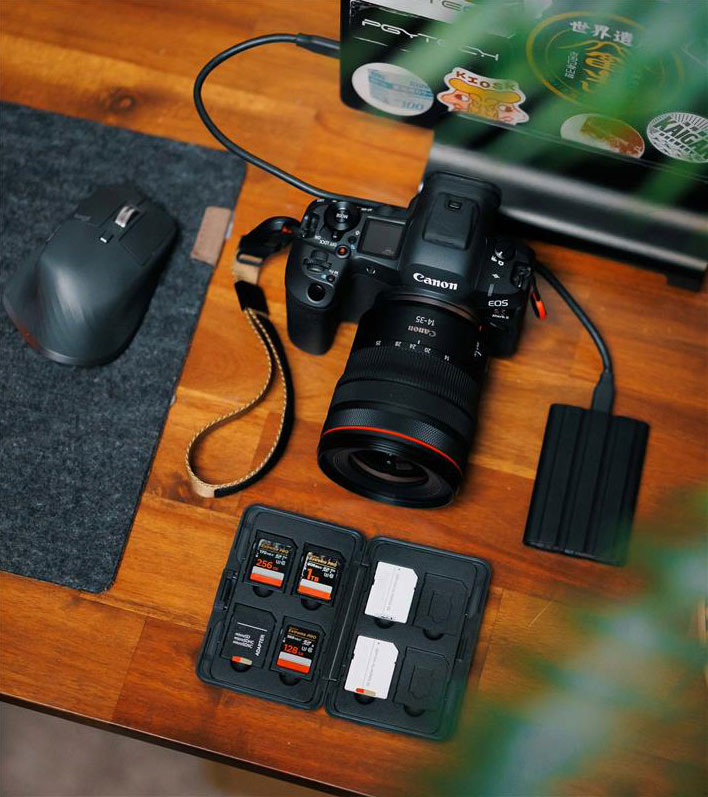
• Efficient Storage Solutions: Offload your work onto a fast external SSD, your primary working drive, which you can take anywhere. Organise your project folders by date and shoot, with subfolders for photos and videos, labelled by camera if necessary.
• Backup Strategy: Keep original files on your SD card until they are double-backed up. Use a secondary HDD or SSD for backup while traveling. This ensures that you are over-prepared with backups, safeguarding your work against unforeseen circumstances.
• Importing Photos: Import directly into Lightroom Classic, applying a base preset during import for quicker culling and to see how a photo looks and feels.
• Importing videos: Drag directly into drive folders using Finder or File Explorer, maintaining the same subfolder labelling system.
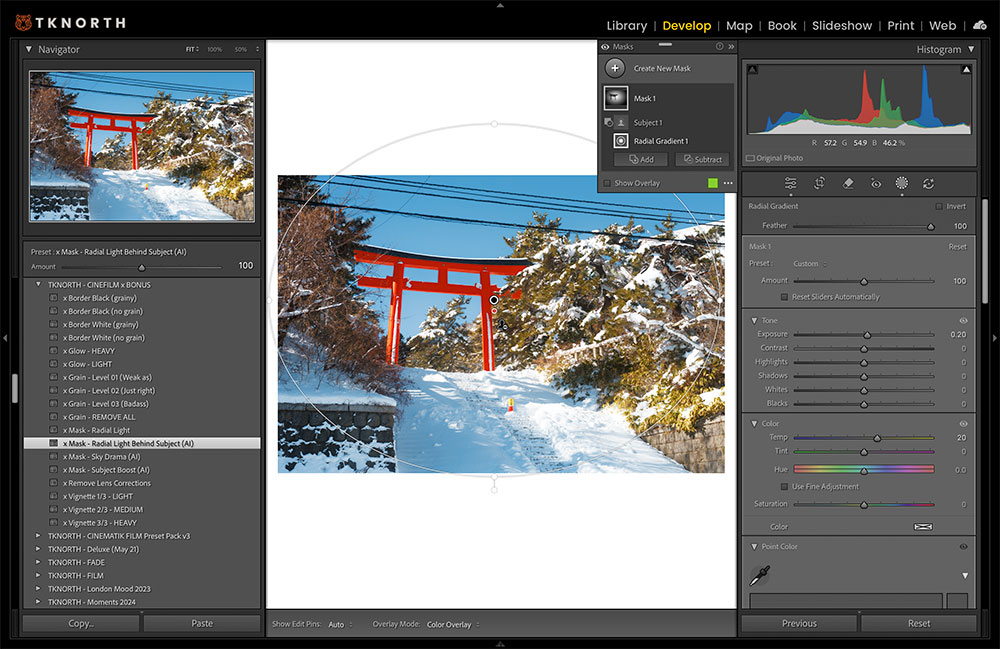
Lightroom Classic is the main editing tool I use for desktop work, while anything I’ve shot on my phone I’ll use Lightroom Mobile. Custom presets in Lightroom aren't a one-click solution, as each photo requires individual adjustments. However, they save significant time when used effectively. It's best to start with a subtle base and refine it as needed. For instance, the "Light Behind Subject" preset uses AI masking to add radial gradients for enhanced lighting, softened with negative clarity and haze. These presets can be saved for easy reuse, allowing you to adjust the masking to fit the light in each photo.
Time-saving tricks like these are invaluable, especially if you frequently use the same adjustments. For organising and culling photos, a simple star rating system is effective:
★★★★: Photos to edit
★★★★★: Final edits
★★: Potential edits
For easy filtering and arrangement, use colour labels for small image groups, for example when editing an Instagram carousel post. Alternatively, create collections when you are working with a larger project or group of images. You can also build smart previews for smoother editing on the go, allowing you to work without an external drive connected.
Let's dive into video editing with Premiere Pro, where one of the most effective time-saving strategies is setting up a basic project template. This template includes pre-labelled bins for audio, footage, music, graphics, and adjustment layers, all ready for use. I rely on this setup for all my YouTube videos, as it contains frequently used elements, allowing me to focus solely on importing the specific footage needed for each project. It's a straightforward tip that requires minimal effort to establish, yet it significantly enhances organisation and efficiency from the outset. Upon opening a new project with this template, I immediately rename it to preserve the original for future use. Additionally, I preload frequently used sound effects, which proves invaluable for YouTube videos or any projects with a consistent format.
This approach is equally effective for Instagram reels, especially when reusing similar formats across multiple edits. When it comes to colour grading, the method varies depending on the project. For a single long clip divided into smaller segments, as is common in my YouTube content, I apply a grade directly to the main video file under the Lumetri colour tab. This ensures consistent colour across all cuts of the video file. For projects involving multiple clips, I opt for an adjustment layer placed above the clips on the timeline. This allows for a unified grade across all clips while still enabling individual adjustments to exposure or tone, maintaining a cohesive colour grade throughout.
Premiere Pro's AI features are also invaluable time-savers. I start my colour grading with Auto Tone in Lumetri Colour, which provides an excellent initial adjustment that can be further refined. Adobe's built-in tools, such as auto levelling for dialogue found under Essential Sound, are particularly useful. By selecting your audio type and hitting Auto Match, the software automatically balances audio levels across clips, ensuring consistent volume straight out of the box.

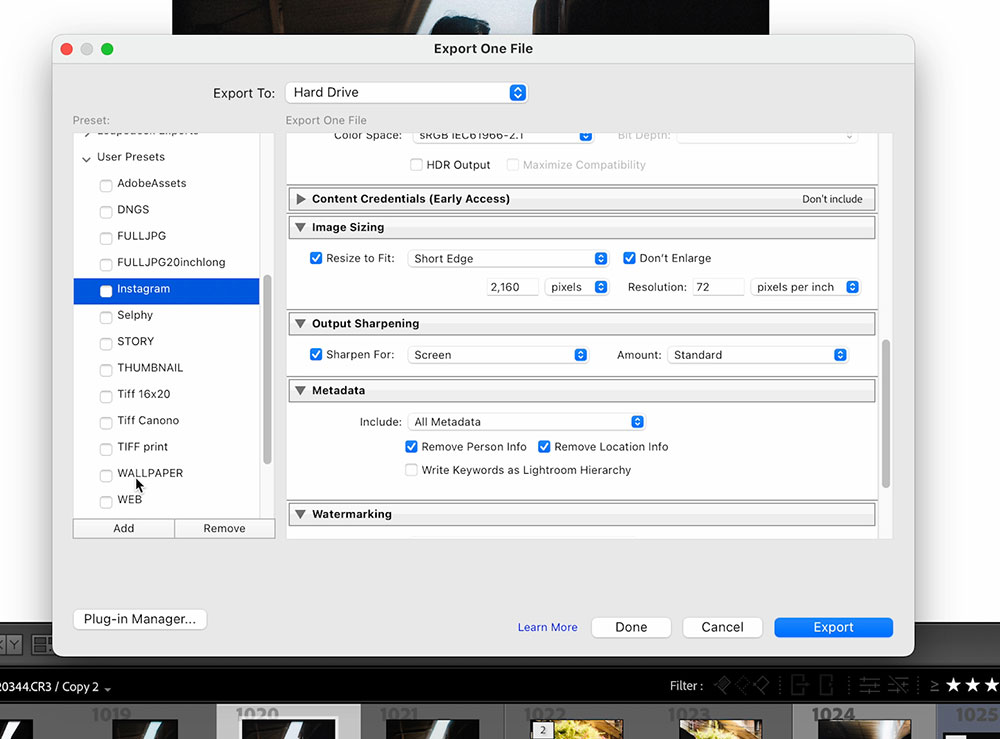
When it comes to exporting, simplicity is key. For photos, I have presets tailored to different uses, such as Instagram. These presets are set to a quality of 100, with a short edge size of 2,160 pixels and standard sharpening for screens. This ensures that whenever I export photos for Instagram, everything is pre-configured and ready to go, saving valuable time. I have similar presets for various other uses as well.
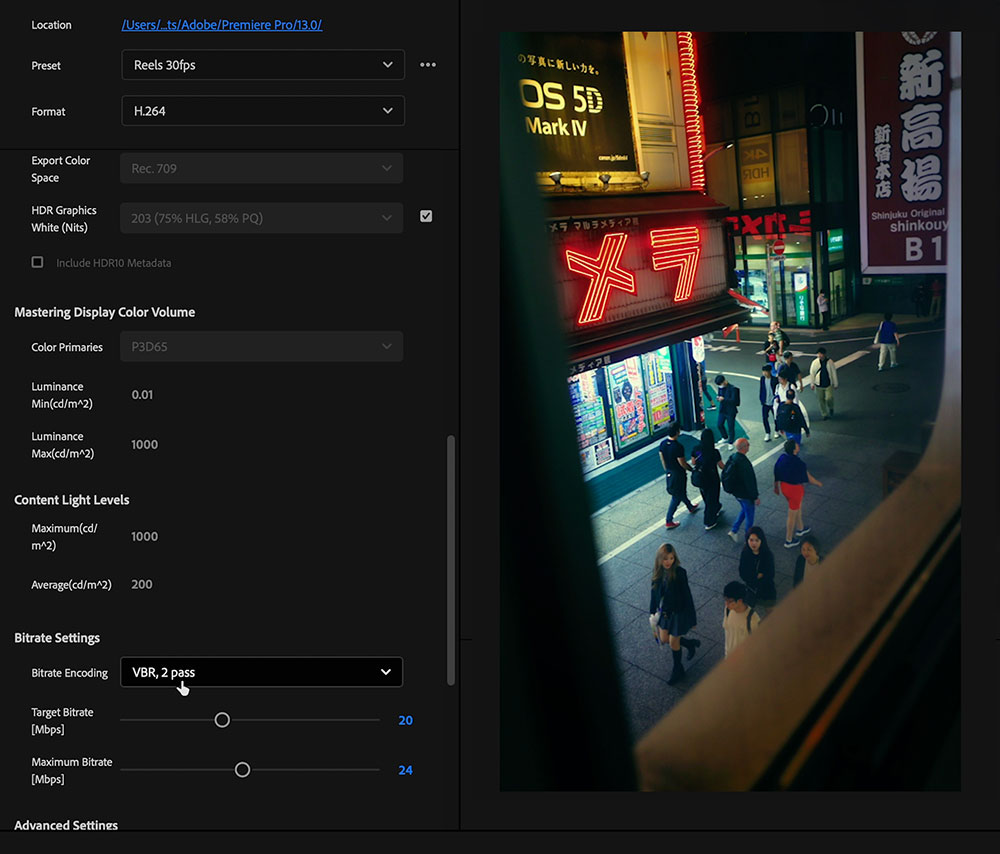
For video exports, I've created custom presets to streamline the process. I have specific settings for YouTube 4K and Instagram Reels, eliminating the need to manually adjust settings each time. For Instagram Reels, I use the H.264 codec with a resolution of 1080 by 1920 pixels, matching the sequence at a frame rate of 30 frames per second. I also select options for rendering at maximum depth and using maximum render quality, ensuring optimal video output. Additionally, I employ VBR 2-pass encoding with a target bit rate of 20 and a maximum bit rate of 24. Although this is slightly higher than some might use, I find it effectively prevents unwanted compression while maintaining crisp, high-quality videos.
Find a system that works for you, and the more organised you are, the more time you'll have to create great work. Embrace the tools and techniques that enhance your process, and watch your creativity flourish.
Watch the full tutorial in the video above, or find more photo and video editing tips here.

How to Edit Your First Video in Premiere Pro (Beginner Guide)

Learn how to develop your own signature look across photo and video using custom Lightroom presets and LUTs for Premiere Pro. Mitch shares his creative approach and Canon-based workflow for consistency and style.

Post-Production Workflow Tips With Pro Photographer Tom Noske