
- A Beginner’s Guide to Blurry Backgrounds: Mastering Aperture, Bokeh and Focal Length
-

Hello!
We've noticed that you are in .
Visit Canon .
Blurry backgrounds, often called bokeh, add depth, softness and focus to your photos. They help your subject stand out and give your work a more cinematic feel. Most people learn that aperture controls bokeh, which is true, but it is only part of the story. Focal length has just as much impact on how blurred and compressed your background looks. Even if you do not own a fast f/1.2 lens, you can still achieve beautiful bokeh by understanding how different lenses shape your scene.
To make this easy to understand, we created two simple comparisons.
• An aperture test shot on the Canon RF 45mm f/1.2 STM
• A focal length test shot on four prime VCM lenses at 24mm, 35mm, 50mm and 85mm
Let us break down how each technique works and how you can use them to improve your photography.
Aperture affects how much light your lens gathers and how much of the scene stays in focus. A wide aperture such as f/1.2 or f/2.8 creates shallow depth of field and beautiful bokeh. A narrow aperture such as f/11 or f/16 keeps everything sharp.
If you are learning, Aperture Priority (Av) mode is the simplest way to practice. Choose your f stop and your camera selects the shutter speed for you.
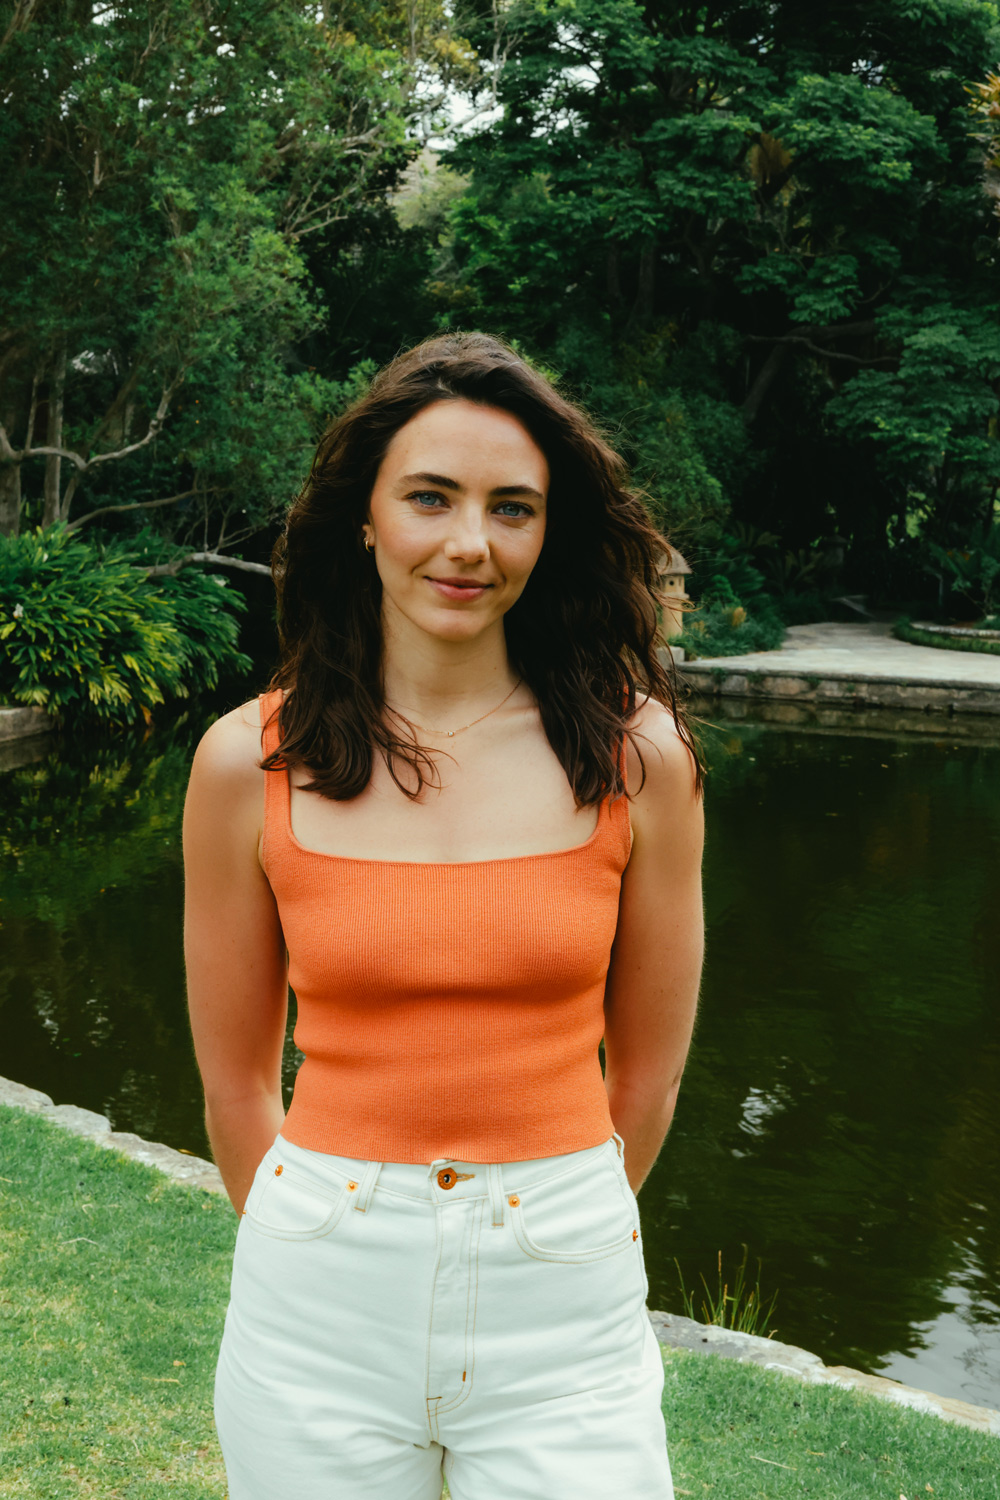
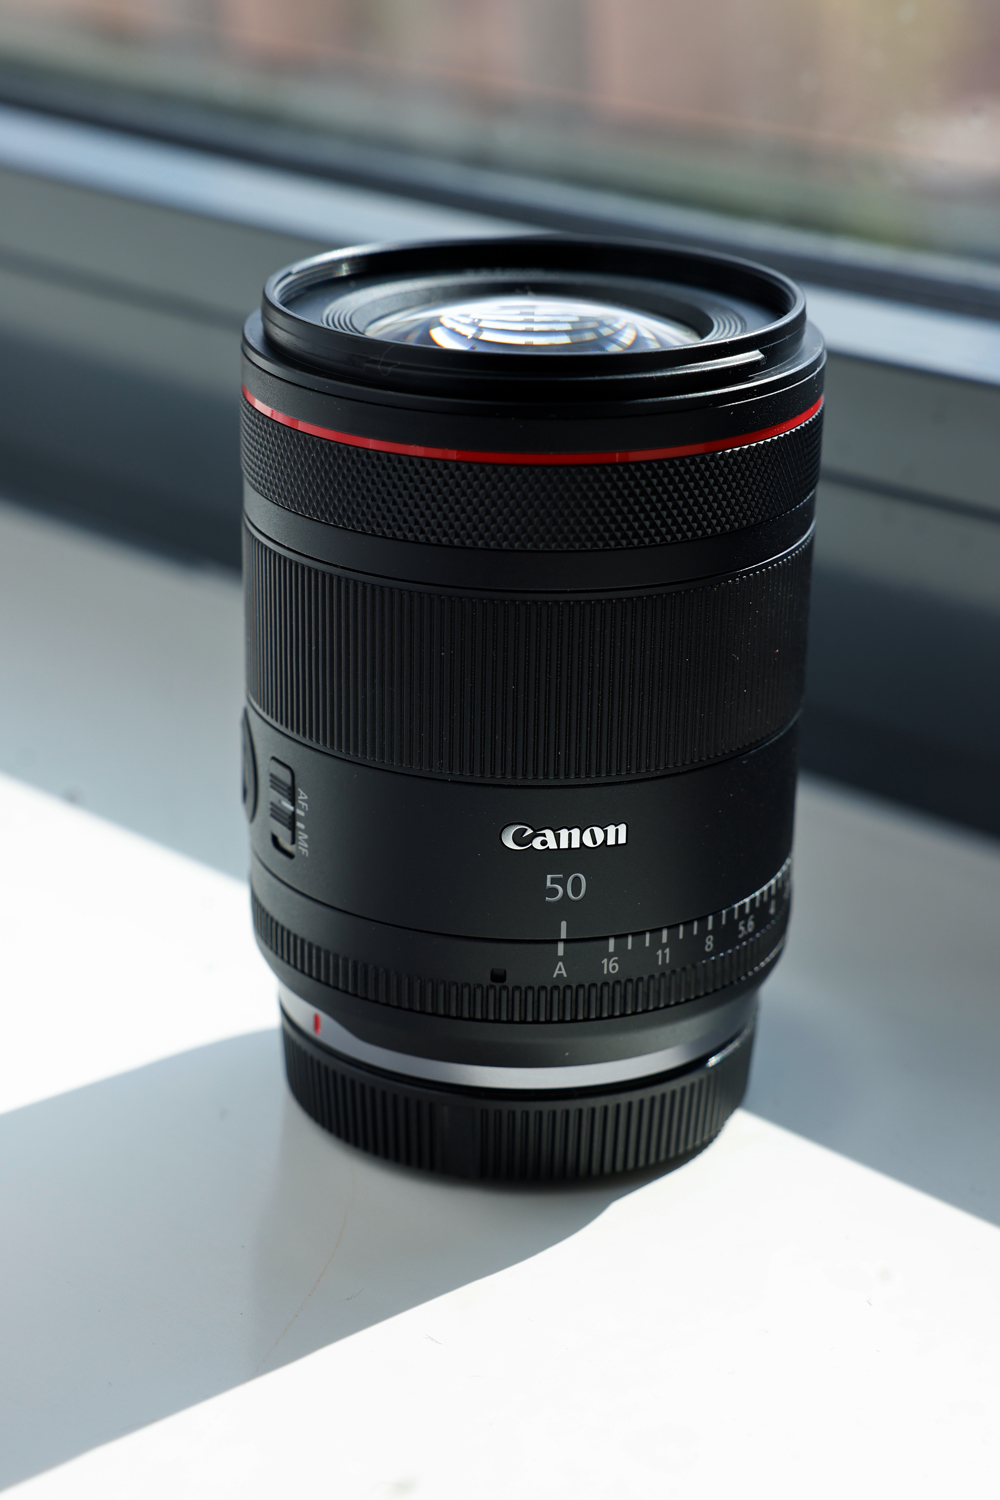
Below is an aperture comparison shot on the Canon RF 45mm f/1.2 STM, a compact portrait lens known for its bright f/1.2 aperture and smooth bokeh.


Aperture is the most obvious way to create background blur, but it is not the only method. Focal length has a powerful effect on how compressed or separated the background appears.
Longer lenses naturally create more background blur because of perspective. When you switch to a longer lens, you step back to keep your subject the same size in the frame. Changing your position alters the perspective, and the background appears closer, tighter and softer. This compression effect can create bokeh even at moderate apertures such as f/4 or f/5.6.
If you do not have a fast lens, understanding focal length becomes one of your strongest tools.
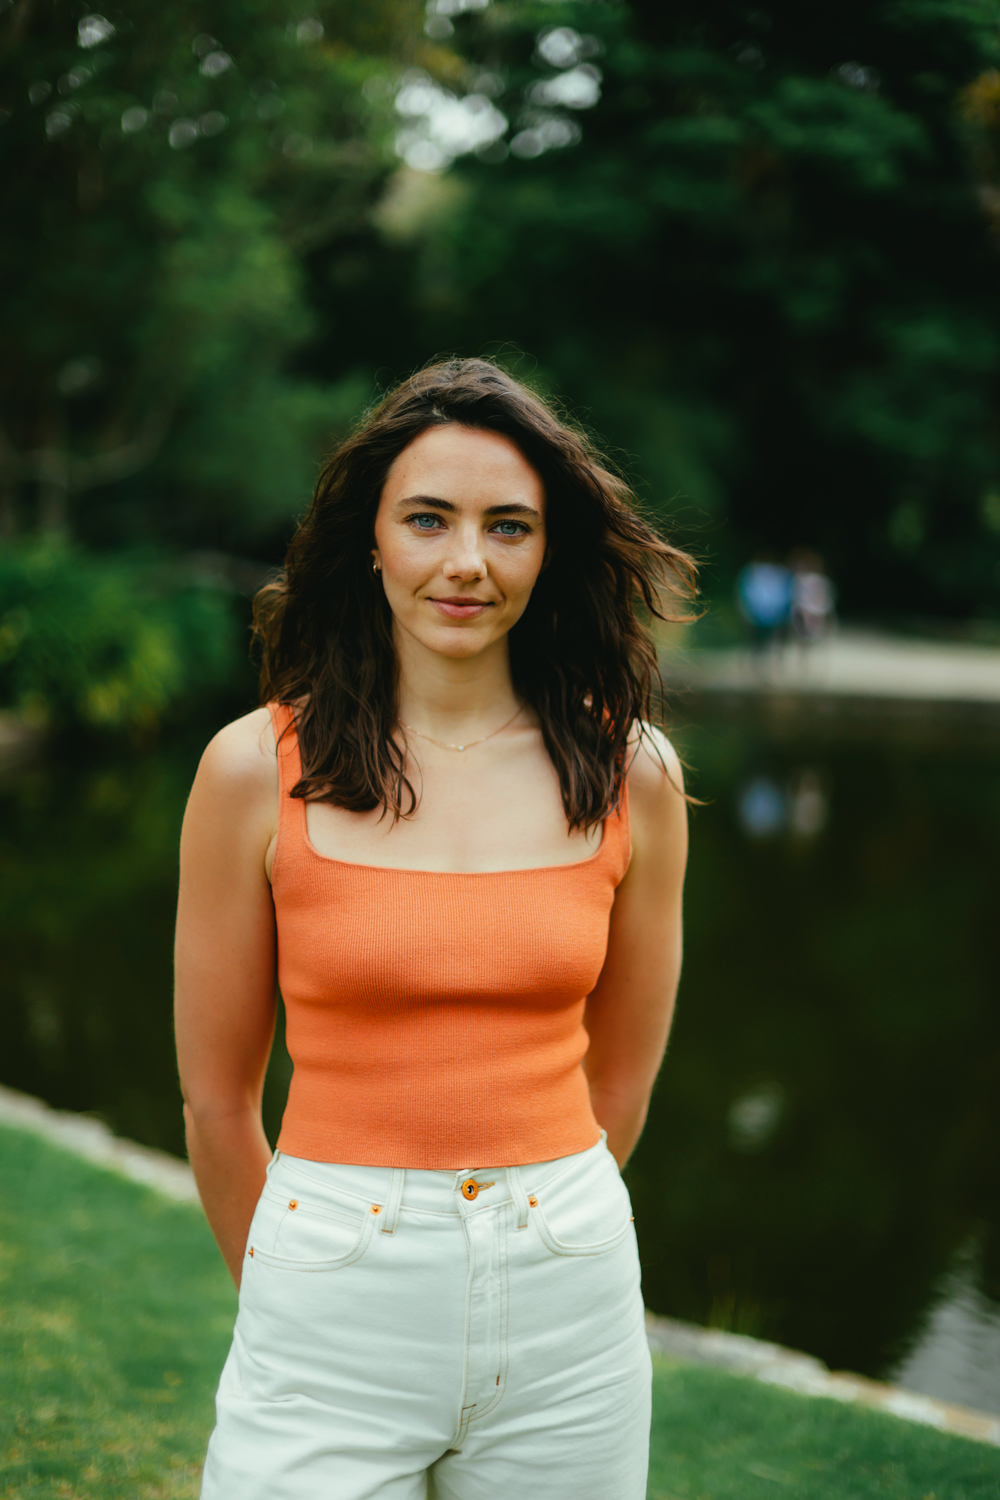
RF 24mm f/1.4L VCM
Wide and spacious. The background stretches outward, and you see a large amount of the environment. Bokeh is minimal, even at wide apertures. This focal length is ideal for environmental portraits or storytelling but not the best for achieving strong blur.
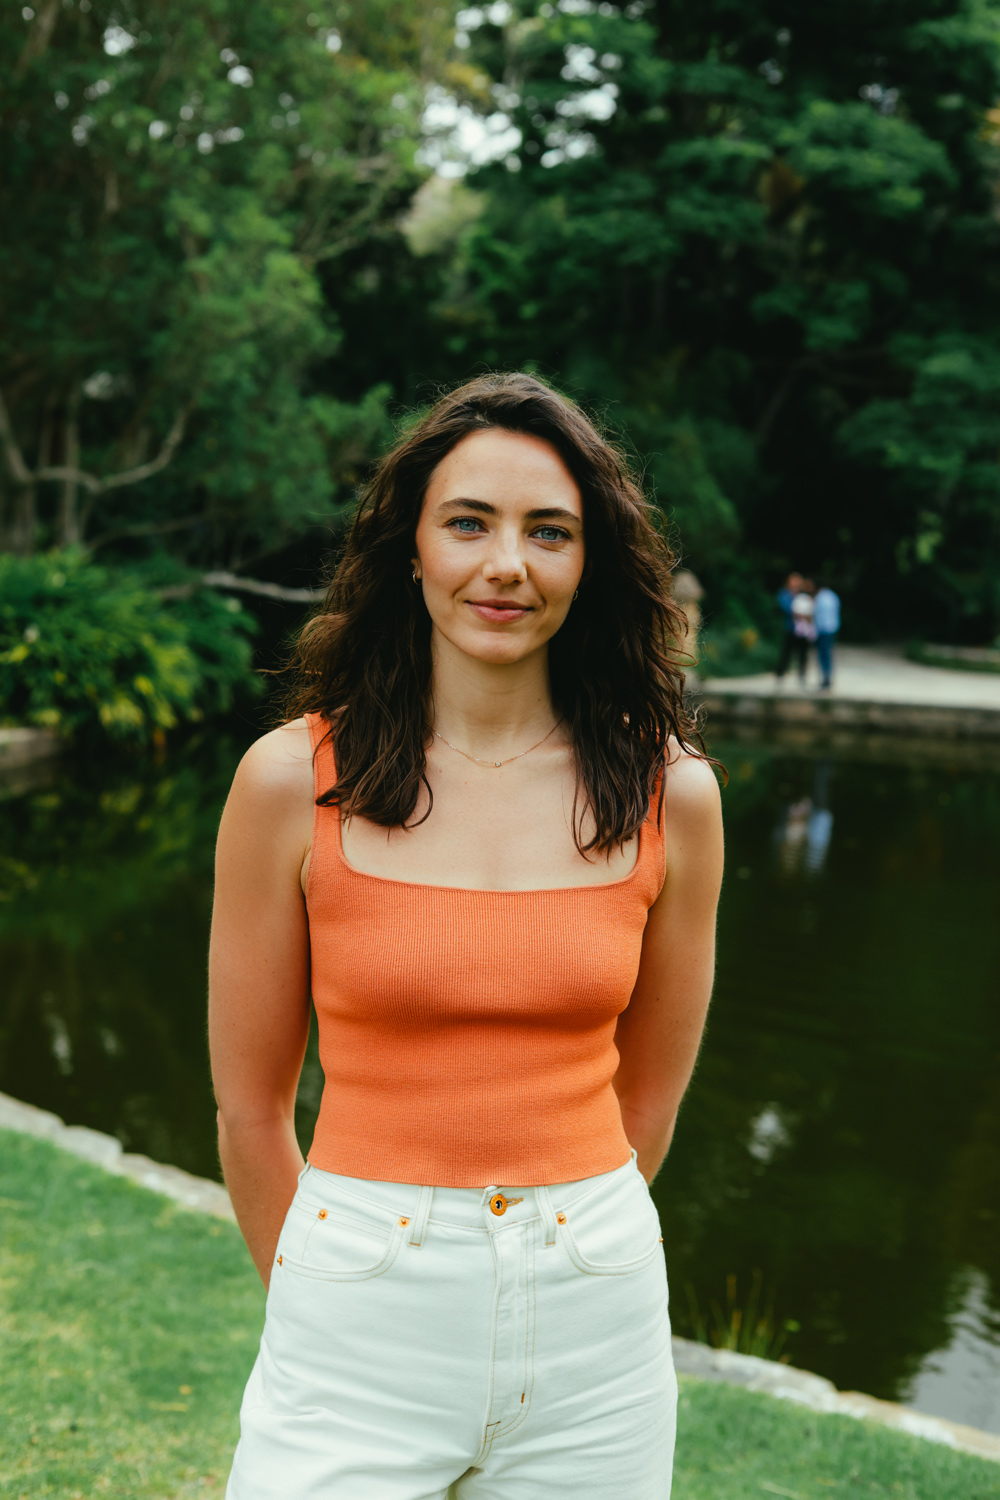
RF 35mm f/1.4 L VCM
Still wide but more natural. The background appears closer and less distorted. Blur improves, especially if you place your subject further from the background. This is a great everyday focal length that balances context and separation.
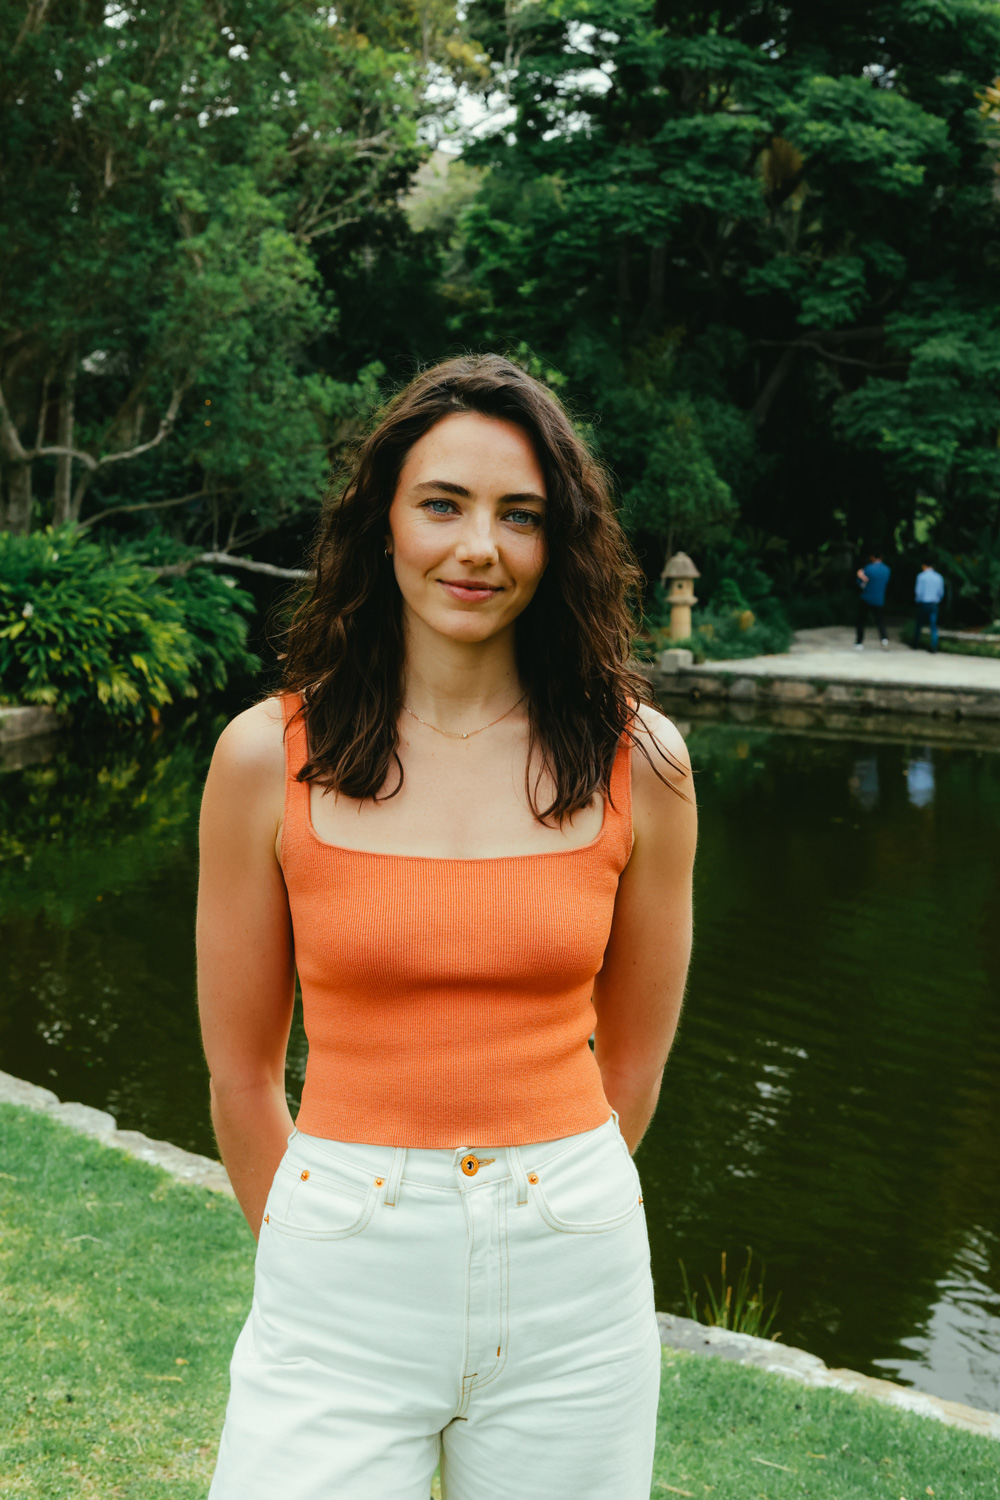
RF 50mm f/1.4L VCM
A classic portrait perspective. Compression increases, making the background appear closer and softer. Even at f/2.8 or f/4, you get smoother bokeh than a wide angle lens could provide. Perfect for portraits, lifestyle scenes and detail shots.
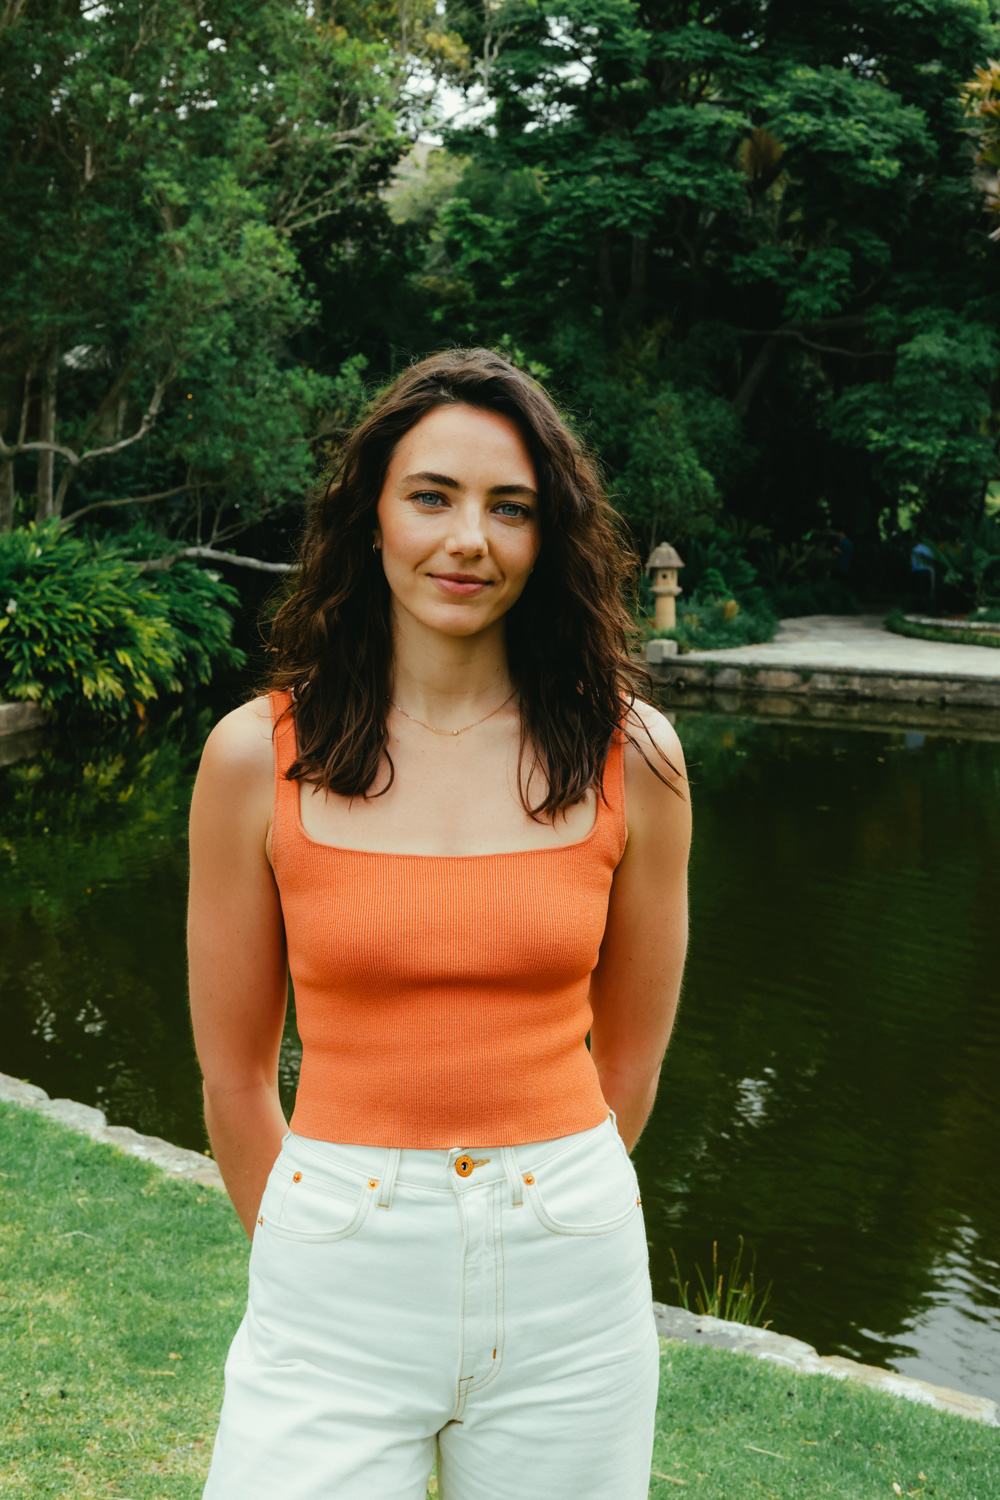
RF 85mm f/1.4 L VCM
The strongest compression among these examples. The background appears significantly closer and blur becomes much more pronounced, even if you are shooting at f/4 or f/5.6. In your comparison, the tree behind the model moves forward visually and the ground disappears from the frame. This is why many portrait photographers choose an 85mm lens to achieve creamy bokeh without needing a super wide aperture.
If your goal is bokeh and you do not own a fast lens, consider:
• Using a longer focal length, like 50mm or 85mm
• Placing your subject far from the background
• Moving closer to your subject
• Shooting with backlit or textured backgrounds to enhance blur
These techniques often create bokeh that looks just as pleasing as shooting at f/1.2.
Aperture Priority (Av)
Best for learning how aperture affects depth of field.
Manual (M)
Useful once you are confident balancing aperture, shutter speed and ISO.
Shutter Priority (Tv)
Helpful if your subject is moving, ensuring your shutter stays fast enough to avoid blur.
• Increase the distance between your subject and the background
• Use longer lenses when possible
• Shoot closer to your subject
• Use backlighting or point lights to enhance bokeh quality
• Focus on the eyes when shooting portraits
• Avoid cluttered or messy backgrounds
• Shoot a portrait at every f stop from f/1.2 to f/16
• Keep distance constant so you can clearly see the effect of aperture
• Repeat the test by adjusting your distance from the subject
• Shoot the same portrait at 24mm, 35mm, 50mm and 85mm while keeping your subject the same size in frame
• Compare the images to see how focal length changes blur and compression
These small experiments give you the fastest, clearest understanding of how bokeh is created.

Canon has expanded the new generation, L-series range of Hybrid lenses.

Fashion photographer Steven Chee shows how Canon hybrid lenses capture both stills and motion with speed, versatility and style.

Mirrorless vs Cinema Camera: When to Make the Switch