- Using Multiple Flashes by Daniel Linnet
-

Hello!
We've noticed that you are in .
Visit Canon .
Once comfortable with using a single Speedlite off-camera, progressing to a second, third or even fourth Speedlite becomes much easier. Complex lighting setups won’t seem so daunting.
First decide on your basic, non flash exposure. This could be either correctly balanced for the available ambient light or set at a specific exposure to eliminate it. The most important is to decide on what aperture you want to shoot at. This will be your main target around which all the lights will be adjusted. Let’s use f8 as an example:
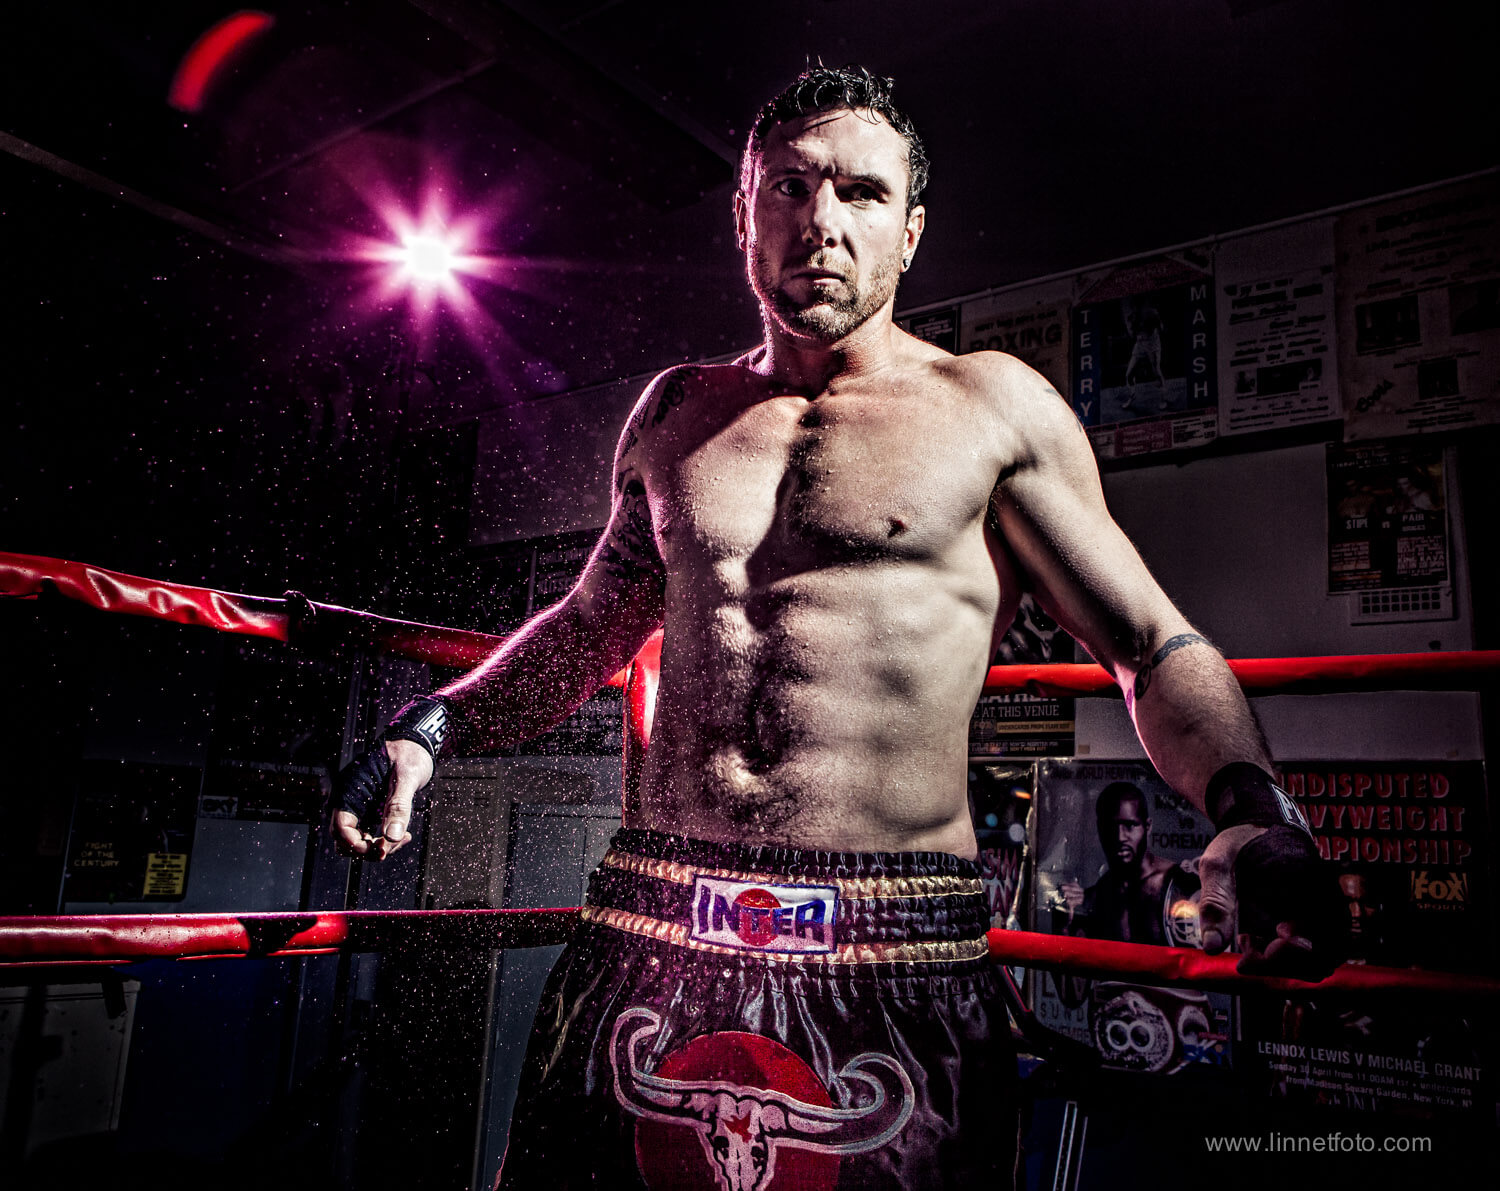
First the base exposure is set to make sure the important detail of the Cocktail sign is retained. Two Speedlites are then turned on and placed just out of frame on either side to create the symmetrical dramatic lighting. The flare was purposely left in the frame to add to the atmospheric quality of the environment.
When setting up multiple Speedlites, I always like to test each one out individually first; fine tuning the position as well as the power to my pre-determined ratio. Take a shot to understand exactly what effect each one has on the composition and the subject independently before switching all on together.
To control and adjust each light individually from your STE-3 Controller or master unit, make sure to allocate each light to it’s own group (A,B,C,D or E)
Start with the placement and adjustment of your main light, the 'key light' (think of it as the sun). Being the main light on the subject, this is normally adjusted to give you your pre-determined aperture (f8, in this case), although it is also common to to go slightly under (up to 1 stop) the base aperture for a moodier result or slightly over ( up to ⅔ stop) for a brighter feel.
Once you have determined the exposure of your key light, you can then then start thinking if you want your other light brighter or darker, and by how much.
When using in ETTL mode, setting the ratios on your controller is as easy as dialling in a +/- EV value for that particular group in relation to the key light. For manual flash adjustment just select the appropriate power value instead (Full, ½, ¼ —> 1/128). For example:

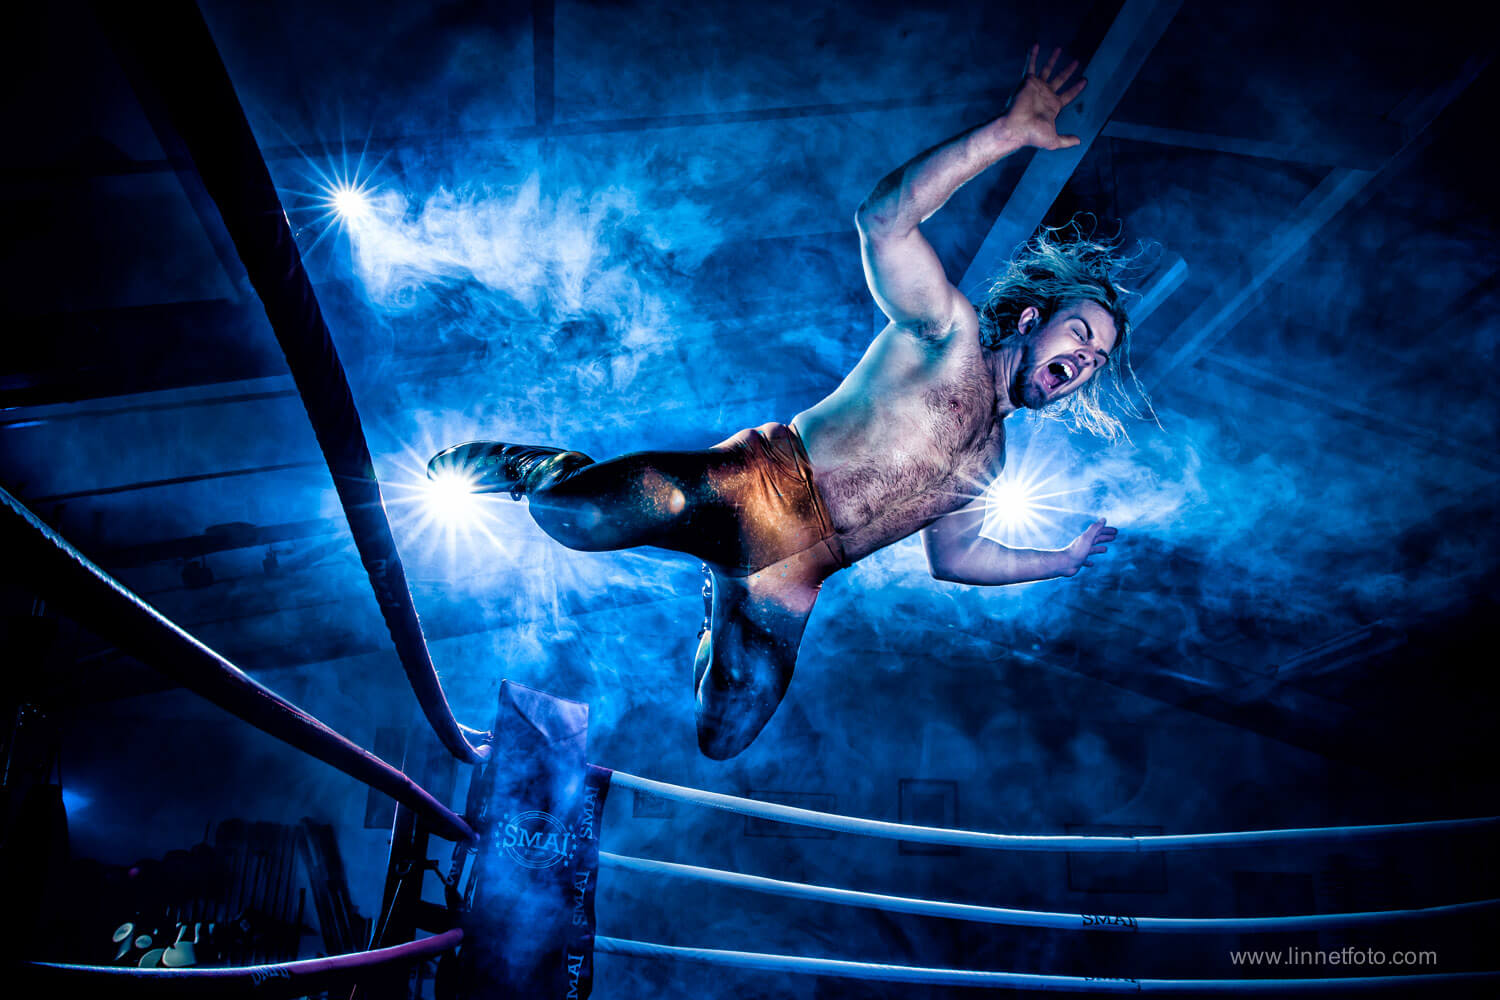
You don’t always need to use shapers and bounce when working with Speedlites off camera. I find that often just a couple of simple bare heads on stands give the most realistic interpretation of a scenario.
The results have more contrast with deep dark shadows.
Two Speedlites are used in a simple configuration. Both are bare heads to achieve the harsh style of arena lighting. Rear light is gelled magenta and aimed at the camera to replicate the feel of being ring side. The rear lighting also helped to highlight the airborne water.
Daniel Linnet is a Sydney based commercial, fine art photographer and educator, specialising in portrait, automotive and the environmental photography. A master of photography with the Australian Institute of Professional Photography, Daniel also founded and runs Sydney Photographic Workshops
Don't forget to check out Daniel’s portfolio and workshops

Learn how to create smooth blurry backgrounds, also known as bokeh, using aperture and focal length. See examples shot on the Canon RF 45mm f/1.2 STM and learn how lens choice affects background blur.

Professional photographer, Logan West shares his journey from a beginner to capturing Porsche's brand new Dakar 911 detailing his top lens picks and what to look for when choosing gear.

Discover the top 5 features of the first RF mount Fisheye lens ideal for creative stills and video creation.

Canon has expanded the new generation, L-series range of Hybrid lenses.

Discover how Open Gate recording on the Canon EOS C50 empowers creators like Moses to shoot once, reframe freely, and deliver across cinematic, vertical, and social formats with ease.

Learn the fundamentals of photography composition with tips on rule of thirds, leading lines, framing, negative space, and more. Community-contributed insights to elevate your shots.

Learn how to capture the night sky with astrophotography tips from Mel White – from dark sky planning to camera settings, gear, and editing.

Discover how three creators – from fashion to filmmaking and action sports – tested the Canon RF 85mm f/1.4L VCM. See how its hybrid design, f/1.4 aperture, and VCM autofocus redefine what an 85mm lens can do.

Prime lenses ideal for producing high-quality, sharp images with better low-light performance making these types of lenses perfect for portraits and travel.

Discover how travel photographer TK North captures compelling images with these six photography tips. Learn how the Canon EOS R6 Mark III helps him travel light, stay creative, and shoot anywhere with confidence.

Canon Photographer Scott Stramyk shares his pro tips for getting more out of your next fashion shoot