
- 10 photography tips and best locations to capture Vivid Sydney
-
Canon Group
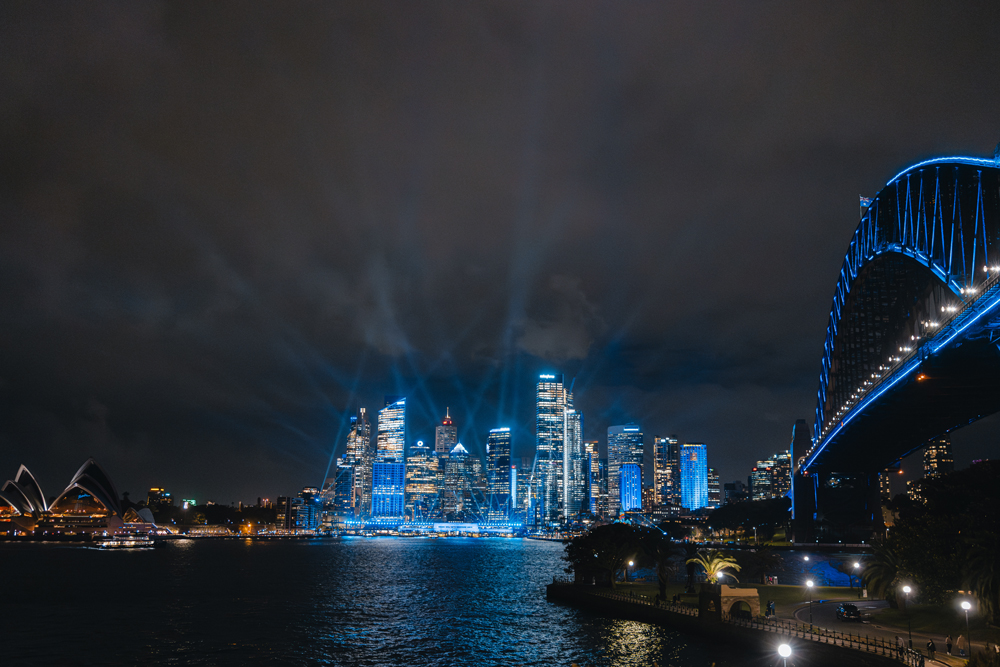
The annual Vivid Festival is back for 2026 – bigger and better than ever before! Vivid Sydney has become one of Australia’s top winter attractions. Transforming the Harbour City into an illuminating fusion of creativity, innovation, and technology, Vivid Sydney is a guaranteed paradise for photographers of all abilities.
Henry (@jujushoots), Sydney photographer and creator, along with Canon Ambassador and creator Wil Calabio, have pulled together these photography tips to help you hit the ground running once you arrive at the festival.
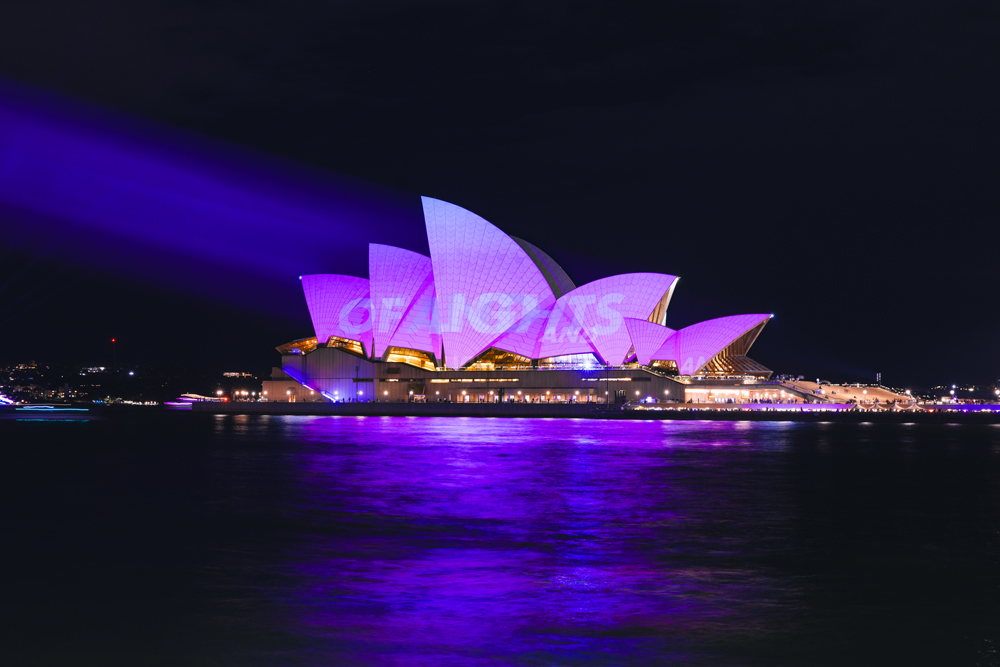
One of the easiest ways to double your visual impact at Vivid Sydney is to use reflections. Whether you’re by the harbour or on rain-slicked streets, getting low helps you align your camera parallel to the reflective surface, creating beautiful symmetry. Reflections are especially powerful at Vivid, where bold colours and intricate light installations bounce dramatically off the water. It’s a great way to maximise composition and add depth, especially around areas like Darling Harbour, Circular Quay, or Barangaroo. Look for still water, or shoot longer exposures for cleaner mirror effects.
When to use:
When shooting near still water, puddles, or reflective surfaces - especially after rain or during still weather.
Try these camera settings:
• Mode: Manual (M)
• Aperture: f/8–f/11
• Shutter Speed: 1/4s or longer for reflections
• ISO: 100–400
• Focus: Spot focus on subject
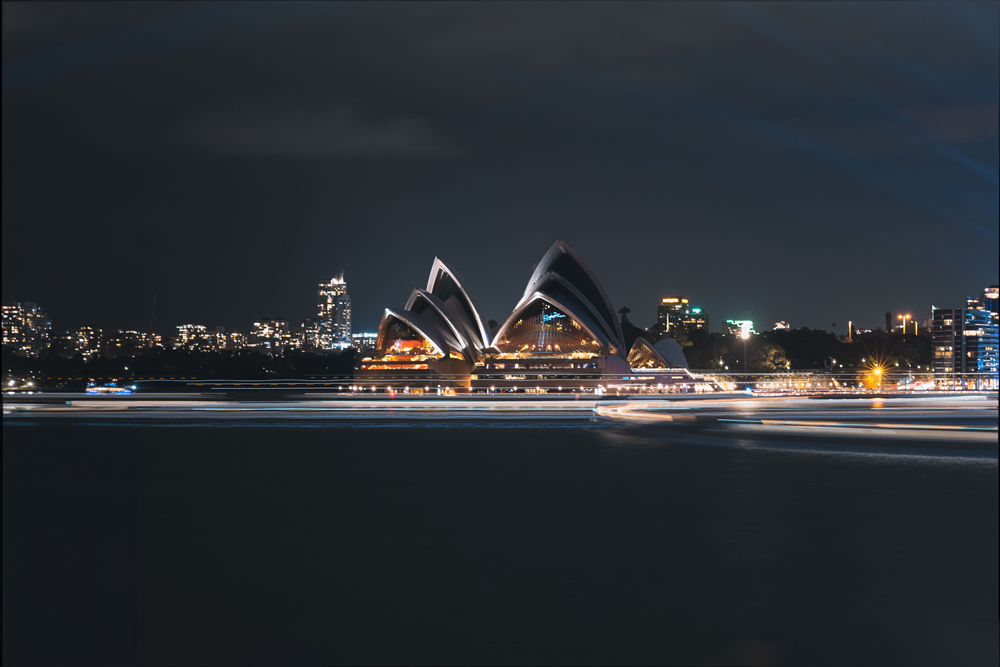
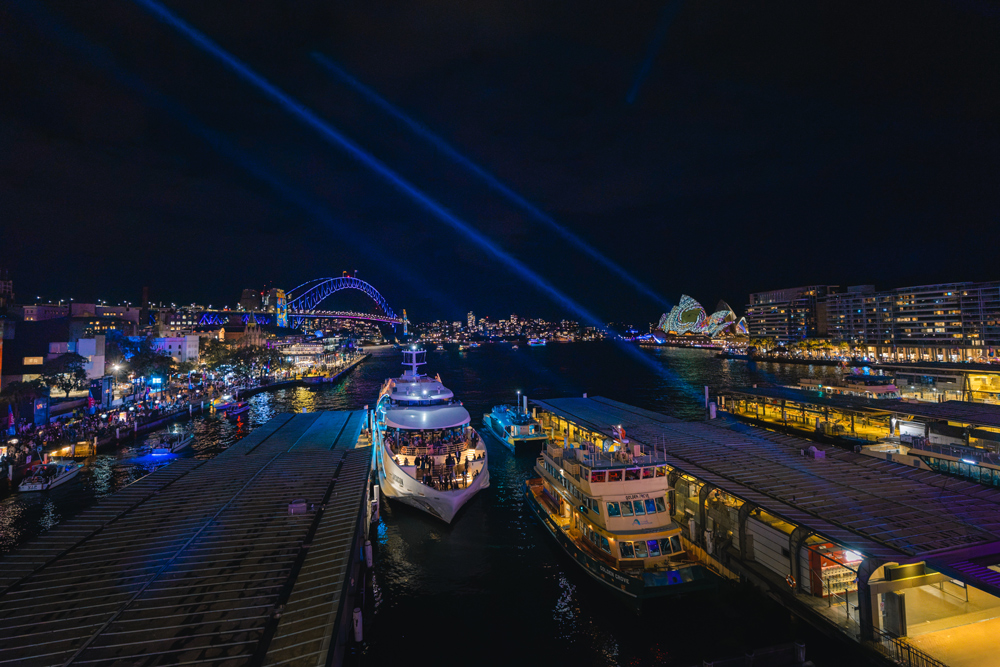
Vivid Sydney is full of movement - from ferries and buses to foot traffic, and all that motion becomes a canvas for creativity. Using long exposures, you can transform moving lights into elegant streaks that add drama and storytelling to your shots and subject. It’s perfect for creating high-impact compositions, particularly when static buildings or structures contrast with dynamic light trails. Consider using a remote shutter or a 2-second timer to avoid camera shake.
When to use:
When photographing roads, headlights, or large pedestrian flows; especially in areas with consistent motion or ferry terminals.
Try these camera settings:
• Mode: Manual (M)
• Aperture: f/8–f/11
• Shutter Speed: 10s or longer
• ISO: 100–400
• Focus: Manual or spot focus
When on foot, capturing candid shots or in areas where tripods aren't allowed - understanding how to shoot handheld will come in handy in these situations. Fast aperture lenses (f/2 or wider) allow more light into the camera, enabling handheld shooting in low-light conditions without increasing ISO excessively. This is ideal for capturing spontaneous moments during the festival.
When to use:
For candid street photography or when tripods are impractical.
Try these camera settings:
• Mode: Aperture Priority (AV)
• Aperture: f/2 or below
• Shutter Speed: Auto (minimum 1/100s recommended)
• ISO: Auto
• Focus: Zone or Servo tracking spot

Some installations at Vivid feature strong, concentrated light sources; like light bulbs, lamps or LED elements. By narrowing your aperture (typically f/16 or lower), you can create beautiful sunstar effects, where the light rays fan out around the source. It’s a simple way to add sparkle and sophistication to your images, especially when shooting directly at bright points of light.
This works best with static subjects and long exposures, so set your camera on a tripod and use a slower shutter speed to compensate. Look for distinct light sources like street lamps or installations to get that striking “sunstar” effect.
When to use:
When bright, isolated lights are visible; particularly from lamps or installations with multiple LEDs.
Try these camera settings:
• Mode: Manual (M)
• Aperture: f/16 or lower
• Shutter Speed: Keep on auto
• ISO: Keep below 800
• Focus: Manual or spot focus
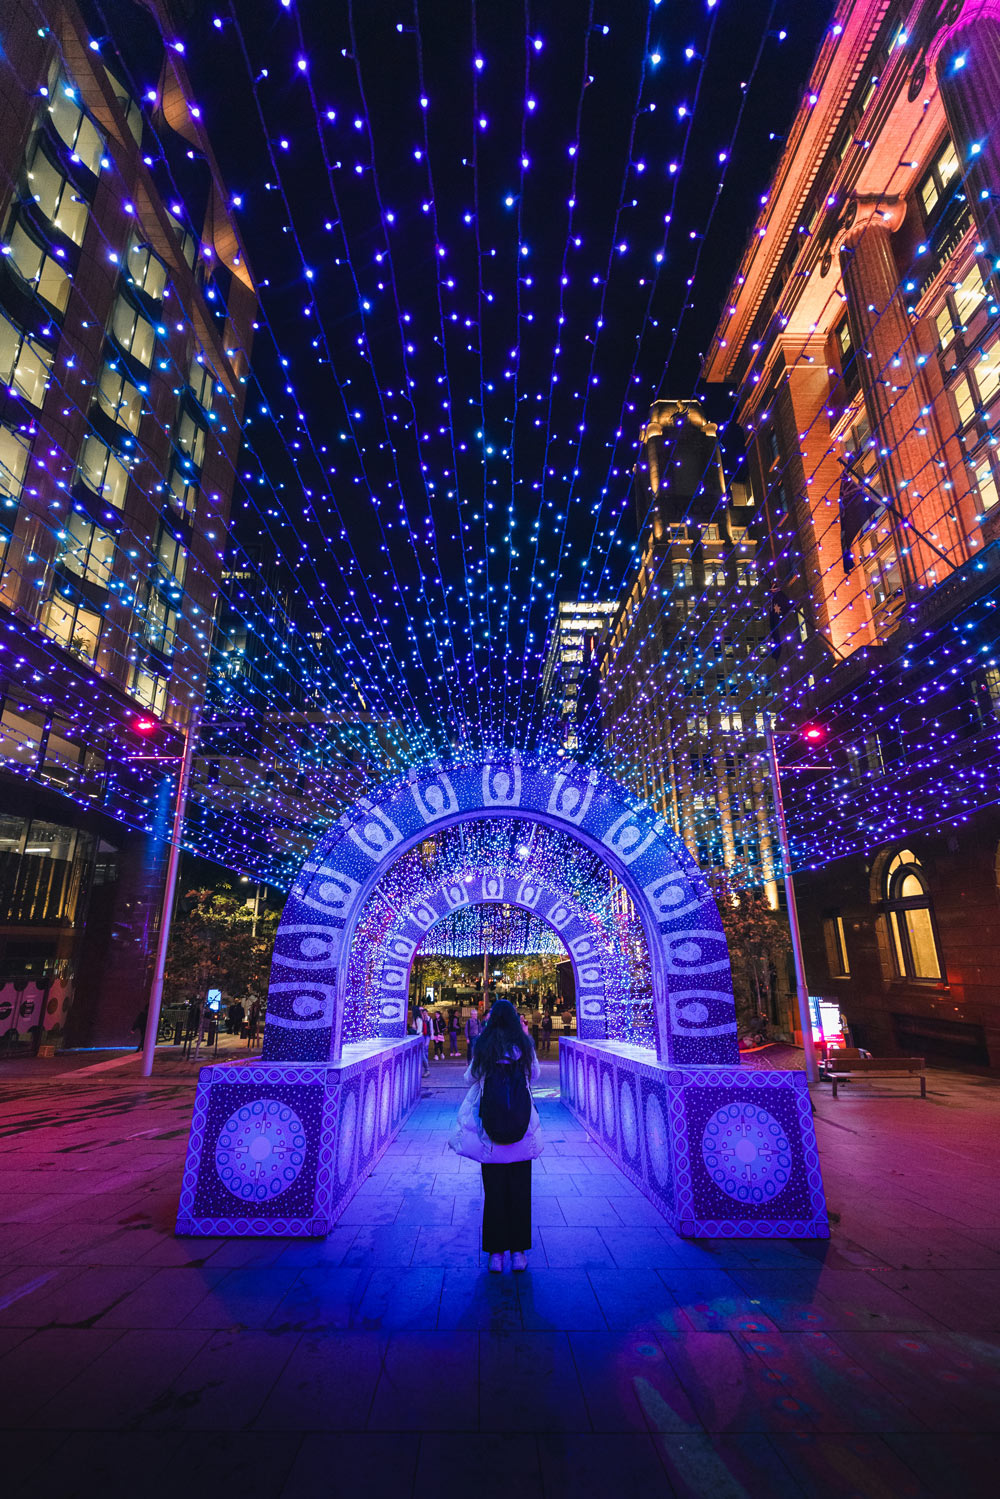
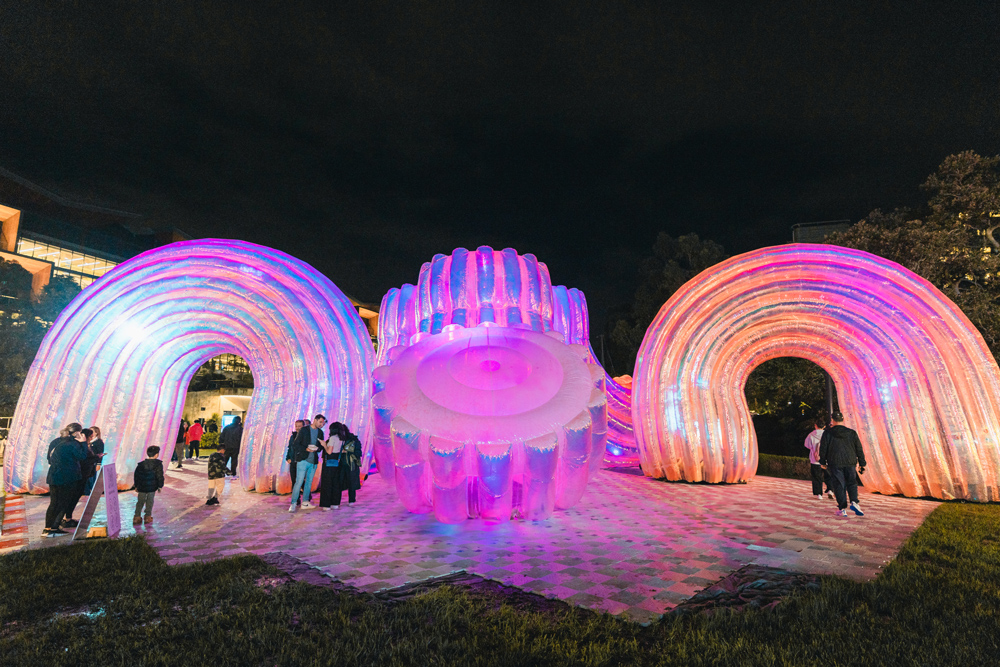
Light alone can be mesmerising, but adding people to the frame brings emotion, interaction, and a sense of human scale. Vivid Sydney’s interactive installations are perfect for this. Capturing someone reaching out to touch light or walking through an illuminated tunnel adds a narrative layer to your shots. It’s also an effective way to convey the size and immersive quality of the displays.
Consider experimenting with silhouettes or backlit shots by exposing for hihglights manually, or via exposure compensation where a subject is backlit against a lighting installation to create a silhouette effect.
When to use:
At installations where people are engaging with the artwork or where scale is hard to gauge without a human figure.
Try these camera settings:
• Mode: Aperture Priority (AV) or Manual (M)
• Aperture: f/5.6 or below
• Shutter Speed: Minimum 1/100sec
• ISO: Try and keep it as low as possible
• Focus: Auto
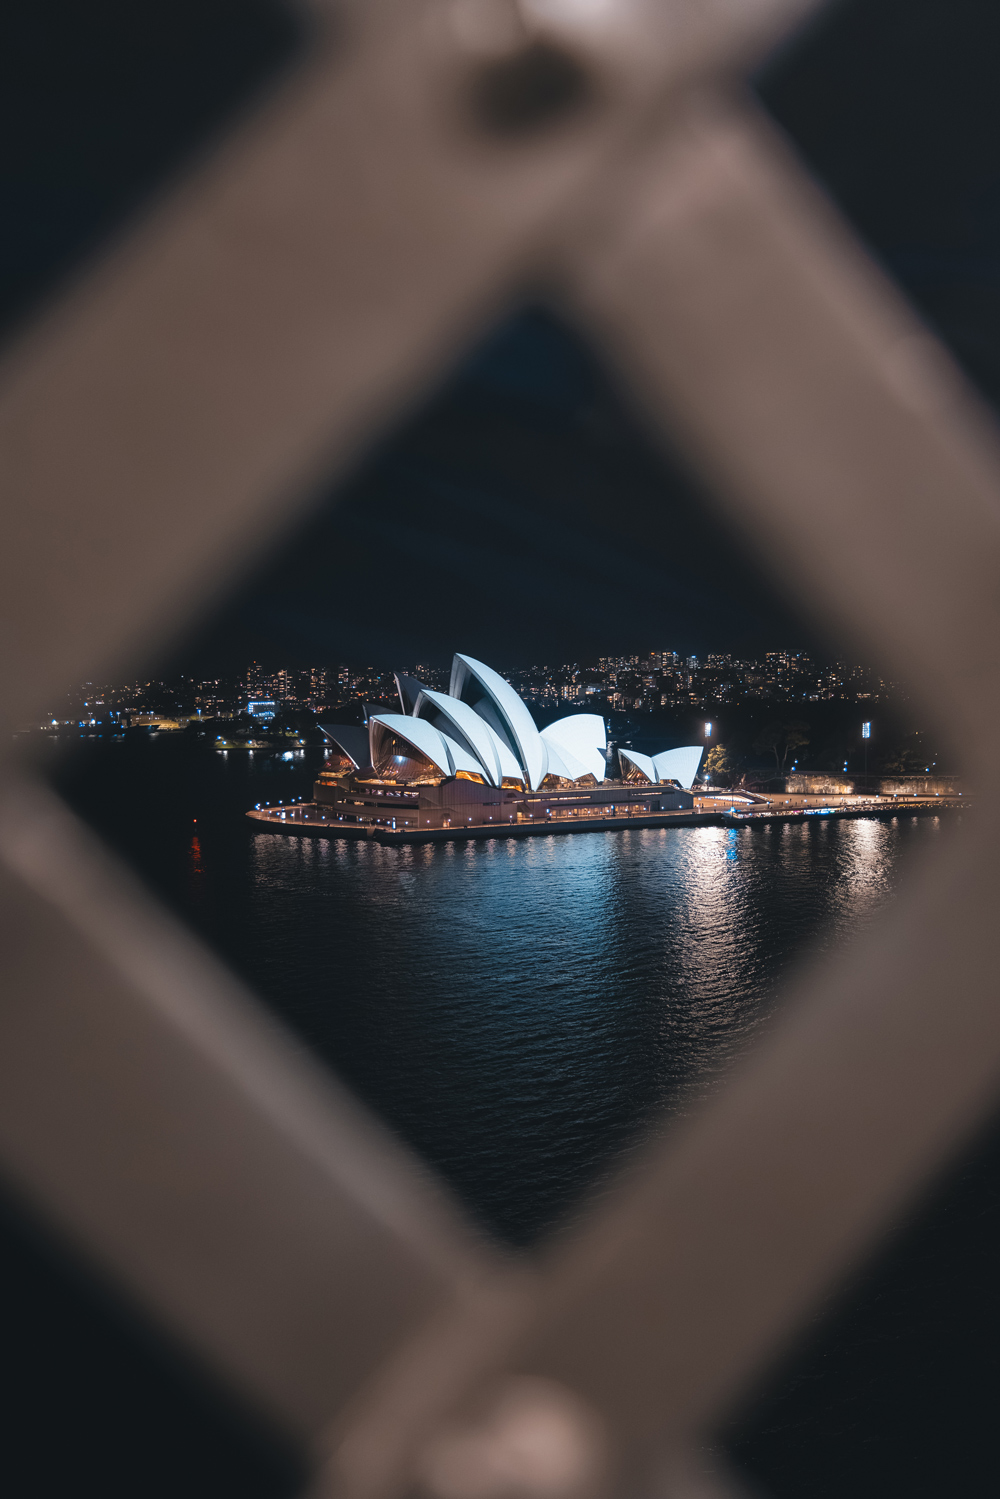
Framing your subject with elements from the environment is a powerful way to draw the viewer’s eye and create more dynamic compositions. Whether you’re photographing a vibrant Vivid installation, an interesting building, or a person, using natural or structural frames can add depth and a sense of story to your shot. Look for things like trees, leaves, fences, poles, archways, or windows to create that frame within the frame.
Try crouching down or shooting across puddles for creative reflections. Steer clear of walking paths to avoid water ripples, and if you're working with tricky lighting, bracket your shots to cover a wider exposure range.
When to use:
When natural or structural elements can be used to frame your subject, adding depth to the composition.
Try these camera settings:
• Mode: Auto
• Aperture: f/5.6 (to keep both frame and subject in focus)
• Shutter Speed: Auto
• ISO: Auto
• Focus: Spot focus on the subject
Don’t stop after capturing a shot you had in mind at any one scene or lighting installation. Using different focal lengths can provide various perspectives of the same subject. Wide-angle lenses capture the scale of installations, while telephoto lenses can isolate details and textures. This approach adds variety to your photo collection.
When to use:
When walking between major installations or in quieter areas where ambient light adds subtle drama.
Try these camera settings:
• Mode: Manual (M)
• Aperture:f/5.6
• Shutter Speed: 1/60–1/200 sec
• ISO: 800–3200
• Focus: Spot Auto or Manual for trickier lighting conditions and up close shots.
Bracketing helps you capture the best of both focus and exposure, especially useful for high-contrast scenes at night. Exposure bracketing blends multiple images at different exposures to retain highlight and shadow detail in installations or bright light sources. Focus bracketing is perfect for close-up shots of artworks or installations with shallow depth, letting you capture sharpness from front to back. This technique is ideal when you want every detail in focus or need to balance uneven lighting across a scene. Use a tripod to maintain composition across all bracketed shots.
Exposure Bracketing (AEB) helps balance highlights and shadows in high-contrast scenes. Great for preserving detail in light installations.
Focus Bracketing is useful when shooting close-ups at night with shallow depth. Ideal for product-style shots of art pieces or installations.
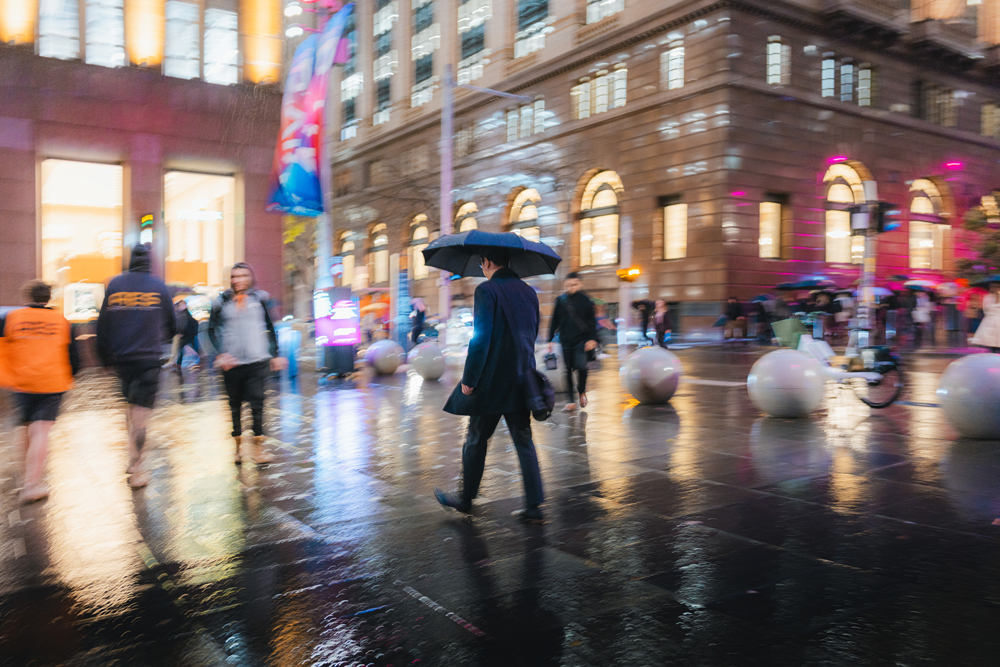
Panning lets you freeze your subject while blurring the background lights, creating a dynamic, energetic image. Use this for people walking, cyclists riding past, or performers moving through illuminated areas. It’s a creative way to show movement while still capturing the atmosphere of the scene. To pull it off, move your camera horizontally at the same pace as your subject, keeping them in the same part of the frame throughout the exposure.
Use a slow shutter speed (around 1/8 to 1/2 second), and follow a moving subject to blur the background lights while keeping the subject sharp. When shooting, pan and move your camera at the same speed as the subject - keeping them centered.
Suggested camera settings:
• Mode: Manual (M) or Shutter Priority (TV) with high burst
• Aperture: f/8 or above for deeper depth of field focus
• Shutter Speed: 1/15s or slower
• ISO: 100–800
• Focus: Servo spot tracking focus
Research the installations you want to photograph and plan a shooting route. Arrive early to scout locations and avoid crowds. Start from the installation you want to see most first and work your way gradually through each spot. Arrive early (around sunset) to scout spots and beat the crowd. It's recommended to avoid weekends if you’re not a fan of being packed with the crowds!
Bring a reliable camera bag or sling, comfortable shoes for a night of walking and pin all your locations ahead of time.
Cameras:
Canon EOS R5 Mark II and EOS R6 Mark II are great low-light performance, with advanced autofocus, in-body stabilisation, and bracketing features perfect for tricky lighting.
Lenses:
Wide-angle lenses are ideal for reflections and light trails
• RF 16mm f/2.8, RF 24mm f/1.4, RF 15-35mm f/2.8
Standard zoom are versatile for framing and shooting subjects
• RF 24-70mm f/2.8, RF 28-70mm f/2
Fast primes are great for handheld, low-light shots
• RF 35mm f/1.4, RF 50mm f/1.2 L USM
Telephoto for range of focal lengths and isolating details
• RF 70-200mm f/2.8, RF 24-70mm f/2.8
Follow Henry to see more of his work:
Instagram: https://www.instagram.com/jujushoots
Website: https://www.jujushoots.com/about
Follow Wil to see more of his work:
Instagram: https://www.instagram.com/itizwil
Be sure to tag #CanonANZ and @canonanz in your Vivid Sydney photos on socials:
Instagram: https://www.instagram.com/canonanz/
Facebook: https://www.facebook.com/canonanz/
TikTok: https://www.tiktok.com/@canonanz

To celebrate the end of the year, We’ve chosen 10 of our favourite images shared by the Canon Collective Facebook Community. The quality of imagery and discussions shared in the group continues to impress and inspire us everyday!


Travel and photograph your way through the vivid colours of India with these essential tips from travel photographer, Melissa Findley.


