- Capturing Sunbursts in Photography
-

Hello!
We've noticed that you are in .
Visit Canon .
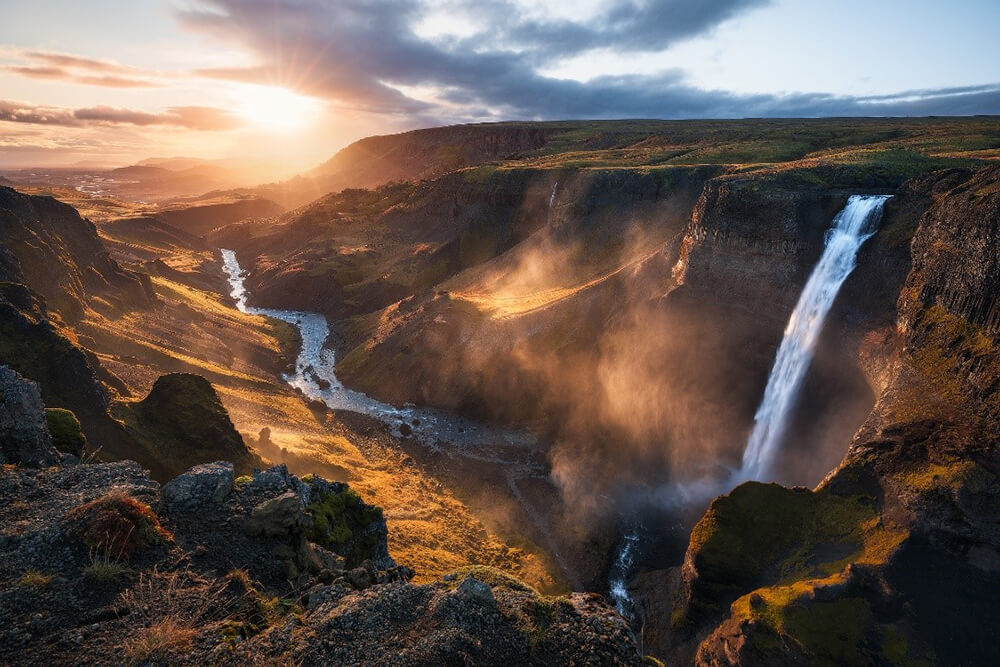
Creatively using the sun to make sunbursts can make an amazing addition to your photos. Here, photographer Daniel Tran takes you through some practical tips on how to perfect sunbursts from your camera. The great thing is that you don’t need to be a photoshop wizard to create this eye-catching effect.
The sunburst effect is created from pointing your lens at a bright source of light such as the sun. As the light passes through the aperture blades of a lens, it renders the sun’s rays in a star like shape with points of light radiating out from the centre.
The effect can create a strong focal point and add another element of interest to your photos but it’s important to understand when and when not to utilise sunbursts in your image. You can do this by quickly reviewing your photo while on location and if you feel that something is missing then a sunburst can be a nice addition to make your photos more impactful. Keep in mind, these techniques can also be replicated for strong light sources at night for a creative effect.
• Aperture – The first and one of the most important steps to achieving the effect is to have the right camera settings and in particular the aperture. The smaller the aperture the more pronounced the sunburst effect will appear in your photo. At times a big sunburst can be a distraction so a smaller aperture like f/22, might not always be the best setting to use. Generally, an aperture setting between f/11 to f/18 will be enough to produce the desired effect. One thing to also keep in mind is that you will start to get more diffraction which causes the light to spread, the smaller you go with the aperture which will result in your images appearing softer. Personally, my preferred f-stop for sunbursts is f/14.
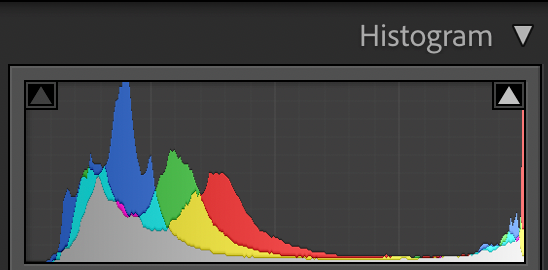
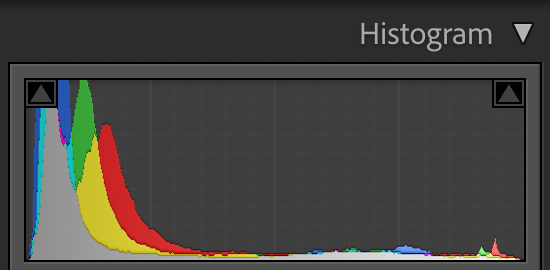
• Shutter speed – You will need to keep a close eye on the exposure and histogram as it can be quite easy to overexpose the photo with the light changing rapidly. Ideally, aim to underexpose the photo by a stop or two. Adjust your shutter speed accordingly. Keep an eye on the shadows and try to avoid any clipping by reviewing the histogram. You can then recover the darker areas in the scene with your preferred photo editing software by simply lifting up the shadows.
Clipped Histogram
Ideal Histogram
• ISO – Always use a low ISO setting such as ISO 100 for the cleanest image as it will help reduce any noise in your images and maximise the dynamic range of your camera. This is important as you will be shooting directly into the sun and the scene will most likely be of high contrast. It’ll become useful when editing your photo in post-production as you will have greater ability to retain the detail in the shadows and highlights.
One thing to keep in mind is that not all lenses are created the same and that each lens will render a differently shaped sunburst, with some lenses handle lens flare better than others. The lens you shoot with can make all the difference and it’s best to experiment with a variety of lenses to find what works best for you. Take for example the blade count of your lens aperture assembly which produces different effects. When you use a lens with an even number such as eight blades, this will render a sunburst effect with eight rays. On the other hand, when using a lens which has an odd number of blades such as nine, the effect is doubled to render eighteen rays from the light source you are photographing. Typically, the pro series line up of lenses such as the Canon L series will handle sunbursts better and render a more clearly defined and crisper sunburst. Canon's recommended lenses to shoot sunburst with are the RF 10-20mm f/4L IS STM or RF 15-35mm f/2.8L IS USM, which both consist of nine aperture blades and causes the rays to spread more.
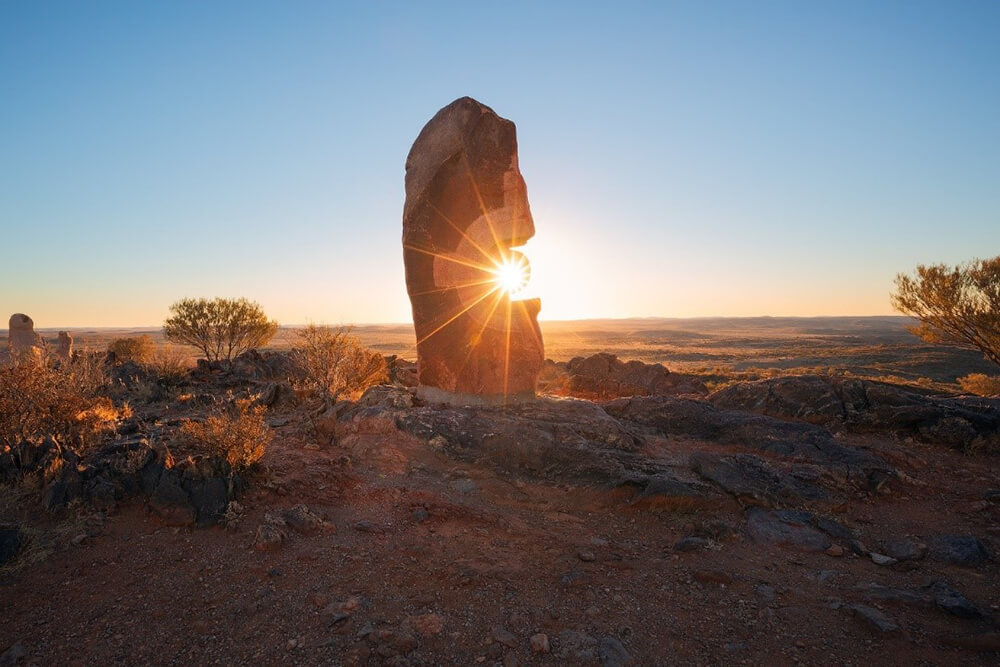
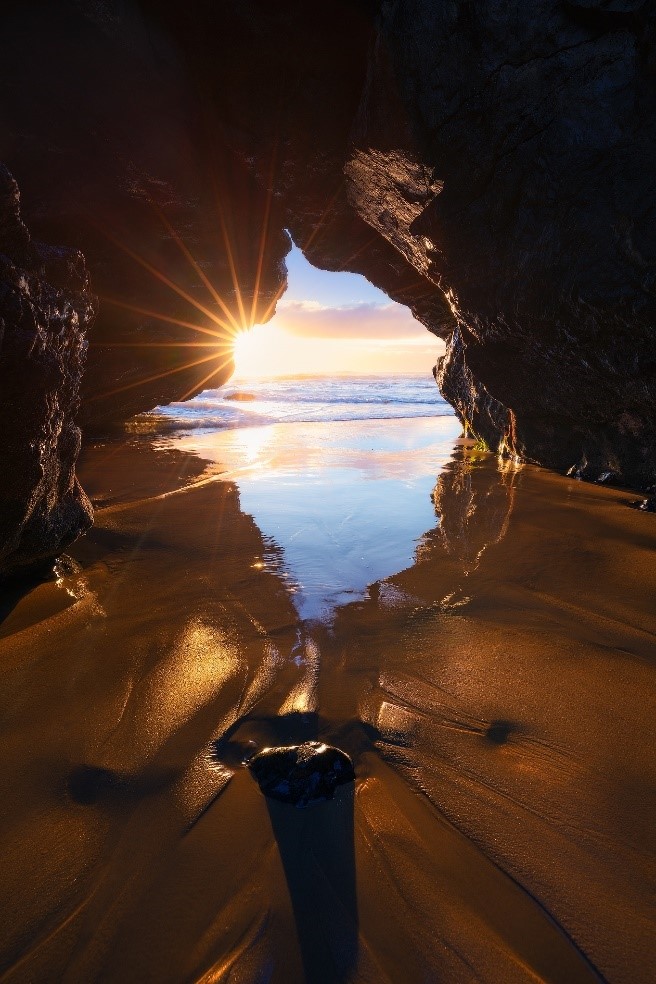
If you can place the sun so it is being partially blocked by something, this will often produce the best results. Anything such as trees, rocks, mountains, buildings or even clouds will do the trick. You may need to move around to find the best angle and to line up the sun, so it is just in the right position. A tripod can often be useful in these situations.
While it’s entirely possible to capture great images of sunbursts during the middle of the day when the sun is high in the sky. The ideal time to shoot sunburst is during golden hour when the sun is rising or setting behind an object as the light will be softer and this type of light will add more impact to your photos.
It’s important that the air quality is clear when attempting to capture any sunbursts. Any conditions such as haze, fog or smoke in the air can have an impact and reduce the clarity of the sunburst effect.
If you want to save yourself a lot of time on editing, be sure to clean your lens beforehand and try to avoid using any filters when shooting sunbursts to avoid any unwanted lens flares. Any dirt or dust spots on lenses will become much more noticeable when shooting directly into the sun and can be extremely challenging to remove in post-production.
By using these techniques, you’ll in no time be able to take your photography to the next level and capture some great sunburst images.
Discover more photography tips and tutorials.
Find out more about Daniel Tran.

Anthony Gordon's Photographic Space Mission with the JAXA Space Agency
.ashx?mw=600&hash=F07250534B4602DE7B8645C4CE8783A6)
Cancer positively changed the Kayakcameraman, Paul Jurak’s, life in more ways than he could have imagined.

Aquabumps founder Eugene Tan reveals his life and business as a photographer capturing Australia's oceans and beach culture.