
- Bird Photography Tips and Techniques with Greg Sullavan
-

Hello!
We've noticed that you are in .
Visit Canon .
Canon Photographer and AIPP Master Photographer Greg Sullavan has dedicated his life to travel and nature photography. Here he shares his professional bird photography tips, revealing everything from his recommended camera gear and settings to the techniques he uses to get the most out of each and every shoot.
“On my very first birdwatching trip to O’Reilly’s Plateau in Lamington National Park I spotted an eastern yellow robin, a whip bird, and a nesting satin bowerbird. I was immediately captivated and have been using my camera to celebrate these beautiful little creatures ever since.”
Greg Sullavan
Whether you dream of becoming a full-time bird photographer yourself or are simply looking for advice on taking more compelling shots of your ornithological adventures, this is everything you need to know.
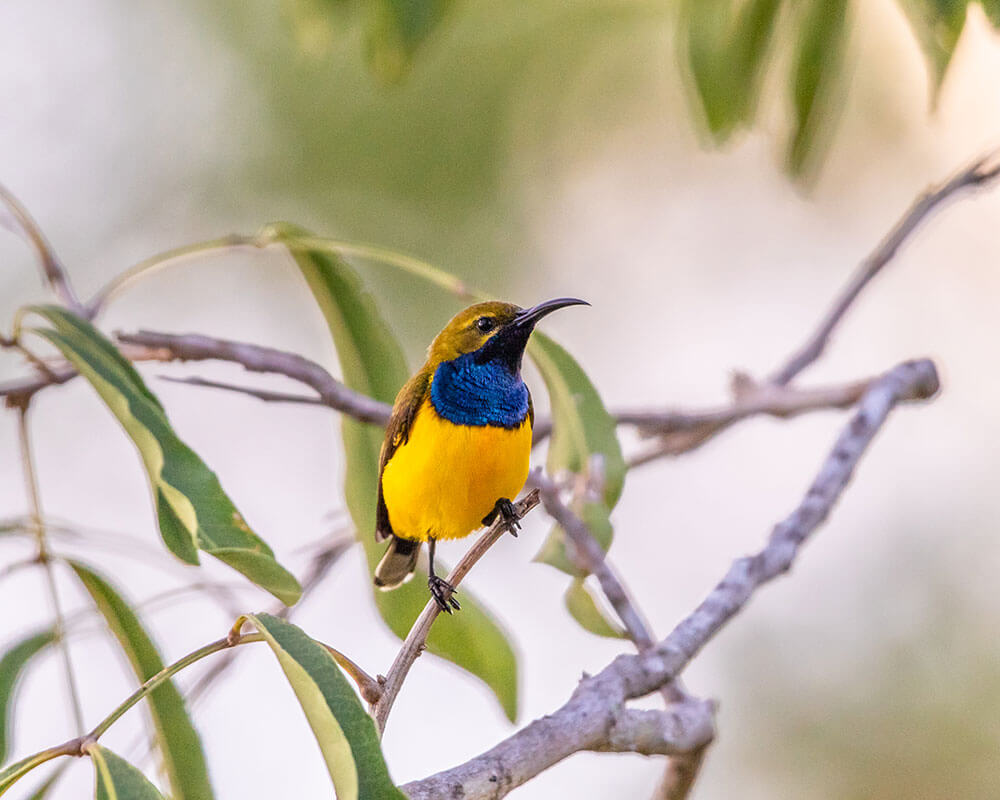
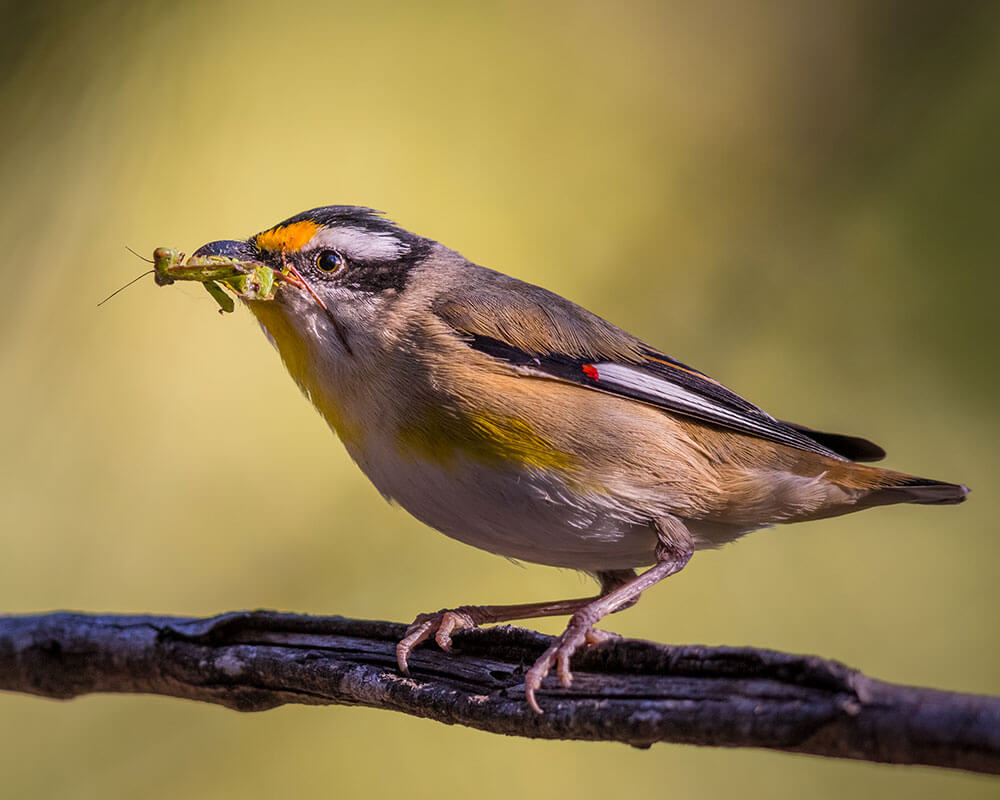
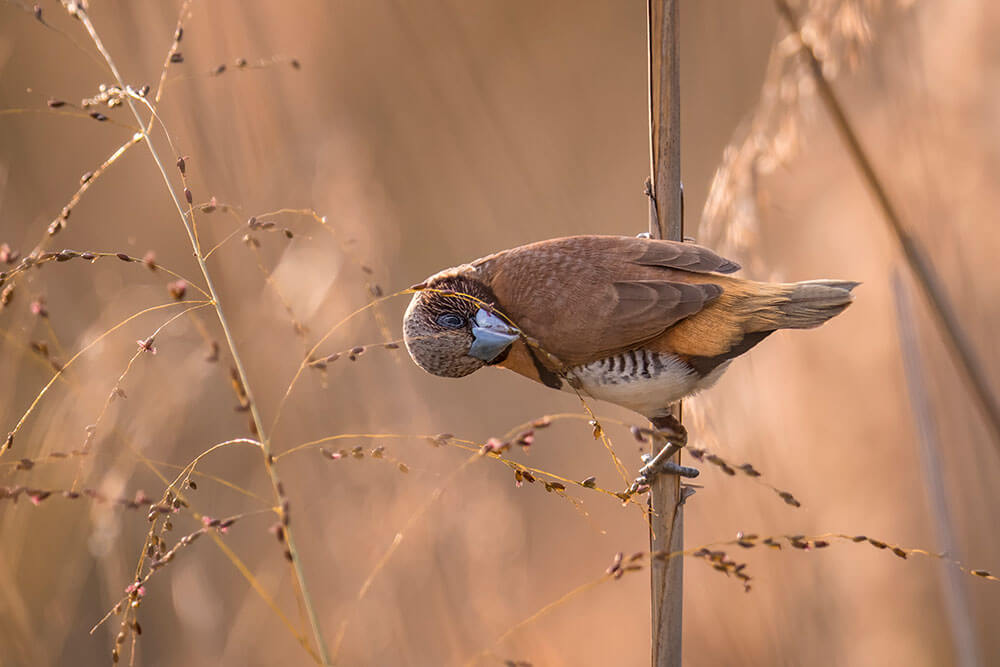
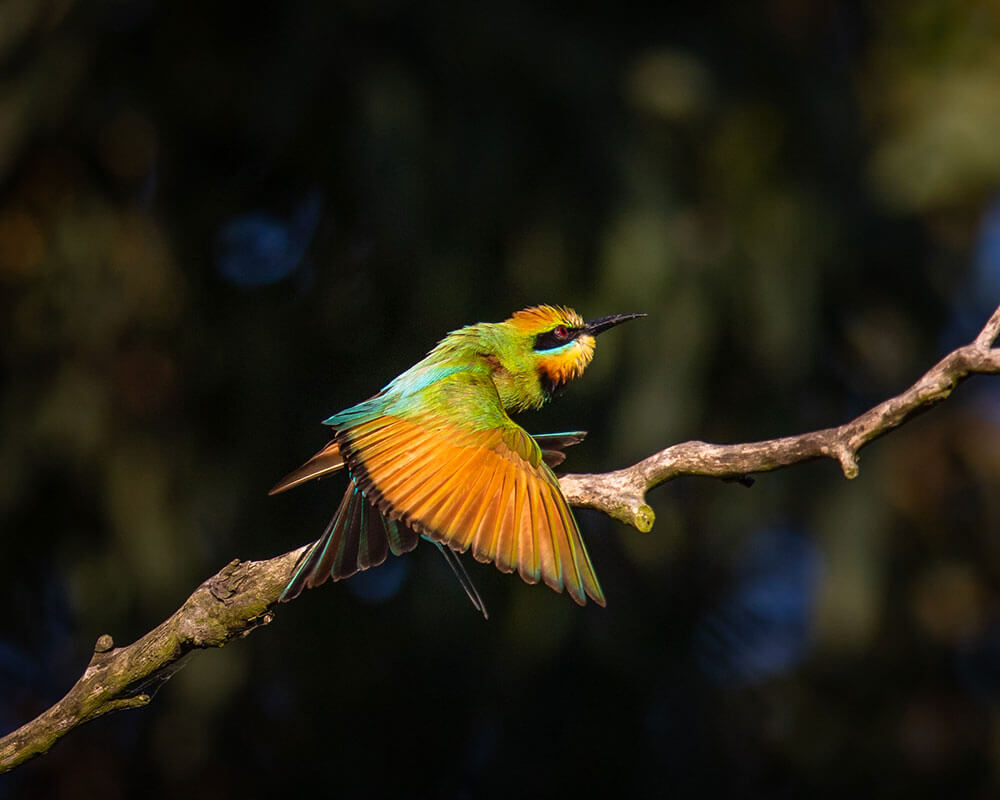
“I try to shoot every week and especially enjoy photographing the rarest and most difficult-to-spot birds, such as rainbow bee-eaters, finches, mannikins and robins.”
Greg Sullavan
By pure coincidence, on my first ever bird watching outing at O’Reilly’s Plateau in Lamington National Park I met a local ranger by the name of Glen Threlfo. Little did I know that he was a living treasure with decades of experience in the Australian wilderness. Glen took me on a walk along the Booyong Trail, where it quickly became apparent just how difficult it is to photograph such small, unpredictable subjects in the wild. But it’s these challenging conditions, and the feeling you are rewarded with when you get a great capture, that make bird photography so special.
Primary factors to consider when investing in bird photography camera gear would be size, weight and cost. Secondary factors would also include weather sealing, low-light performance, number of pixels, focussing system, overall sharpness and frame rate.
“With bird photography, there’s no such thing as too much zoom.”
Greg Sullavan
Every bird photographer will offer you different advice on the best type of kit to use, but one thing we will all agree on is that you need a good zoom lens. These fast-moving airborne creatures are not going to eat out of your hands, so you’ll want to be able to zoom in close to fill the frame with your subject.
My favourite lens for bird photography is the Canon professional-grade EF 200-400 F4-5.6L super telephoto lens. It has a constant f/4 max aperture and built-in 1.4x extender, allowing you to increase the focal length up to 560mm. It has excellent image stabilisation which ensures your shots are always tack sharp, and it doesn’t drop any frames when shooting in burst mode. Also, because it has near-silent ultrasonic autofocus, you don’t have to worry about scaring off any would-be subjects.
Canon EOS 1DX Mark II: My preferred bird photography camera setup is the Canon EOS 1DX Mark II with the EF 200-400 F4-5.6L. This camera has 63 focussing points, shoots 14 frames per second in RAW and has full weather sealing, making it ideal for shooting outdoors in all conditions.
Canon EOS 7D Mark II: I also recommend the Canon EOS 7D Mark II paired with the EF 100-400 F4.5-5.6L II, which will give you a 1.6x focal length extension, compliments of the APS-C type sensor. The benefit is that you won’t lose any f-stops of light when using an extender. This represents a combination of good performance and value, with money left over for matching camo gear. The 7D Mark II also has weather sealing, shoots at 10 frames per second and features 65 focal points. It’s not as fast as the 1DX Mark II, but it can drive Canon’s professional telephoto lenses and will also work with the Canon 1.4X extender.
When you’re getting started with bird photography, I suggest using Shutter Priority mode (Tv) and auto ISO to let the camera help with the technical stuff. Simply choose your desired shutter speed and the camera will automatically select the best aperture and ISO for the lighting conditions. I recommend a shutter speed of 1/800th as a good place to start with bird photography, as this will allow you to freeze motion and ensure sharp images.
Ready to move on from Shutter Priority mode (Tv)? Switch to full Manual mode for full control over your ISO and aperture, as well as your shutter speed.
ISO: In daylight hours you should stick to a low ISO of around 100 or 200 to avoid introducing grain to your images. With bird photography we need to maintain a high shutter speed (around 1/800th to 1/4000th), so you will likely need to increase your ISO to achieve proper exposure in low light conditions.
Aperture: Your lens’ aperture number, or f-stop, controls the amount of light that enters your camera. It also controls depth of field. An aperture of f/2.8, for example, will allow more light to hit your camera’s sensor in less time than an aperture of f/10, which is great for freezing motion when photographing birds in flight. A low f-stop number will also create a shallower depth of field and a creamy background blur known as ‘bokeh, which helps to make your subject (i.e. the bird) stand out from the background. Note that most lenses are sharpest at around two stops down from wide open. For example, a lens with a maximum aperture of f/4 will be sharpest between f/8 and f/11.
Once you have dialled in your camera settings, your job is to become a master of exposure compensation. This means looking at the camera’s light meter reading recommendations and thinking about making the image brighter (+1, +2, +3 stops) or darker (-1, -2, -3 stops) depending on the result you would like.
Most cameras have the option of changing the auto focus from ‘One-Shot AF’ to ‘AI Servo AF’. This will allow you to continuously focus on moving birds, tracking them and maintaining focus as they move. Many photographers prefer to use ‘back button focus’ and only use the shutter release button to take the photographs in short bursts, with the drive mode set to ‘High Speed’.
Most modern DSLR cameras have a high number of focussing points—as many as 65. A standard focussing point will scan for contrast to latch its AF onto from side to side. A ‘cross type’ focal point will also scan for contrast up and down. Finally, a ‘dual cross-type’ focal point adds a diagonal x to the equation. With all your focal points activated, tracking a bird in flight is much easier than you might imagine. However, it gets harder when you are shooting a small bird moving quickly between the branches of a tree, for example. In this situation it would be better to use a single focussing point.
Selecting the right metering mode can also play a big part in your camera making the right choice in regards to exposure. My suggestion is to use the ‘Spot Metering’ mode, which offers pinpoint precision and will give you the most consistent results. It is worth noting that the camera’s built in light metering system divides an image into 252 zones to create an exposure that represents 18% grey. If you have a single focussing point dropped onto the eye of a bird, for example, then your camera won’t need to consider the ambient light in the background.
The ‘rule of thirds’ isn’t the only game in town when it comes to bird photography composition. You can also implement the ‘golden ratio’, ‘fibonacci spiral’ and even ‘magic triangles’. Here are the rules I personally follow when photographing wildlife. But as always with photography, remember that the rules are there to be broken, so don’t be afraid to experiment and develop your own style.
1. Avoid including anything man-made in your bird photography images as it ruins the romance. Bird photography is, after all, a form of nature photography.
2. Use the full zoom of your lens range when possible. The depth of field compression will help isolate your subject and give the illusion that the background is close behind it.
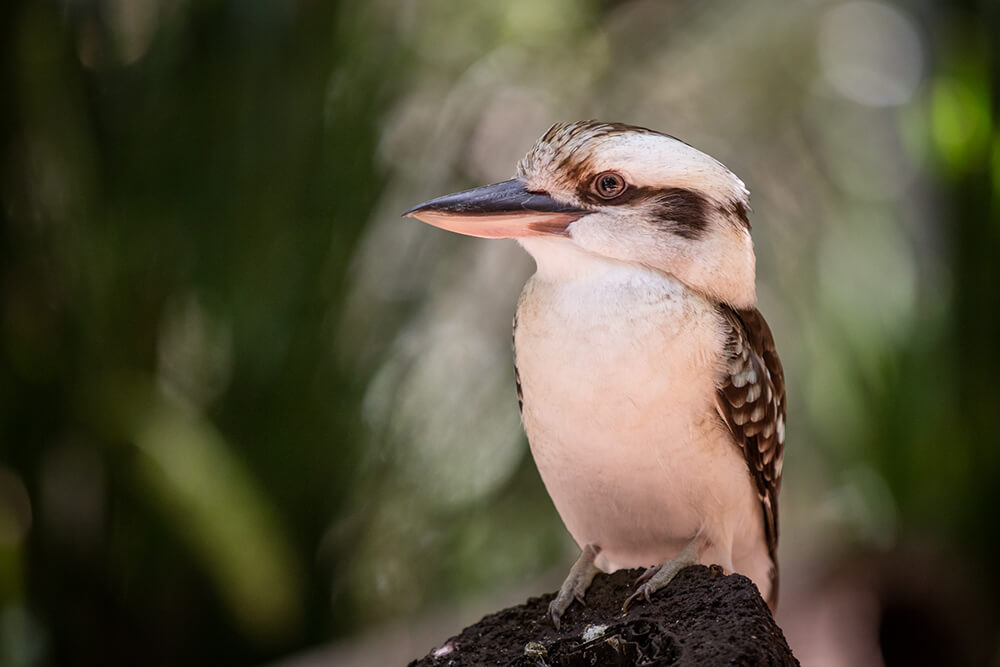
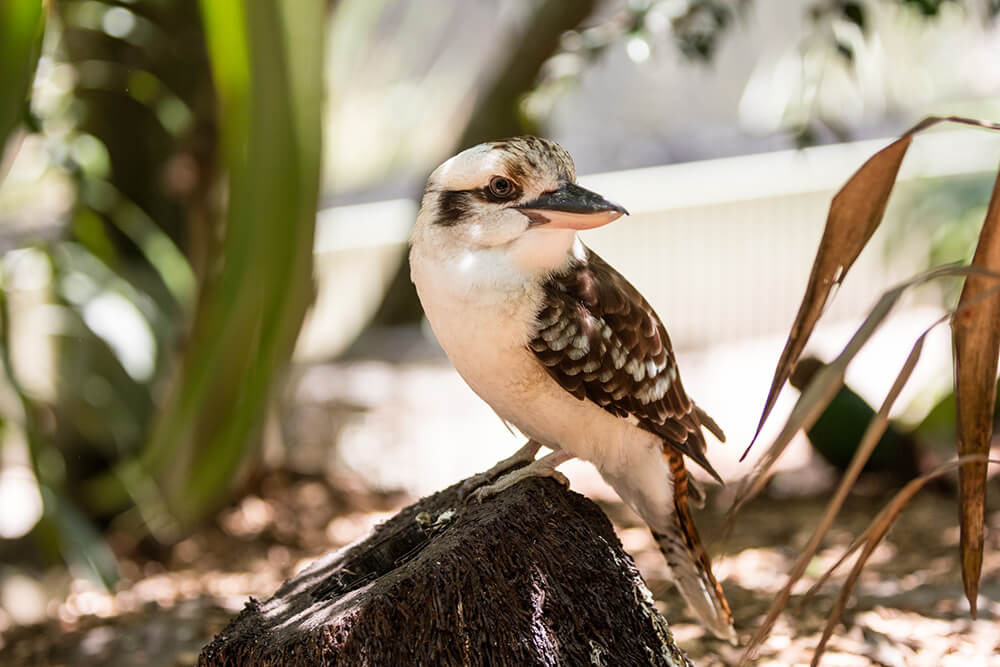
3. Try to shoot your subject against a clean background and always try to avoid unnecessary clutter. The example photographs below are of the same kookaburra, but taken from a slightly different angle. Note the cleaner background of the first image, as well as the depth of field compression and absence of man-made elements.
4. Lighting will make or break your photograph so it’s important to choose the right time of day for your shoot. For example, light in the late afternoon or early morning will add rich, warm colours and depth to your subject.
5. Birds are usually most active at sunrise and sunset, so always try to make your shoot to coincide if possible.
6. Spring is probably the best time of year for bird photography as this is typically when birds display their colourful breeding season plumage.
7. Observe the behaviour of the birds you are photographing. If you can capture the mannerisms of your subjects, your photographs will tell stronger stories.
8. Approach your subjects slowly and try not to make sudden noises or movements. As you get closer, pause every few steps and take a couple of shots. Then try to slowly improve your positioning to get better shots.
9. Share your photographs with friends and family on social media to raise awareness within your community of the importance of protecting green spaces for nature.
Bird photographers are spoilt for choice in Australia and we don’t have to travel far to find interesting scenes and subjects. My recommendation would be to visit your nearest parks and natural bush reserves to see what you can find locally. I have photographed azure kingfishers and crested shrike thrush just ten minutes away from my house. Not to mention the critically endangered shore birds we have on our doorstep at the Ramsar protected wetlands. Most cities in Australia also have parks and duck ponds where you can get started. And you can always visit an aviary or wildlife park with your camera to practice your technique.
But ultimately nothing beats the feeling of photographing a wild bird in its natural environment, as they are so much harder to spot. Your photos will give you some serious street credibility among the birding community. There are also lots of great social media forums to assist with identifying birds and finding hotspots to visit. By default, you will become an eco-warrior and defender of the green spaces in your local community.
“As a bird photographer, you can raise awareness of the wildlife around your local community and protect it for future generations. All you have to do is get out there with your camera and start shooting!”
All images by Greg Sullavan.
Greg Sullavan is a Canon Photographer, Bachelor of Visual Arts and AIPP Master Photographer based in Brisbane.

Phil Hillyard has captured countless iconic sports moments across 30 seasons of AFL. We go behind the scenes with the Sydney Swans at the Sydney Cricket Ground for a game of Friday night footy.

Tips to choose the right lens to shoot sports and wildlife photography with impact.

Learn how to capture the energy, passion and action of live sport with professional sports photographer Phil Hillyard