
- How to Capture Beautiful, Natural Light: Transform Your Videos with Cinematic Lighting Techniques
-

Hello!
We've noticed that you are in .
Visit Canon .
Natural light is one of the most powerful and beautiful tools filmmakers can work with - but it’s also one of the most unpredictable. It can bring a scene to life with warmth, depth, and realism, yet a single cloud or harsh shadow can completely change the mood.
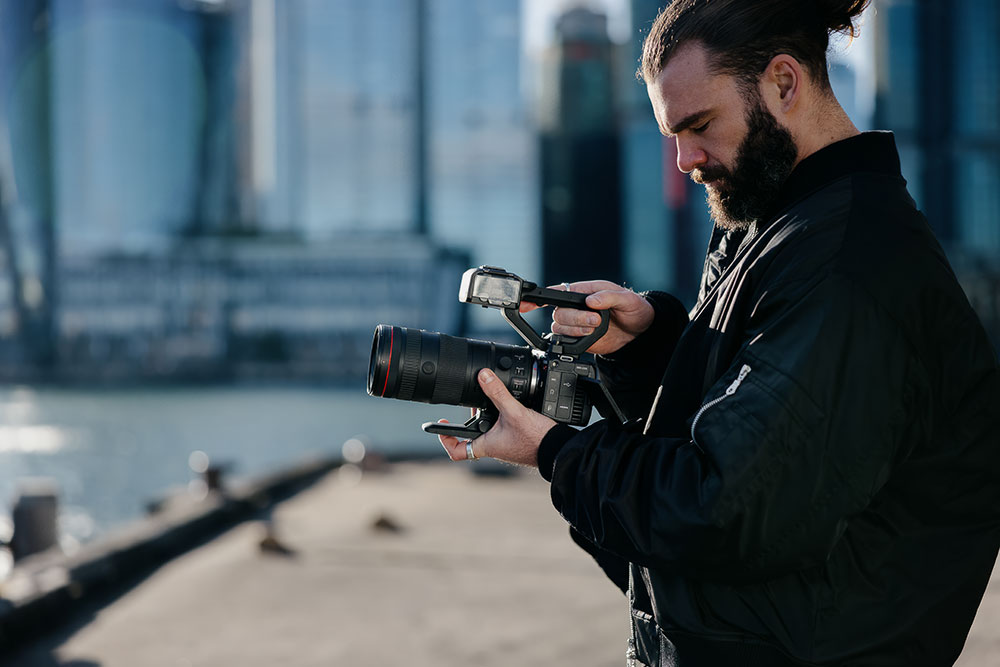
In this article, Sydney-based filmmaker Trystin Sinnott shares how he harnesses the power of natural light in his cinematic storytelling, using the Canon EOS C50 as his go-to camera for outdoor shoots. Known for his run-and-gun style and adaptable approach, Trystin walks us through his creative process, camera settings, and favourite tools that help him make the most of real-world lighting conditions.
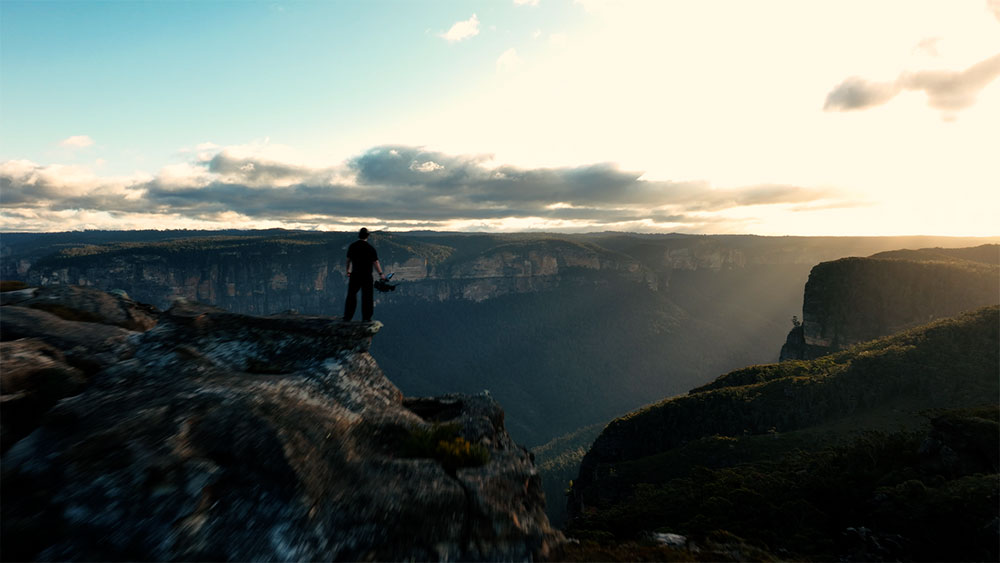
I’ve always loved the unpredictability of natural light. It’s one of the few elements on set you can’t control completely, which makes it both challenging and creatively freeing. I like to approach my work with a run-and-gun mindset, allowing space to adapt to the location, talent, and changing conditions. That freedom lets creativity flow naturally - the light shifts, the scene evolves, and you learn to work with what’s in front of you rather than fighting it.
Over time, I’ve learned that embracing natural light is all about observation and adaptability. During the Canon EOS C50 launch film, I was shooting a morning scene inside a dock area where the interior was dark but the exterior was intensely bright. The contrast was extreme. Using C-Log 2 on the EOS C50, I was able to retain detail in both the highlights and shadows. In post, I pushed the footage exactly where I wanted it - the Canon colour science held beautifully, where other cameras might have started to break apart. That’s when I realised how much latitude and reliability the C50 gives you when you’re dealing with real-world light.
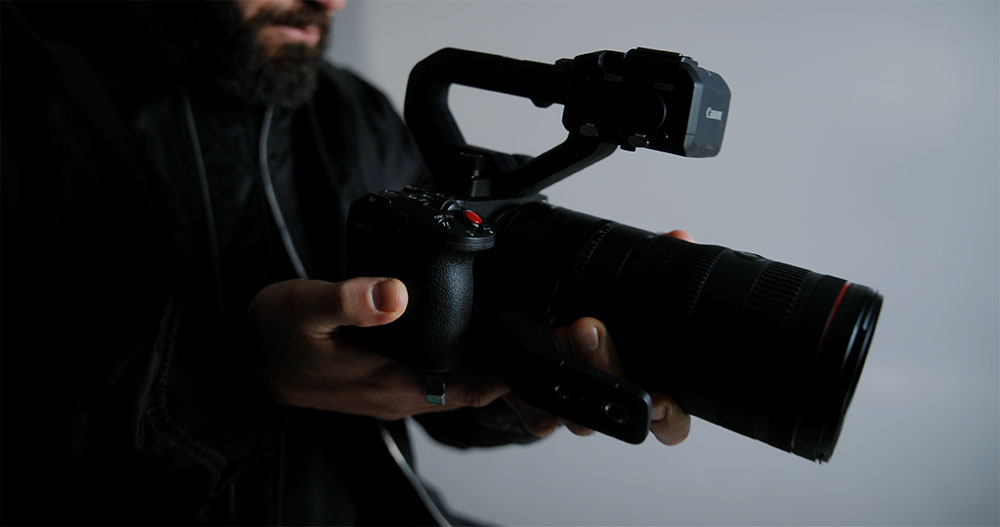
The EOS C50 has become my go-to camera for outdoor cinematography because it’s compact, intuitive, and dependable. Its dynamic range and exposure tools make it ideal for unpredictable conditions. Whether I’m chasing sunrise light or adapting to harsh midday sun, I know it’ll hold up.
When shooting outdoors, I start by setting my shutter speed, aperture, and ISO to match both the light and the look I want. My rule of thumb is simple - stick to a 180-degree shutter angle wherever possible. For 24 fps, that means shooting at 1/50, and for 50 fps, 1/100. I rarely change it unless it’s for a creative reason.
A low aperture like f/1.8 or f/2.8 helps isolate the subject with a beautiful shallow depth of field, while f/8 to f/11 keeps more of the scene sharp and detailed. I try to keep ISO low to avoid grain, but the C50 handles higher ISOs incredibly well, which is a lifesaver when light changes quickly. Its exposure tools and monitoring make adjusting on the fly much easier than older cinema cameras I’ve worked with.
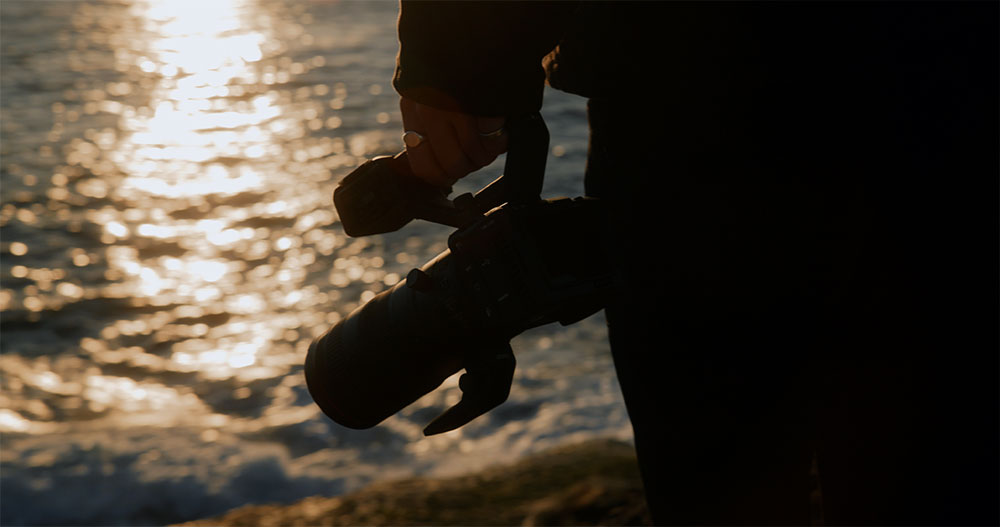
During the EOS C50 shoot by the ocean at sunrise, I locked my shutter at 1/50 and used ISO 800 to take advantage of C-Log 2’s native base, with my aperture around f/10 and a Peter McKinnon VND 2–5 Mist Edition filter to fine-tune exposure. That setup allowed me to capture a crisp silhouette with the sun backlighting the subject - the movement stayed natural, and the image remained clean. Being able to balance ISO, shutter, ND, and aperture without compromise is the perfect combination for shooting in natural light.
The direction and intensity of the sun completely shape the mood of your scene. Side-lighting adds depth and texture, backlighting creates that soft cinematic glow, and shade gives you even exposure and a gentle feel.
Golden hour is always my favourite time to shoot, but even the harsh light of midday can work if you know how to use it. During the EOS C50 launch, I filmed talent on a city street in direct backlight. The sun was blasting through, and the background was blown out while my subject was underexposed. Rather than forcing a silhouette, I looked around and noticed a white wall behind me reflecting light. By moving the subject a few metres so the wall bounced that light back, the scene instantly balanced out.
It’s small adjustments like that that can completely transform a shot. Always look for natural reflectors in your environment - walls, sand, pavements, or even a passing car. The way light interacts with surfaces can be your best lighting assistant.
ND filters and diffusers are essential when you’re shooting in natural light. ND filters let you keep your aperture wide and your shutter cinematic without overexposing your image. Diffusers, on the other hand, soften harsh sunlight into something more flattering.
I rely heavily on my Peter McKinnon VND 2–5 Mist Edition filter. It adds a subtle bloom in the highlights, perfect for sunlight, and saves me from constantly adjusting settings. I also always carry reflectors - even a small silver or white one can fill in shadows without flattening the scene.
On a recent midday shoot, I used a reflector to bounce just enough light back into the subject’s face to preserve natural contrast. That subtle shift made the footage feel organic rather than over-lit.
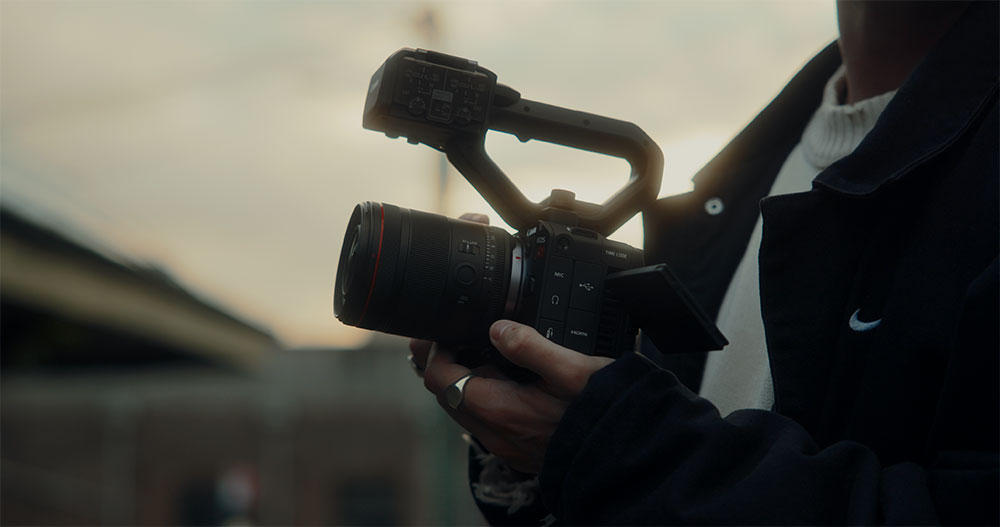
The EOS C50 works seamlessly with these tools. I can attach NDs directly, monitor exposure using built-in tools, and make small, accurate adjustments in-camera without breaking rhythm. It’s a setup that feels intuitive when you’re working fast in changing light.
Choosing between handheld, tripod, or gimbal depends entirely on the emotion you’re trying to convey. Handheld adds energy and intimacy, while gimbal or tripod shots bring calm and structure.
When I’m shooting sport or action sequences, handheld gives that raw, immersive feel - like you’re right there with the subject. For smoother, more deliberate movement, a gimbal gives me that fluid, cinematic motion. Both have their place, and it’s about using each intentionally to shape the story.
One tip for better handheld stability: make your rig heavier. A slightly heavier setup smooths out micro jitters and makes camera movement feel more controlled. Adding a cage, handles, or rails to the C50 gives it more balance and flexibility. It’s counterintuitive, but extra weight can actually make handheld shots look more cinematic.
It’s also worth noting that the EOS C50 doesn’t include in-body stabilisation, which is a plus when you’re using a gimbal. Without internal corrections interfering, stabilisers perform even better, keeping your motion fluid and predictable.
This is where I like to have fun. Natural light gives you an endless playground of tones, angles, and textures to experiment with. I often use silhouettes, shadows, lens flares, and backlight to give a shot character.
One of my favourite tricks is to frame the sun just behind a subject or object so it peeks through slightly, creating beautiful flares and dynamic shapes. During the EOS C50 shoot, I filmed my friend Ollie as he set up the camera early in the morning. The sun was directly behind him, and I used his silhouette against the gear to capture the form and texture without revealing too much detail. The sunlight cutting through the edges of the setup created striking highlights that made the frame feel alive.
The C-Log 2 dynamic range on the EOS C50 allowed me to retain detail in both highlights and shadows, even under intense contrast. That flexibility meant I could push the image in post without losing integrity.
When you learn to expose for both your subject and your background, high-contrast conditions stop being a problem and start becoming a creative advantage. Don’t shy away from imperfections like lens flares or uneven lighting - those little quirks can add mood and personality when used deliberately.
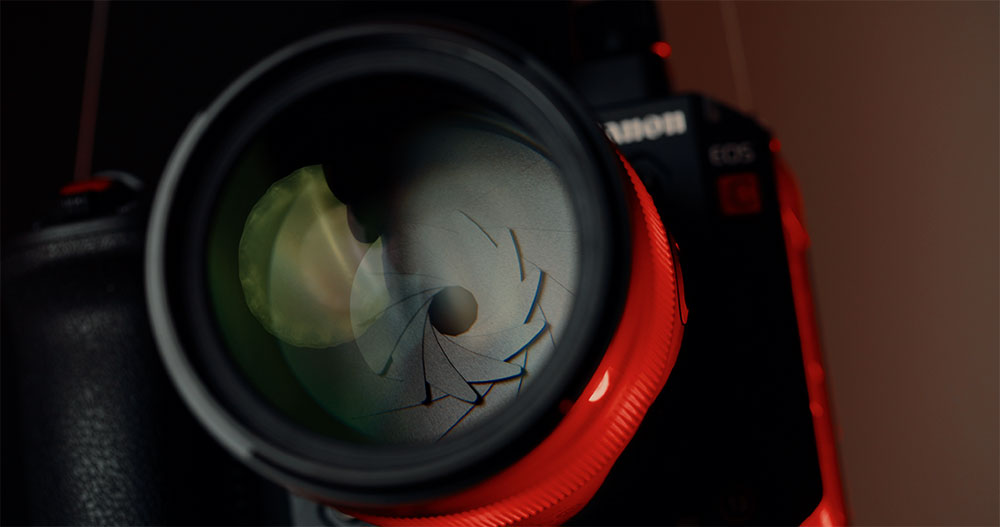
Camera: Canon EOS C50 - compact, lightweight, with excellent exposure tools and Canon’s trusted colour science.
Lenses: Fast primes like the 35mm f/1.8 and 50mm f/1.2, plus a 24–70mm f/2.8 for versatility.
Accessories: ND filters (variable and fixed), reflectors, diffusers, tripod or gimbal, and high-quality audio gear.
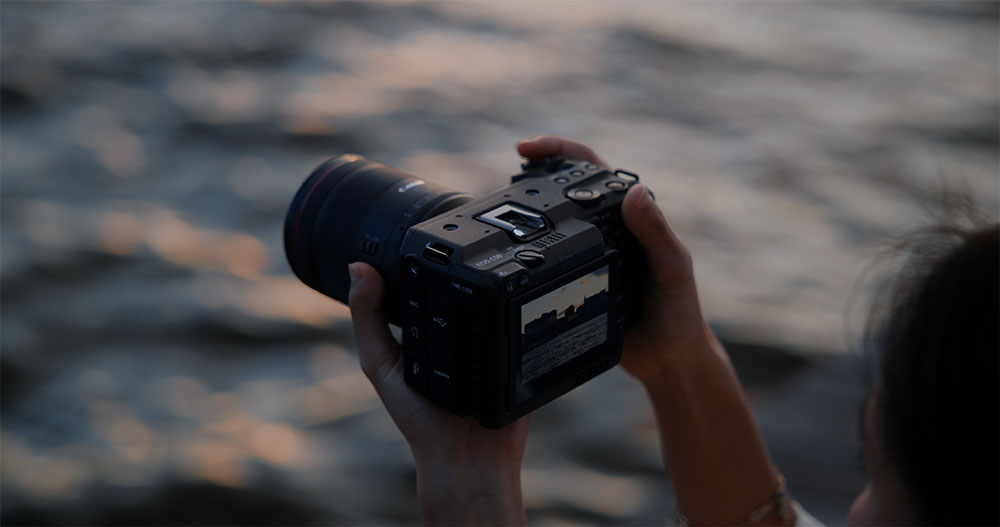
The EOS C50’s Super 35mm Dual Gain Output sensor and RF lens mount make it ideal for hybrid shooters who want cinematic quality in a manageable form. Its DIGIC DV7 processor handles C-Log 2 footage smoothly, giving you the confidence to shoot in challenging light and know the results will hold up.
If there’s one piece of advice I’d give anyone learning to film with natural light, it’s this: work with the light, not against it. Watch how it changes throughout the day - from the cool blues of early morning to the golden warmth of sunset - and find ways to use each to your advantage.
Even harsh midday light can look incredible if you use it intentionally. Move your subject, find reflectors, or embrace the contrast. The Canon EOS C50 fits perfectly into that workflow. It’s compact, reliable, and captures natural light beautifully, freeing you up to focus on storytelling rather than technical distractions.
Natural light filmmaking is all about being curious, adaptable, and patient. Keep experimenting, stay open to the environment, and when you find that perfect light, you’ll know - not because it just looks good, but because it feels real.
