
- Transform Your Product Images: Professional Product Photography Tips & Tricks
-

Hello!
We've noticed that you are in .
Visit Canon .
Kia ora! I'm Reuben Looi, a photographer and retoucher currently based in Tāmaki Makaurau, New Zealand. My journey into photography started as a hobby, stemming from a deep appreciation for travel, landscapes, and astrophotography when I first moved to New Zealand. However, life took an unexpected turn when I decided to transition from my graphic design career into photography, initially exploring genres like fashion, portraits, and events.
It wasn't until 2020 that I found myself drawn to the world of advertising photography, thanks to an opportunity at an advertising agency. Relocating to Auckland to pursue my career as a commercial and advertising photographer, I had the privilege of working alongside talented and experienced photographers, refining my skills in lighting and capturing products.
Today, I'm excited to share some of my experiences and knowledge with you. Product photography is about storytelling and highlighting the essence of each item. In this article, I'll guide you through the art and science of product photography, drawing from my journey and expertise. Together, we'll harness the power of Canon cameras and lenses to elevate your product photography skills, whether you're an enthusiast or aspiring professional.
Now, let's talk about cameras & lenses! These are the tools that help us to capture the intricate details and textures of the products.
I personally use the EOS R5 as my main camera. It is a beast of a camera with a 45-megapixel sensor. This high megapixel count is extremely useful, especially during post-processing when cropping while preserving details and resolution is necessary.
If you're looking for budget-friendly camera alternatives within the EOS R series, there are several excellent options to consider. The EOS R7 and EOS R8 offer compelling features and performance at varying price points.
The EOS R8 features a full-frame sensor with 24.2MP, ideal for those seeking a balance between resolution and low-light performance. On the other hand, the EOS R7 incorporates a smaller APS-C sensor but compensates with a higher resolution of 32.5MP. This makes the EOS R7 an excellent choice for photographers who prioritize capturing intricate details in their shots. Whichever model you choose, you can expect exceptional image quality and the versatility of the Canon EOS R series at a price point that won't break the bank.
When it comes to lenses, my preferred choice is the RF 24-70mm f/2.8L IS USM. This lens covers a wide focal length range, making it indispensable for commercial photography. It eliminates the need for frequent lens changes, allowing me to adjust focal lengths. During product shoots, I often work with an aperture set to a minimum of f/5.6, making fast prime lenses almost unnecessary. This lens offers convenience and exceptional optical performance, making it my staple lens for capturing a variety of products.
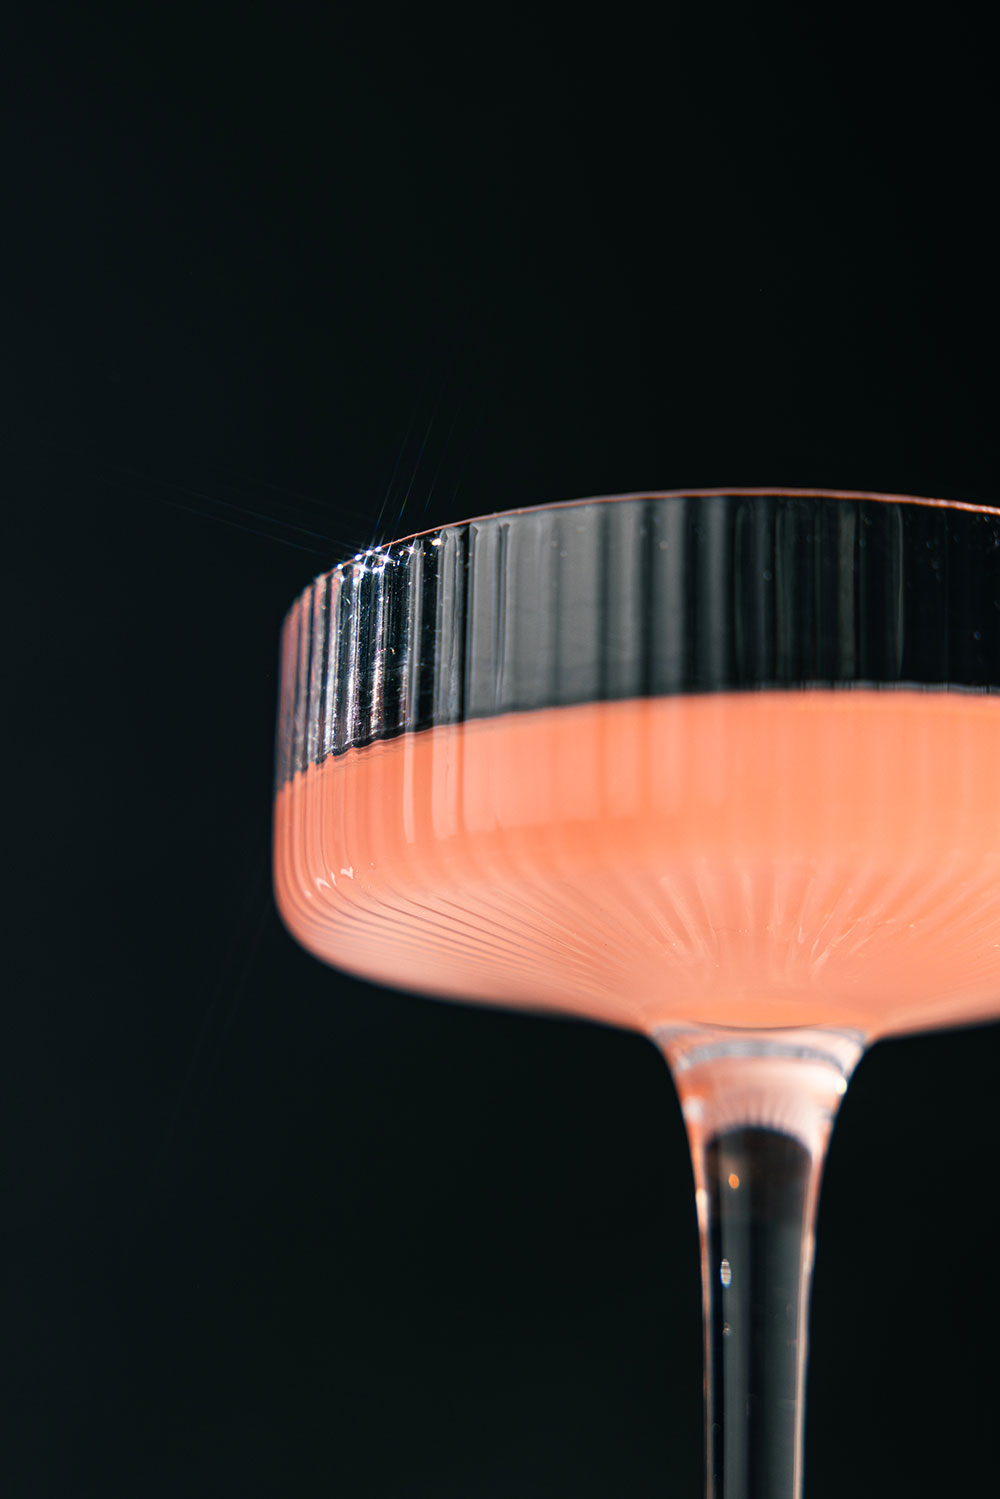
Image by Reuben Looi
Shot on the Canon EOS R5 and RF 24-70mm f/2.8L IS USM
For occasions when I need to capture the finer details with a closer minimum focusing distance, I’ll swap to the RF 100mm f/2.8L Macro IS USM. This lens allows me to zoom in even further and reveal the smallest features of the products I'm photographing.
Canon also provides alternatives through the RF 35mm and 85mm macro prime lenses. These lenses still deliver exceptional image quality, and they are also more budget-friendly, making them valuable additions for any enthusiast photographers seeking cost-effective lens options.
Some Other Equipment You Might Need:
• Tablet or Laptop: Used for live tethering during shoots, enabling real-time monitoring and control of image capture.
• Tether Cable: Essential for establishing a stable and efficient connection between the camera and the device.
• Grey Card: A crucial tool for achieving precise colour accuracy and making exposure adjustments.
• CF Express Type B or SD Card
Having knowledge of lighting is crucial in product photography and other aspects of photography. It can transform a regular product into a captivating masterpiece. Each product possesses its own unique shape and texture, demanding adaptable lighting to bring out its best.
In this shoot, I employ a straightforward setup for glassware. My key light, a bare bulb, is positioned to the left of my camera, placed behind the glass. In my humble opinion, this backlit setup makes glassware look its best. Additionally, another light is positioned behind a diffusion screen to soften shadows, while a third one with a snoot adds focused highlights. Both of these lights originate from a direction similar to my key light to prevent undesirable double-cross shadows.

Image by Reuben Looi
Shot on the Canon EOS R5 and RF 24-70mm f/2.8L IS USM
There are many ways to light a product, and it can be subjective based on personal taste. The key is to experiment and find what works best for each product. Lighting and shadow play can add depth and dimension to your shots.
For compositions, I typically position my product either at the centre of the frame for a balanced composition or slightly off-centre, applying the rule of thirds to infuse dynamism into the shot. I make sure to utilise leading lines and leverage natural framing from props to direct the viewer's attention toward the main subjects. My creative process involves experimenting with different angles and focal lengths to uncover unique perspectives that emphasise the product's distinctive features.
In many commercial product photography sessions, your primary focus as a photographer will be on lighting, shooting, and creative problem-solving. There may not be time to manage product details simultaneously. This is where a product stylist steps in, ensuring products are pristine and using props strategically to enhance their story or function. However, if you don't have a stylist, prioritise lighting and minimal use of props to keep things simple and effective. Remember the principle, "Less is more." When selecting backdrops, go for neutral colours or textures that compliments your product.
Check out more lifestyle product photography tips.
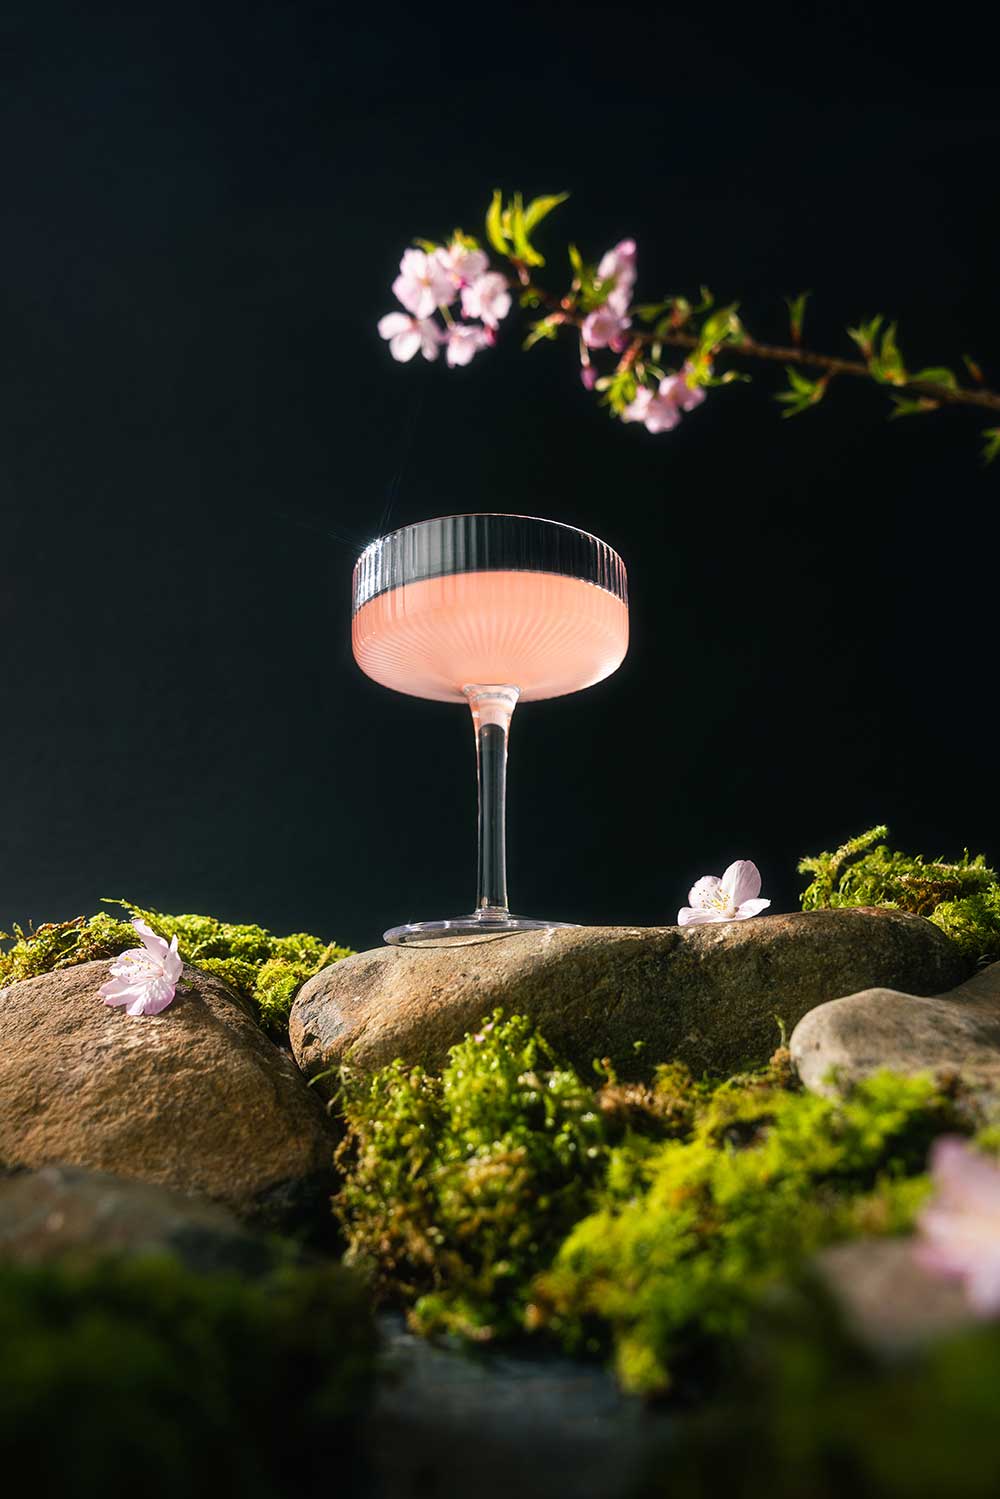
Image by Reuben Looi
Shot on the Canon EOS R5 and RF 24-70mm f/2.8L IS USM
When it comes to camera settings in product photography, a few recommendations can make a significant difference.
1. Shoot in RAW
First and foremost, always shoot in RAW format. This allows for the preservation of the maximum amount of image data, providing greater flexibility during post-processing, especially when adjusting exposure, white balance, and colour grading to achieve the perfect look for your products.
2. Use a low ISO setting to minimise noise.
Most of the time, always opt for a narrow aperture (higher f-number) such as f/5.6 to f/11 to maximise depth of field, ensuring that the entire product remains in sharp focus. Consider shooting in manual mode for complete control over exposure settings, allowing you to fine-tune shutter speed, aperture, and ISO to achieve the desired look.
3. Tripods are crucial
Last but not least, always use a tripod to eliminate camera shake and guarantee crisp, clear images.
Post-processing plays a vital role in elevating the quality of product images, although my approach is always to strive for the best shot right in-camera. Correcting issues during the shoot can save you countless hours in post-production. This is why I often shoot tethered to my tablet or laptop using Capture One while working with products. Tethering allows me to view all the details on a larger screen and is particularly useful when clients are present on set.
In terms of my post-production process, when working on commercial projects, I aim to maintain neutral and true-to-life colours. Precision is key, especially in product photography, where accuracy matters. I typically use a grey card to correct my white balance. In Capture One, I make subtle adjustments to contrast, details, highlights, and curve layers to enhance the image while preserving its authenticity. If necessary, I'll also retouch minor imperfections such as dust, speckles, cracks, or any unwanted elements in the shot. The goal is always to present products in the best possible light while maintaining their integrity and accurate representation.
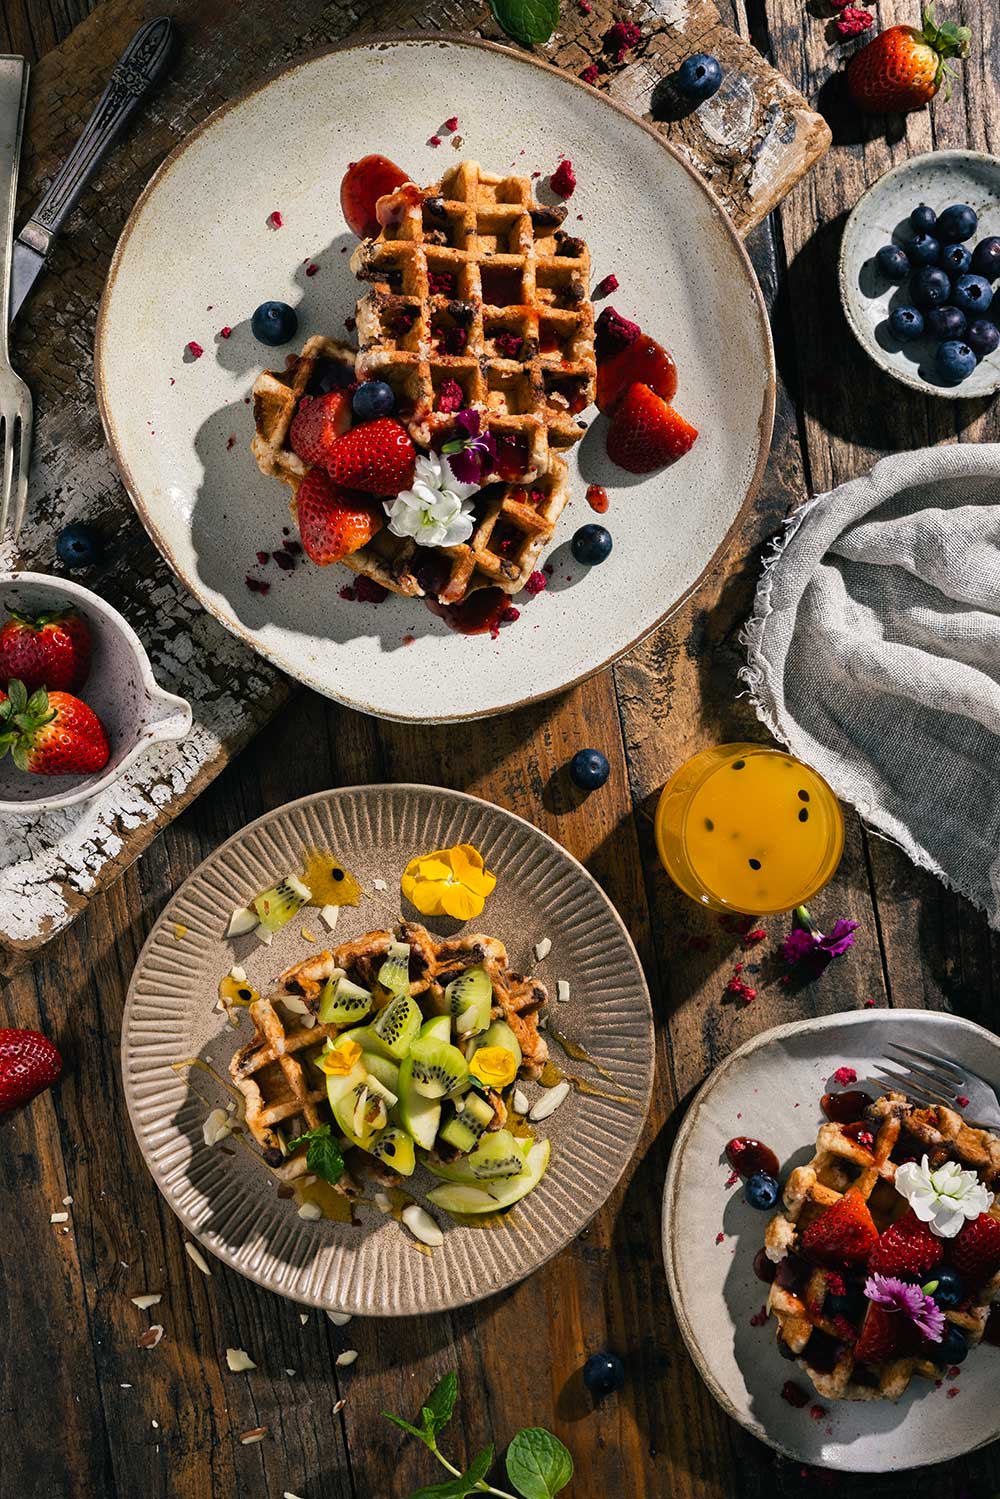
Image by Reuben Looi
Shot on the Canon EOS R5 and RF 24-70mm f/2.8L IS USM
Reflecting on my early days in photography, I've learned two valuable lessons. First, simplicity is key. As a beginner, it's easy to get lost in gears and complex setups, but often, less is more. Master the basics of lighting and composition before diving into advanced techniques.
Second, attention to detail matters. Don't assume you can fix imperfections in post-processing all the time. Instead, carefully examine every aspect of the product before taking the final shot, ensuring it's pristine and camera-ready. These practices lead to remarkable product photography.
Showcasing your work in product photography doesn't require real clients right away. It's all about proactivity. Create your own mood boards, craft briefs, and organize your photo shoots. Collaborate with friends or fellow creatives to bring your vision to life. Make it a passion project that fuels your growth.
And while you're at it, document your journey with your phone and capture behind-the-scenes moments during the shoot. Share these moments on your social media platforms to provide your audience with a peek into the creative process. People love watching what happens behind the camera and witnessing the journey that leads to that perfect shot. It not only helps you build your portfolio but also connects you with your audience on a more personal level, showcasing your dedication and creative direction.
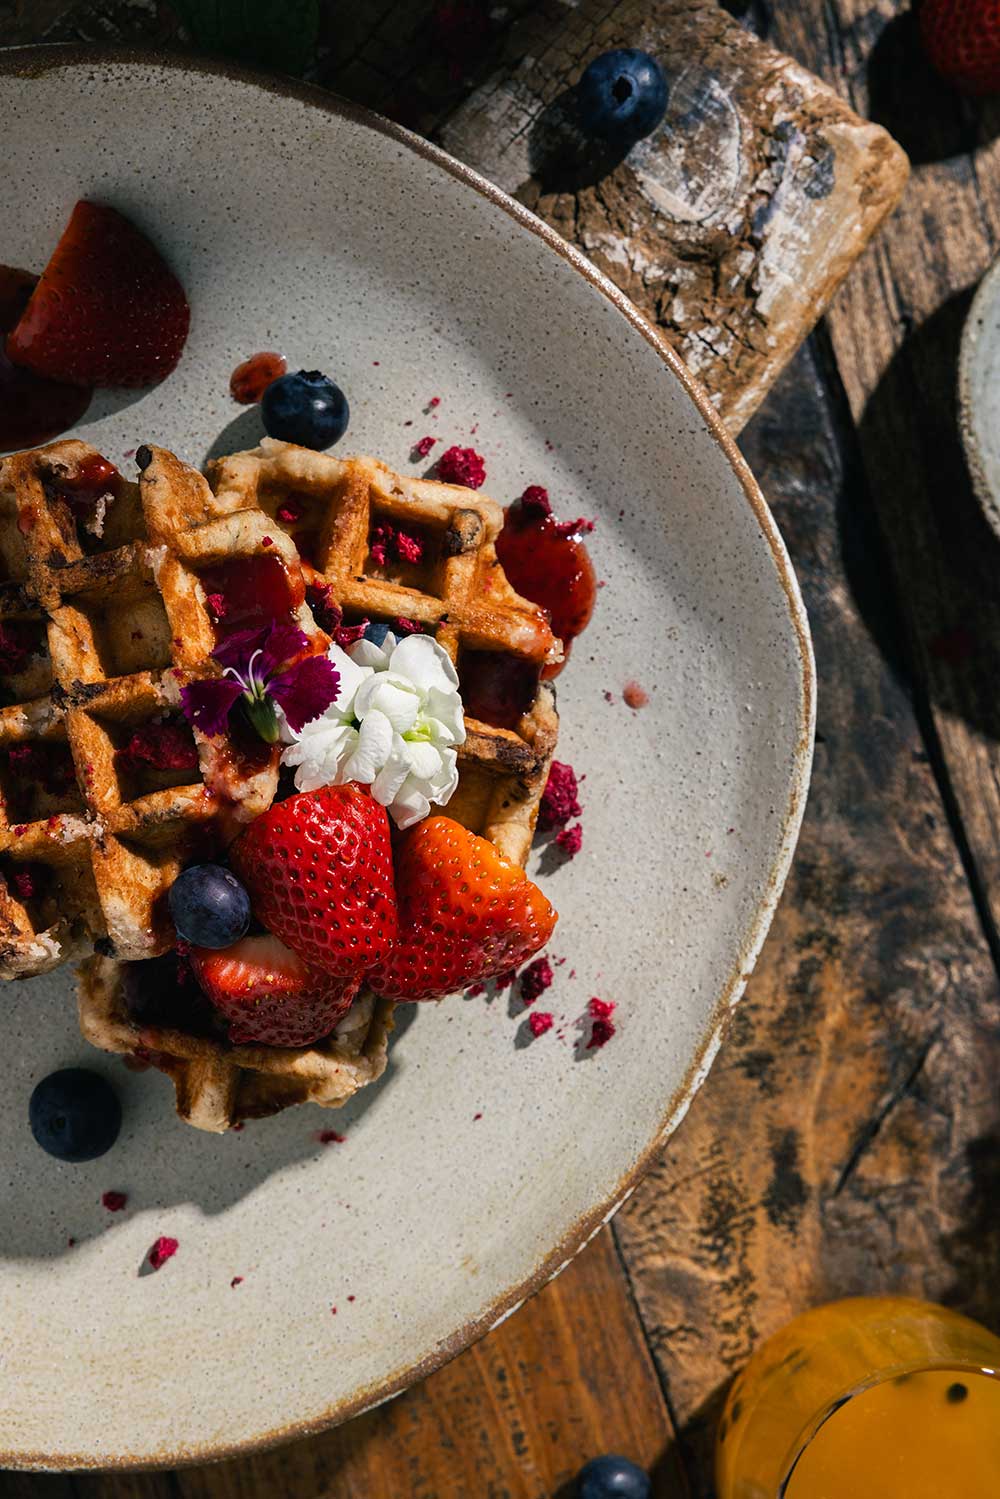
Image by Reuben Looi
Shot on the Canon EOS R5 and RF 24-70mm f/2.8L IS USM
Key Takeaways from the Article:
• The EOS R5 with its high megapixel sensor is excellent for detailed product shots.
• The RF 24-70mm f/2.8L IS USM lens is versatile for commercial photography.
• The EOS R7 & EOS R8 are budget-friendlier options for camera body.
• Consider the RF 100mm f/2.8L Macro IS USM or more budget-friendly options like the RF 35mm f/1.8 Macro IS STM and RF 85mm f/2 Macro IS STM macro prime lenses.
• Understand the significance of adaptable lighting for various product textures and shapes.
• Experiment with different lighting setups and techniques to add depth to your shots.
• Use the rule of thirds, leading lines, and natural framing to create visually appealing product shots.
• Consider a stylist for commercial shoots or focus on minimalism and effective lighting for simpler setups.
• Always shoot in RAW, which allows the preservation of the maximum amount of image data, providing greater flexibility during post-processing.
• Use low ISO settings, narrow apertures, and tripods for optimal camera settings.
• Prioritise getting the shot right in-camera to save time in post-processing.
• Shoot tethered for better control and view larger details.
• Maintain neutral and accurate colours and make subtle adjustments in post-processing.
• Simplify your approach, focusing on mastering basics before diving into complexity.
• Pay attention to detail to capture clean and camera-ready shots from the start.
• Build your portfolio proactively by creating your own projects and collaborating with others.
• Document your creative journey and share it on social media to connect with your audience and showcase your dedication.
Well, that's a wrap! I hope you've picked up a thing or two from this article. If you have any questions about photography or simply want to chat, feel free to reach out to me on Instagram @reubenlooi or @reubenroams. Happy shooting!

How should you pick your next lens? Learn about lens types, focal lengths, aperture, and compatibility to help you choose the perfect lens for your needs.

How to shoot cycling with sports photographer Harry Talbot.

Photographer and videographer, Denys Black, get's hands on with our first APS-C sensor mirrorless camera - the EOS R7.