

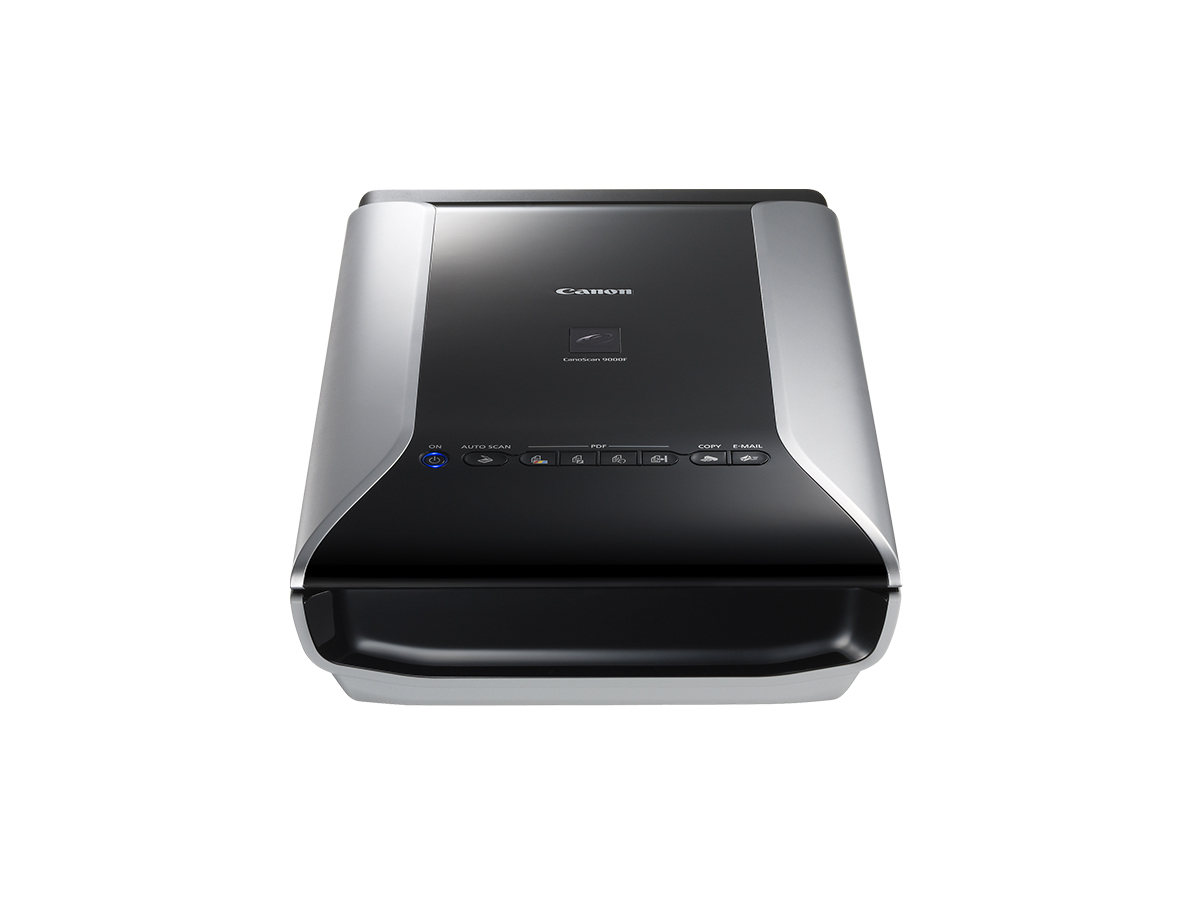
Issue
Cause and solution
Check 1: Install the required software programs (MP Navigator EX, other applications that accompany the machine, etc.) from the Setup CD-ROM
Caution
1. Place the Setup CD-ROM in the drive.
For Macintosh: Double-click the Setup icon. Enter the administrator ID and password on the authentication dialog box.
For Windows XP/Windows 2000 and Macintosh, skip step 2 and go to step 3.

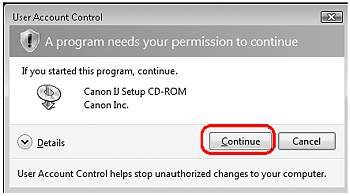
2. For Windows 7/Windows Vista, when the AutoPlay dialog box appears, run the setup program, and then click Continue or Yes to proceed when the User Account Control dialog box appears.
3. If prompted, select your language and place of residence, and then click Next.
In some countries, these dialog boxes will not appear.
4. Click Easy Install on the main menu.
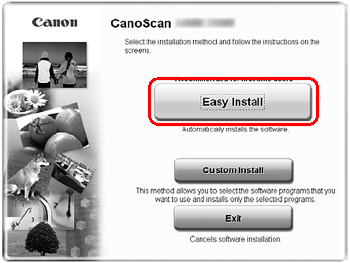
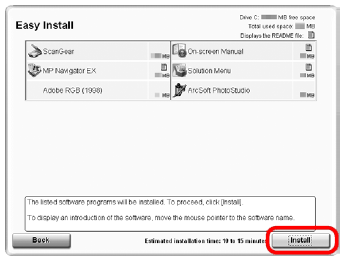
5. Click Install to start installation.
Carefully read the License Agreement, and then click Yes to proceed.
For Macintosh, skip step 6 and go to step 7.
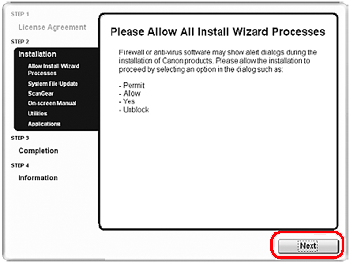
6. For Windows, carefully read the Please Allow All Install Wizard Processes screen, and then click Next.
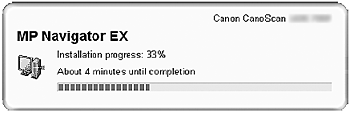
7. Follow the on-screen instructions to perform the installation.
For Macintosh, skip step 8 and go to step 9.
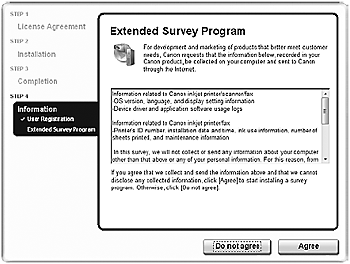
8. For Windows, when the Extended Survey Program screen appears, confirm it.
If you can agree, click Agree.
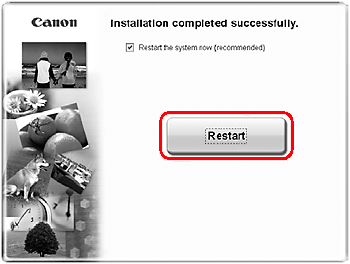
9. When the installation is complete, follow the on-screen instructions.
For Windows: Click Restart. After restarting the computer, Solution Menu will appear.
For Macintosh: Click Exit. Solution Menu icon will be registered in the Dock.
⋖Solution Menu⋗
You can select either MP Navigator EX or "On-Screen Manual".
Caution
Make sure to remove the CD-ROM from the drive and store it in a safe place.
Cause and solution
Check 2: To use the COPY button, install the printer driver of your printer
Cause and solution
Check 3: Check that the printer operates properly
Cause and solution
Check 4: To use the E-MAIL button, install any of the following programs
Windows:
- Windows Mail (Windows Vista)
- Outlook Express (Windows XP/Windows 2000)
- Microsoft Outlook
(If an e-mail software program does not operate properly, check that the program's MAPI is enabled. To enable MAPI, refer to the manual of the e-mail software program.)
Macintosh:
- Mail (Mac OS standard)
- EUDORA
- Microsoft Entourage
Cause and solution
Check 5: The MP Navigator EX screen may be hidden behind other windows. (Windows 7/Windows Vista)
Click MP Navigator EX on the taskbar to bring the MP Navigator EX screen to the front.
Cause and solution
Check 6: Applications may not be assigned to the Scanner Buttons
Set to start MP Navigator EX when a Scanner Button is pressed.
Specifying the Scanner Button settings using MP Navigator EX allows you to scan documents easily.
Caution
Log on to an administrator account before making the settings.
Windows 7
1. From the Start menu, select Devices and Printers.
2. Right-click the icon of your scanner, then select Scan properties.
3. In the User Account Control dialog box, click Yes.
4. In Actions on the Event tab, set MP Navigator EX as the application to start.
Set MP Navigator EX 3.1 for all events in Select an event.
If MP Navigator EX is already set, click Cancel to end.
5. Click OK.
Windows Vista
1. From the Start menu, select Control Panel ⋗ Hardware and Sound ⋗ Scanners and Cameras.
2. Select WIA CanoScan (model name), then click Properties.
3. In the User Account Control dialog box, click Continue.
4. In the WIA CanoScan (model name) Properties dialog box, select the Event tab.
5. In Actions on the Event tab, set MP Navigator EX as the application to start.
Set MP Navigator EX 3.1 for all events in Select an event.
If MP Navigator EX is already set, click Cancel to end.
6. Click OK.
Windows XP
1. From the Start menu, select Control Panel ⋗ Printers and Other Hardware.
2. In the resulting screen, click Scanners and Cameras.
3. Right-click WIA CanoScan (model name), then click Properties.
4. In Actions on the Event tab, set MP Navigator EX as the application to start.
Set MP Navigator EX 3.1 for all events in Select an event.
If MP Navigator EX is already set, click Cancel to end.
5. Click OK.
Windows 2000
1. From the Start menu, select Settings ⋗ Control Panel.
2. In the resulting screen, click (or double-click) Scanners and Cameras.
3. The Scanners and Cameras Properties dialog box opens. Select CanoScan (model name), then click Properties.
4. Select an event in Scanner events, then set MP Navigator EX 3.1 for Send to this application.
If MP Navigator EX is already set, click Cancel to end.
5. Click OK.
Restart the computer.
Caution
The settings are not effective until you restart the computer.